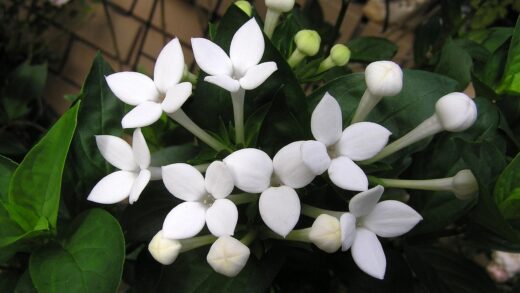
Starting a new journey with these magnificent climbers begins with the fundamental steps of correct planting and successful propagation. You must approach this process with a long-term vision, as the decisions you make today will influence the plant’s health for decades. Whether you are starting from a store-bought sapling or trying to multiply an existing favorite, the principles remain the same. Precision in the early stages is the best insurance against future growth problems or disappointing floral displays.
The first step in planting is selecting a site that offers the perfect combination of sun, space, and soil quality. You should look for a spot that receives full sun for the majority of the day, as shade will drastically reduce flowering. The site must also accommodate a very large and heavy plant that will eventually require a massive support structure. Avoid areas where the roots might interfere with septic lines, underground utilities, or delicate garden walls.
The soil at the chosen site should be prepared well in advance to give the new plant the best possible start. You should dig a hole that is at least twice as wide as the root ball and just as deep to loosen the surrounding earth. Mixing in some high-quality compost or aged manure will provide a slow-release source of nutrients for the first growing season. If your soil is particularly heavy clay, consider adding some grit or sand to improve the drainage in the planting hole.
Timing your planting is also a critical factor that affects the establishment rate of the young vine. Late autumn or early spring, while the plant is still dormant, are the ideal times to get it into the ground. Planting during the heat of summer puts unnecessary stress on the root system and requires constant, vigilant watering to prevent wilting. By planting during the cool, dormant months, you allow the roots to settle in before they have to support a full canopy of leaves.
Planting techniques for success
When you are ready to place the vine in the hole, you must pay close attention to the depth at which it sits. The point where the roots meet the stem, known as the root flare, should be level with or slightly above the surrounding soil. Planting too deep can suffocate the roots and lead to trunk rot, while planting too shallow can cause the roots to dry out. Once the depth is correct, backfill the hole with soil, tamping it down gently to remove any large air pockets.
More articles on this topic
Installing the support structure at the same time as planting is a wise move that prevents future root damage. If you try to drive heavy posts or anchors into the ground later, you risk severing the very roots the plant needs to survive. You should have your trellis, wires, or pergola already in place before the vine goes into the ground. This allows you to immediately begin training the young shoots in the direction they need to grow.
Immediately after planting, you must give the vine a thorough soaking to help settle the soil and hydrate the roots. This initial watering is crucial for eliminating any remaining air gaps and ensuring good contact between the roots and the earth. You should continue to water the plant regularly during its first year, especially during dry spells, to help it establish a deep root system. A layer of mulch around the base will help keep that moisture where it belongs.
If you are planting a grafted specimen, you must be careful not to bury the graft union under the soil. The graft union is the visible bump on the lower stem where the flowering variety was joined to a hardy rootstock. If this union is buried, the top part of the vine might grow its own roots, or the rootstock might send up wild suckers. Keeping the union clear ensures the plant grows as intended by the nursery and maintains its desired characteristics.
Propagation from soft wood cuttings
Taking cuttings is one of the most popular ways to create new plants that are genetically identical to a parent you already love. You should take softwood cuttings in late spring or early summer when the new growth is still flexible but starting to firm up. Look for healthy stems that are about six inches long and have several sets of leaves. These young shoots have the highest concentration of natural rooting hormones and are most likely to succeed.
More articles on this topic
To prepare the cutting, you should remove the lower leaves, leaving only a few at the very top to provide energy. Dip the cut end into a rooting hormone powder or gel to stimulate the growth of new roots and protect against pathogens. Insert the cutting into a pot filled with a sterile, well-draining rooting medium like a mix of peat and perlite. Keeping the environment humid by covering the pot with a clear plastic bag will prevent the cutting from drying out.
Place the pots in a bright spot with indirect sunlight, as direct sun will overheat the cuttings under the plastic. You should check the moisture levels daily, ensuring the soil stays damp but never waterlogged or soggy. Within four to six weeks, you should start to see signs of new growth or feel resistance when you gently tug on the stem. This resistance indicates that roots have successfully formed and are beginning to anchor the plant.
Once the roots are well-established, you can slowly acclimate the young plants to the outside environment through a process called hardening off. Start by placing them in a sheltered, shady spot for a few hours each day, gradually increasing their exposure to sun and wind. After a week or two of this transition, they will be strong enough to be moved into their permanent positions or larger pots. This careful transition prevents transplant shock and ensures the long-term survival of your new clones.
Simple and effective layering methods
Layering is an even more reliable propagation method because the new plant remains attached to the parent until it has its own roots. You should select a long, flexible stem that is close to the ground and can be easily bent down. At a point about a foot from the tip, make a small nick in the bark to encourage the plant to produce roots at that spot. This slight injury triggers the plant’s healing response, which in this case involves growing new root tissue.
Dig a small trench in the soil, bend the stem into it, and secure it firmly with a heavy stone or a U-shaped landscape pin. You should cover the wounded section of the stem with soil, leaving the leafy tip exposed and pointing upward. Keeping this buried section moist is essential, so you might need to water it more frequently than the rest of the garden. Over the course of a single growing season, a strong root system will develop at the buried site.
The following spring, you can check for root development by gently removing a bit of the soil around the buried stem. If you see a healthy mass of white roots, the new plant is ready to be independent of the parent vine. Use a sharp, clean pair of shears to sever the connection between the old plant and the new one. You can then carefully dig up the newly rooted section, taking care to keep as much of the root ball intact as possible.
This method is particularly useful for those who want a high success rate with minimal equipment or daily maintenance. Since the parent plant provides all the necessary water and nutrients, the “baby” plant is under much less stress than a cutting. It is an excellent way to expand your garden or share a favorite plant with friends and neighbors. Many professional gardeners prefer layering for woody vines because it produces a much larger and more robust starting plant.
Challenges of growing from seeds
Growing these vines from seed is a fascinating project, but it requires a significant amount of patience and a bit of luck. You should collect the seed pods in late autumn when they have turned brown and are starting to split open naturally. Inside the pods, you will find large, flat seeds that look like beans, which can be stored in a cool, dry place until spring. Be aware that plants grown from seed are genetically unique and may not look or smell exactly like the parent.
Before planting the seeds, you should soak them in warm water for twenty-four hours to soften the hard outer shell. This process, known as scarification, helps the embryo inside the seed break through and begin the germination process more easily. Some gardeners also use a small file to lightly nick the seed coat, which allows moisture to penetrate even faster. Once the seeds have plumped up from the water, they are ready to be placed in a pot of high-quality seed-starting mix.
Germination can take several weeks or even months, so you must be prepared to wait and keep the soil consistently warm. Place the pots on a heat mat or in a very warm, sunny window to provide the thermal energy needed for growth. Once the seedlings appear, they will need plenty of light to prevent them from becoming leggy and weak. Transplant them into larger containers once they have developed a few sets of true leaves and are looking sturdy.
The biggest drawback to seed-grown plants is the unpredictable and often extremely long wait for the first flowers to appear. You might wait ten, fifteen, or even twenty years only to find that the flowers are small or have a weak fragrance. However, if you are looking for a vigorous green screen and aren’t worried about the flowers, seeds are a very cost-effective option. It is an adventurous choice for those who enjoy the long-term mystery of gardening and plant breeding.