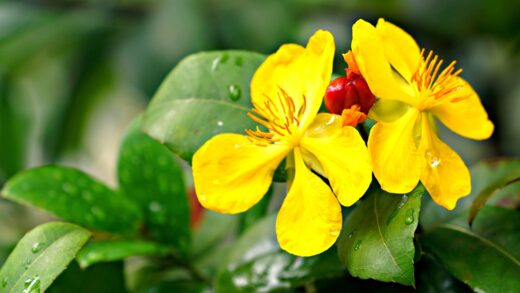
The successful cultivation of the clustered tulip begins with proper planting, a crucial step that lays the foundation for years of vibrant spring displays. Unlike their larger hybrid counterparts, these species tulips are prized for their reliability and their ability to naturalise, forming charming drifts of multi-headed scarlet blooms. Understanding the specific requirements for planting depth, spacing, and soil conditions is paramount to ensuring the bulbs establish well and have the best possible start. The ideal time for planting is in the autumn, typically from September to November, before the ground freezes solid. This period allows the bulbs sufficient time to develop a strong root system over the winter, which is essential for anchoring the plant and absorbing nutrients and water in the spring.
Choosing the right location is just as important as the planting technique itself. The clustered tulip hails from the sunny, rocky slopes of Central Asia, so it thrives in a spot that receives full sun and has exceptionally well-drained soil. A site with at least six hours of direct sunlight per day will encourage strong stems and a profusion of flowers. Poor drainage is the single biggest threat to tulip bulbs, as they are highly susceptible to rot in waterlogged conditions. Therefore, heavy clay soils must be amended with organic matter like compost and grit to improve their structure and allow excess water to drain away freely. Raised beds or rock gardens are often ideal environments for these tulips, as they naturally provide the sharp drainage they crave.
When it comes to the act of planting, precision is key for optimal results. The general rule of thumb for tulip bulbs is to plant them at a depth of two to three times their own height. For the relatively small bulbs of the clustered tulip, this usually translates to a depth of about 10 to 15 centimetres. This depth helps to protect the bulbs from winter frosts and from being accidentally disturbed by gardening activities. Proper spacing is also important to prevent overcrowding, which can lead to competition for resources and a reduction in flowering. A spacing of around 10 centimetres between bulbs will give them enough room to grow and for new offset bulbs to develop.
Once planted, the bulbs require minimal attention until spring, but the initial watering is an important step. After placing the bulbs in their holes and covering them with soil, water the area thoroughly. This helps to settle the soil around the bulbs, eliminating any air pockets, and it provides the necessary moisture to encourage the initiation of root growth. After this initial watering, they generally do not need any further irrigation during the autumn and winter unless the season is exceptionally dry. The winter rains and snowmelt will typically provide all the moisture they need to get started before they emerge in the spring.
Selecting the ideal planting site
The long-term success and perennial performance of the clustered tulip are heavily dependent on the selection of an appropriate planting site. These tulips are native to mountainous regions where they grow on sunny, free-draining slopes, and replicating these conditions in the garden is the key to making them feel at home. The primary requirement is a location that receives ample direct sunlight. A position in full sun, which means it gets a minimum of six hours of sunlight during the spring growing season, is essential. This light exposure fuels photosynthesis, providing the energy needed for robust growth, vibrant flower colour, and, crucially, the replenishment of the bulb for the following year’s display.
More articles on this topic
Equally as critical as sunlight is the quality and drainage of the soil. Tulipa praestans bulbs will not tolerate “wet feet” and are extremely prone to rotting in soil that remains saturated for extended periods. The ideal soil is a sandy loam that is loose and drains quickly. If your garden has heavy clay soil, which is dense and retains a lot of water, you must amend it before planting. Incorporating generous amounts of organic matter, such as compost or well-rotted leaf mould, will help to improve the soil structure. Furthermore, adding inorganic materials like coarse sand, perlite, or fine horticultural grit is highly recommended to enhance porosity and ensure excess water can easily percolate away from the bulbs.
The topography of the planting area can also be used to your advantage. Planting on a gentle slope or in a raised bed can significantly improve drainage, as gravity will help to pull water away from the root zone. Rock gardens are another excellent choice for clustered tulips, as the crevices and pockets of soil between the rocks naturally provide the sharp drainage that these bulbs require. The rocks also absorb and radiate heat from the sun, creating a warmer microclimate that helps the soil dry out after rain and provides the summer baking period that many species tulips appreciate during their dormancy.
Finally, consider the long-term vision for your planting. The clustered tulip is an excellent naturaliser, meaning it will multiply and spread over time if it is happy in its location. Therefore, choose a spot where the bulbs can be left undisturbed for several years. Avoid areas that are heavily cultivated each season or sites where they will be overshadowed by fast-growing perennials later in the year. Planting them among low-growing ground covers or at the front of a border ensures they receive the necessary spring sun and can complete their life cycle without being disturbed, allowing them to establish a permanent and ever-expanding presence in your garden.
The process of planting bulbs
Autumn is the designated season for planting clustered tulip bulbs, with the period from late September to early November being optimal in most temperate climates. The goal is to get the bulbs into the ground after the summer heat has subsided but well before the soil freezes. This timing allows the bulbs to acclimate and, most importantly, to develop a healthy root system throughout the winter months. These roots are vital for anchoring the plant and are the primary means by which the tulip will draw water and nutrients from the soil when it begins its active growth in the spring. Planting too early in warm soil can risk premature sprouting, while planting too late may not give the roots enough time to establish.
More articles on this topic
Before you begin digging, it is a good practice to prepare the entire planting bed rather than just individual holes. Loosen the soil to a depth of at least 20-25 centimetres to ensure good aeration and to make it easier for the new roots to penetrate. This is also the ideal time to incorporate any necessary soil amendments. Spread a layer of compost, grit, or sand over the surface and mix it thoroughly into the existing soil. If the soil is particularly poor, a light dusting of a balanced granular fertilizer or bone meal can be added to the bottom of the planting area to provide essential nutrients for the developing bulbs.
When it comes to planting the individual bulbs, proper depth and orientation are key. A good guideline is to plant the bulbs at a depth roughly three times their vertical height. For Tulipa praestans, this typically means planting them about 10-15 centimetres deep, measured from the base of the bulb to the soil surface. Place the bulb in the hole with the pointed end facing upwards, as this is where the shoot will emerge. If you are unsure which end is which, planting the bulb on its side is a safe bet; the shoot will naturally find its way towards the sun.
After placing the bulbs at the correct depth and spacing them approximately 10 centimetres apart to allow for future growth and multiplication, carefully backfill the holes with the prepared soil. Gently firm the soil over the bulbs to eliminate any large air pockets, but avoid compacting it too heavily. The final step in the planting process is to water the area well. This initial watering is crucial as it settles the soil and provides the moisture needed to stimulate the bulbs to break dormancy and begin producing roots. In most climates, this is the only watering they will need until they emerge in spring.
Propagation through division
One of the most effective and reliable methods for propagating the clustered tulip is through the division of its bulbs. This species is known for its ability to naturalise, which it achieves by producing small offset bulbs, or bulblets, that form around the base of the main, or mother, bulb. Over several years, a single planted bulb can develop into a dense clump. While this creates a wonderfully full display, overcrowding can eventually lead to competition for resources, resulting in smaller plants and fewer flowers. Dividing these clumps every three to five years is a great way to rejuvenate the planting and increase your stock of these beautiful tulips.
The ideal time to lift and divide clustered tulip bulbs is during their summer dormancy, after the foliage has completely withered and died back, which is typically in late summer or early autumn. At this point, the bulbs are resting and are less susceptible to damage from handling. Use a garden fork or spade to carefully dig around the entire clump, giving it a wide berth to avoid spearing any of the bulbs. Gently lift the whole clump of soil and bulbs out of the ground and place it on a tarp or in a wheelbarrow.
Once the clump is lifted, you can begin the process of separation. Carefully crumble away the soil from around the bulbs with your hands. You will see the main bulbs along with several smaller offset bulbs attached to their bases. These offsets can be gently twisted or snapped off from the mother bulb. Discard any bulbs that show signs of disease, rot, or damage. You can choose to replant all the healthy bulbs, both large and small, although it is worth noting that the smallest bulblets may take a year or two before they are large enough to produce a flower.
After separating the bulbs, they should be replanted as soon as possible to prevent them from drying out. Prepare the new planting area or the original bed by loosening the soil and adding fresh compost, as you would for new bulbs. Replant the divided bulbs at the correct depth of 10-15 centimetres and space them at least 10 centimetres apart to give them ample room to develop. This process of division not inly allows you to propagate your tulips and spread them to other parts of the garden but also ensures the long-term health and vigour of your existing collection.
Growing from seed
Propagating the clustered tulip from seed is a less common method, primarily because it is a much slower and more patient process compared to division. While tulips grown from offset bulbs can flower in one to two years, those grown from seed can take anywhere from four to seven years to reach flowering size. However, growing from seed can be a rewarding experience for the dedicated gardener, and it can also lead to interesting, albeit minor, variations in the resulting plants. It is a method often employed by plant breeders and enthusiasts looking to explore the genetic diversity within a species.
To grow clustered tulips from seed, the first step is to collect the seeds once they are ripe. After the flowers have faded, allow the seed pods to develop and mature on the plant. The pods will turn from green to a papery, tan-brown colour and begin to split open when the seeds inside are ready. At this point, you can harvest the pods and carefully remove the flat, papery seeds. It is important to collect the seeds before the pods fully split and disperse them naturally.
The seeds require a period of cold, moist stratification to break their dormancy and trigger germination. The easiest way to achieve this is to sow them in the autumn in a well-drained seed-starting mix in pots or seed trays. Sow the seeds on the surface of the compost and cover them with a thin layer of grit or sand. The containers should then be left outdoors in a sheltered location where they will be exposed to the natural winter cold and moisture. This mimics the conditions they would experience in their native habitat.
Germination will typically occur in the spring, with the seedlings resembling small blades of grass. At this stage, they are very delicate and require careful attention. The most important thing is to allow them to grow on for the full season and let their tiny leaves die back naturally, just as you would with mature bulbs. This allows the miniature bulb to form and store energy. The seedlings can be left in their original pot for the first couple of years, being kept moist during growth and dry during dormancy, before they are large enough to be pricked out and planted into individual pots or a nursery bed to grow on to flowering size.