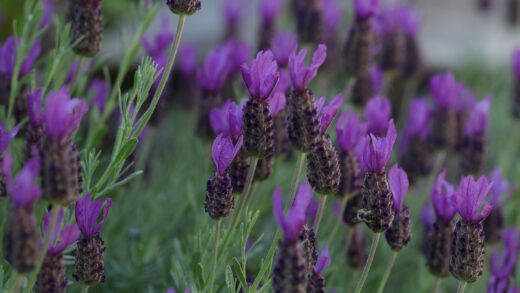
Successfully establishing blanket flowers in your garden begins with understanding the optimal methods for planting and propagation, processes that are as straightforward and rewarding as the plant itself. This hardy perennial, celebrated for its brilliant, long-lasting blooms, is remarkably easy to introduce into a landscape, whether you are starting from seeds, nursery-grown plants, or divisions from an existing clump. The key to a thriving display lies in timing, proper soil preparation, and respecting the plant’s fundamental need for sunlight and excellent drainage. By mastering these foundational techniques, you can ensure your blanket flowers not only survive but flourish, creating a vibrant tapestry of color that returns year after year with minimal fuss.
Planting blanket flowers is a task that promises immense rewards for a modest amount of effort. The ideal time to introduce them to your garden is in the spring, after the danger of the last frost has passed. This timing allows the plant the entire growing season to establish a robust root system before the challenges of winter set in. Alternatively, planting can also be done in the early autumn, giving the roots at least six to eight weeks to settle in before the ground freezes. Regardless of the season, the chosen location must receive at least six hours of direct sunlight daily, as this is non-negotiable for vigorous growth and prolific flowering.
When you are ready to plant a container-grown specimen, prepare the planting hole by making it roughly twice the width of the root ball but no deeper. It is critically important that the crown of the plant—the point where the stems meet the roots—sits level with or even slightly above the surrounding soil surface. Planting too deeply is a common mistake that can lead to crown rot, a fatal condition for blanket flowers. Gently tease out any circling roots at the bottom of the root ball to encourage them to grow outwards into the new soil, and then backfill the hole, firming the soil gently to remove any large air pockets.
After placing the plant in the ground, water it thoroughly to help settle the soil around the roots. This initial watering is crucial for establishing good root-to-soil contact, which is essential for water and nutrient uptake. For the first few weeks, monitor the soil moisture and provide consistent water to help the plant overcome transplant shock and begin its new growth phase. Once you see signs of active growth, you can gradually reduce the frequency of watering, allowing the plant to acclimate to the drier conditions it naturally prefers.
Propagation from seed
Growing blanket flowers from seed is an incredibly cost-effective and satisfying way to cultivate a large number of plants. You can start seeds indoors approximately six to eight weeks before your last expected frost date, or you can sow them directly into the garden once the soil has warmed up in the spring. If starting indoors, use a sterile, well-draining seed-starting mix and sow the seeds thinly in trays or small pots. The seeds require light to germinate, so press them gently onto the surface of the soil but do not cover them with more than a very thin dusting of mix or vermiculite.
More articles on this topic
To ensure successful germination, maintain consistent moisture by misting the soil surface regularly, and keep the seed trays in a warm location, ideally between 20 and 22 degrees Celsius. Covering the tray with a clear plastic dome or plastic wrap will help to retain humidity until the seeds sprout, which typically occurs within seven to twenty days. Once the seedlings emerge, remove the cover to promote good air circulation and place them under bright, direct light, such as a south-facing window or under grow lights, to prevent them from becoming weak and leggy.
When the seedlings have developed at least two sets of true leaves, they are ready to be transplanted into individual pots. This gives them more space to develop a strong root system before they are moved outdoors. Handle the delicate seedlings by their leaves rather than their stems to avoid causing damage. Continue to grow them in a bright, protected spot, and begin to harden them off about a week or two before you plan to plant them in the garden. Hardening off is the crucial process of gradually acclimating the young plants to outdoor conditions, including direct sun, wind, and temperature fluctuations.
For direct sowing in the garden, wait until all danger of frost has passed and the soil has warmed. Prepare the garden bed by clearing it of weeds and raking the surface smooth. Scatter the seeds over the prepared area and press them firmly into the soil to ensure good contact. Water the area gently and keep it consistently moist until germination occurs. Once the seedlings are large enough to handle, you will need to thin them out to the recommended spacing for your specific variety, typically around 30 to 45 centimeters apart. This thinning is vital for preventing overcrowding and ensuring each plant has the resources it needs to mature properly.
Propagation through division
Division is an excellent and reliable method for propagating established perennial blanket flowers, and it also serves as a vital maintenance task to rejuvenate older clumps. The ideal time to divide blanket flowers is in the early spring, just as new basal foliage is beginning to emerge. This timing allows the newly created divisions the entire growing season to re-establish themselves. You can also divide them in the early autumn, but ensure it is done at least six weeks before the first hard freeze to give the roots enough time to anchor themselves in the soil.
More articles on this topic
The process begins with carefully excavating the entire plant clump. Use a sturdy garden fork or spade to dig around the perimeter of the plant, about 15 centimeters away from the base, to minimize root damage. Work your way around the clump and then gently pry it up from the ground. Once the plant is lifted, you can shake or gently wash off the excess soil from the roots. This will give you a clearer view of the crown and root structure, making it easier to identify the best places to make your divisions.
With the root ball exposed, you can proceed to separate the clump into smaller sections. For smaller, less dense clumps, you may be able to pull the sections apart by hand. For larger, more established plants with a tough, woody center, you will likely need to use a sharp, sterilized tool like a spade, a hori-hori knife, or even an old serrated bread knife. The goal is to create new sections that each have a healthy mass of roots and at least a few shoots or dormant growth buds. It is a good practice to discard the old, woody central part of the original clump, as the younger, more vigorous outer sections will establish more successfully.
Once you have your new divisions, it is important to replant them as quickly as possible to prevent the delicate roots from drying out. Plant them in their new locations at the same depth they were originally growing, ensuring the crown is not buried. Backfill the hole, firm the soil, and water them in thoroughly. Treat these new divisions as you would new transplants, providing them with consistent moisture for the first few weeks until they show clear signs of new growth. Division not only multiplies your stock of plants but also invigorates the parent clump, leading to healthier growth and more prolific flowering.
Taking basal cuttings
Another effective method for propagating blanket flowers, particularly for specific named cultivars that you wish to clone exactly, is by taking basal cuttings. This technique involves taking shoots that emerge directly from the base of the plant in the spring. The ideal time for this is when the new spring growth is about 7 to 10 centimeters tall and is still soft and succulent. These young shoots have a high concentration of growth hormones, which makes them eager to form new roots under the right conditions.
To take a basal cutting, select a healthy, strong shoot from the outer edge of the plant clump. Use a sharp, clean knife or razor blade to sever the shoot as close to the crown of the plant as possible, sometimes even taking a small sliver of the woody crown tissue with it. This small piece of older tissue at the base of the cutting can often enhance rooting success. Once you have your cutting, carefully remove the lower leaves, leaving only a few at the top to reduce moisture loss through transpiration.
For the best chance of success, dip the base of the cutting into a rooting hormone powder or gel. This will help to stimulate the development of new roots more quickly and reliably. Prepare a small pot or tray filled with a sterile, well-draining rooting medium, such as a mix of perlite and compost or coarse sand and peat. Use a pencil or a dibber to make a hole in the medium, then gently insert the cutting, ensuring that the first set of remaining leaves is just above the surface. Firm the medium around the base of thecutting to provide support.
To create the humid environment that cuttings need to root, you can cover the pot with a clear plastic bag or place it inside a propagator. Place the cuttings in a bright location but out of direct sunlight, which could scorch the delicate foliage. Keep the rooting medium consistently moist but not waterlogged. Roots will typically begin to form within a few weeks. You can check for rooting by giving the cutting a very gentle tug; if you feel resistance, roots have formed. Once a healthy root system has developed, you can transplant the new plant into a larger pot and gradually acclimate it to outdoor conditions before planting it in the garden.
Site selection and soil preparation
The long-term success of your blanket flowers is largely determined before you even put the plant in the ground. Thoughtful site selection and meticulous soil preparation are paramount. As sun-loving prairie natives, these plants absolutely must be located in a spot that receives a minimum of six to eight hours of direct, uninterrupted sunlight per day. A lack of sunlight is the most common reason for poor performance, resulting in sparse, leggy growth and a significant reduction in the number of flowers produced. Observe the light patterns in your garden to pinpoint the optimal sun-drenched location.
Beyond sunlight, the single most critical soil characteristic for blanket flowers is excellent drainage. These plants are extremely intolerant of “wet feet” and will quickly succumb to root and crown rot in heavy, water-retentive soils. The ideal soil is sandy, gravelly, or a lean loam that allows water to percolate through it quickly. If your garden consists of heavy clay, you must take steps to amend it. While adding compost is beneficial for structure, it is even more important to incorporate inorganic materials like coarse sand, grit, or perlite to permanently improve drainage and create a more hospitable environment for the roots.
Before planting, it is wise to prepare the entire bed rather than just a single planting hole. This creates a more uniform growing environment and encourages the roots to spread out widely. Loosen the soil to a depth of at least 30 centimeters using a garden fork or tiller. This will break up any compaction and improve aeration. At this stage, you can work in your amendments, spreading a layer of sand or grit over the surface and incorporating it thoroughly into the loosened soil. Rake the surface smooth to create a fine, friable tilth ready for planting.
For gardeners struggling with persistently heavy, wet soil, creating a raised bed or a berm is an excellent solution. By elevating the planting area even just 15 to 20 centimeters above the surrounding grade, you can guarantee that excess water will drain away from the root zone. You can fill the raised bed with a custom soil mix, such as a blend of topsoil, compost, and coarse sand, to create the perfect growing conditions from the start. This proactive approach ensures your blanket flowers have the well-drained, sunny home they need to thrive for years to come.