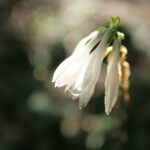
Successfully establishing a Brugmansia in the garden or a container begins with proper planting techniques, which lay the groundwork for a healthy and vigorous life. This involves selecting an appropriate location, preparing the soil meticulously, and handling the young plant with care to minimize stress. Equally important for the enthusiast is the art of propagation, the process of creating new plants. Brugmansia are remarkably easy to propagate, most commonly from cuttings, allowing gardeners to multiply their stock, share with others, or create new plants to replace older, less vigorous specimens. A solid understanding of these foundational practices is essential for anyone wishing to cultivate these spectacular flowering shrubs, ensuring they not only survive but truly flourish, gracing the garden with their dramatic, fragrant blooms for years to come.
Selecting the right location
The first and one of the most crucial steps in planting a Brugmansia is choosing the correct site. This decision will have a long-lasting impact on the plant’s overall health, growth rate, and flowering capacity. Angel’s trumpets crave a warm and sunny position but can be sensitive to the intense heat of the afternoon sun, especially in very hot climates. The ideal location is one that receives ample direct sunlight in the morning, for at least six hours, and then benefits from partial or dappled shade during the hottest part of the afternoon. This balance protects the large, tender leaves from scorching and helps to conserve soil moisture.
Consideration must also be given to the plant’s mature size. Brugmansia can grow into large shrubs or small trees, often reaching heights and spreads of several metres in a single season. Therefore, it is important to choose a location where it will have plenty of room to grow without being crowded by other plants, buildings, or fences. Good air circulation around the plant is vital for preventing fungal diseases, so avoid planting it in a cramped or stagnant corner of the garden. The sheer weight of the branches when laden with flowers also means a spot sheltered from strong winds is highly advisable to prevent damage.
The soil at the chosen location is another primary concern. Brugmansia are heavy feeders and require a soil that is rich in organic matter and nutrients. Before planting, it is essential to assess the existing soil and amend it if necessary. If the soil is heavy clay or very sandy, it should be improved by incorporating generous amounts of well-rotted compost, manure, or other organic material. This will not only provide essential nutrients but also improve the soil’s structure, promoting better drainage while also enhancing its ability to retain moisture, creating the ideal root environment for these thirsty plants.
Finally, the high toxicity of all parts of the Brugmansia plant must be a key factor in site selection. The location should be carefully chosen to be out of reach of children and pets who might be tempted to touch or ingest the leaves, flowers, or seeds. Placing the plant in a less-trafficked part of the garden, or behind a border of other plants, can provide a simple yet effective safety measure. This allows the plant’s stunning beauty to be appreciated from a safe distance, ensuring peace of mind for the gardener and their family.
More articles on this topic
The planting process
Once the ideal location has been chosen and the soil prepared, the next step is the physical act of planting. If you are planting a Brugmansia that is currently in a nursery pot, the process should be undertaken with care to minimize transplant shock. Begin by digging a hole that is at least twice as wide and just as deep as the pot the plant is in. This wider hole allows you to backfill with improved soil and gives the roots plenty of loose earth to spread into as they establish themselves. The extra width is more important than extra depth, as it encourages horizontal root growth.
Before removing the plant from its container, water it thoroughly. This helps the root ball to hold together and makes it easier to slide out of the pot. Carefully invert the container and gently tap the rim to release the plant, supporting the base of the stem with your other hand. Once the plant is out, inspect the root ball. If the roots are tightly coiled or circling the bottom of the pot (a condition known as being root-bound), it is important to gently tease them apart with your fingers or make a few vertical cuts with a sharp knife. This encourages the roots to grow outwards into the surrounding soil rather than continuing to circle.
Place the plant in the centre of the prepared hole, ensuring that the top of the root ball is level with or slightly above the surrounding soil surface. Planting too deep can lead to stem rot and other problems. Once you are satisfied with the positioning, begin backfilling the hole with the amended soil, gently firming it down around the root ball to eliminate any large air pockets. Be careful not to compact the soil too much, as this can impede drainage and root growth.
After the hole has been completely backfilled, the final and most critical step is to water the newly planted Brugmansia thoroughly and deeply. This helps to settle the soil around the roots and provides the plant with the moisture it needs to recover from the stress of transplanting. It is also beneficial to apply a layer of organic mulch, such as bark chips or compost, around the base of the plant. This mulch will help to conserve soil moisture, suppress weed growth, and keep the root zone cool.
More articles on this topic
Propagation from cuttings
Propagating Brugmansia from cuttings is the most common and reliable method for creating new plants that are genetically identical to the parent. The process is remarkably straightforward and can be done at almost any time during the active growing season, although spring and early summer are often the most successful periods. The first step is to select healthy, vigorous stems from the parent plant. It is best to choose semi-hardwood cuttings, which are stems that are beginning to turn woody but are not yet old and tough. The cuttings should be approximately 15 to 20 centimetres in length.
Once the desired stems have been selected, use a sharp, sterile knife or pair of secateurs to make a clean cut. It is important to remove all of the leaves from the lower two-thirds of the cutting, leaving only a few leaves at the very top. This reduces the amount of water the cutting loses through transpiration while it is developing roots. If the remaining leaves are very large, they can be cut in half to further reduce moisture loss. This preparation ensures that the cutting’s energy is directed towards root production rather than supporting a large amount of foliage.
There are two primary methods for rooting the prepared cuttings: in water or directly in soil. For the water method, simply place the base of the cuttings in a jar of water, ensuring that no leaves are submerged. The water should be changed every few days to keep it fresh and prevent bacterial growth. Within a few weeks, small white nubs, followed by roots, will begin to appear along the submerged portion of the stem. Once a healthy network of roots has developed, the cutting can be carefully potted into a well-draining potting mix.
For the soil method, the base of the cutting can be dipped in a rooting hormone powder to encourage faster root development, although this is not always necessary for Brugmansia. The cutting is then inserted into a pot filled with a moist, sterile rooting medium, such as a mix of perlite and compost. The pot should be placed in a warm, bright location, out of direct sunlight, and the medium kept consistently moist. Covering the pot with a plastic bag can help to create a humid environment that promotes rooting. Roots typically form within four to six weeks, after which the new plant can be cared for as usual.
Growing from seed
While propagation from cuttings is more common due to its speed and reliability, growing Brugmansia from seed can also be a rewarding experience, though it requires more patience and may result in plants with different characteristics from the parent. Brugmansia seeds are contained within the thorny or smooth pods that develop after the flowers have been successfully pollinated. These pods should be allowed to mature on the plant and harvested when they begin to show signs of drying or splitting.
Once harvested, the pod should be opened to reveal the seeds inside. The seeds have a cork-like outer coating that can be gently removed, although this is not strictly necessary. It is often recommended to soak the seeds in warm water for 24 hours before sowing. This process, known as scarification, helps to soften the seed coat and can improve the speed and consistency of germination. Soaking helps to break the seed’s dormancy and signals that conditions are right for it to begin growing.
To sow the seeds, prepare a seed tray or small pots with a high-quality, sterile seed-starting mix. The soil should be moistened before the seeds are planted. Place the seeds on the surface of the mix and then lightly cover them with a thin layer of soil or vermiculite. Brugmansia seeds require light to germinate, so they should not be buried too deeply. After sowing, the container should be covered with a plastic dome or bag to maintain high humidity and placed in a warm location with bright, indirect light.
Germination can be erratic and may take anywhere from a few weeks to several months, so patience is key. Throughout this period, it is important to ensure that the soil remains consistently moist but not waterlogged. Once the seedlings have emerged and developed their first set of true leaves, the cover can be gradually removed to acclimate them to lower humidity. The seedlings can then be carefully transplanted into individual pots and grown on until they are large and strong enough to be planted in their final location.
Post-planting and initial care
The care provided in the first few weeks and months after planting or propagating a Brugmansia is crucial for its successful establishment. For newly planted specimens, the primary focus should be on maintaining consistent soil moisture. The plant’s root system is still recovering from being transplanted and is not yet able to seek out water from a wide area, so it is important to water regularly and deeply, especially during dry periods. However, it is equally important to avoid overwatering and creating soggy conditions that could lead to root rot.
For newly propagated cuttings, once they have been potted up, they should be treated gently. They need to be gradually acclimated to stronger light conditions. Start them in a location with bright, indirect light and slowly move them into a position with more direct sun over the course of a week or two. This process, known as hardening off, prevents the tender new leaves from being scorched by intense sunlight. It is also wise to protect young plants from strong winds that could damage their fragile stems.
It is generally recommended to wait a few weeks before beginning to fertilize a newly planted or potted Brugmansia. This allows the plant’s root system to begin establishing itself without the risk of being burned by chemical fertilizers. Once new growth is evident, a balanced, water-soluble fertilizer can be applied at half-strength to provide the nutrients needed for healthy development. The frequency of feeding can then be gradually increased as the plant matures and its demands for nutrients grow.
Regular monitoring is a key component of initial care. Keep a close eye on the young plant for any signs of stress, such as wilting, yellowing leaves, or the presence of pests. Addressing any issues promptly will prevent them from escalating and will give the plant the best possible start. With careful attention to watering, light, and nutrition during this critical establishment phase, your new Brugmansia will be well on its way to becoming a robust and spectacular feature in your garden.