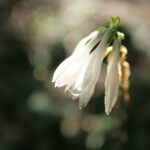
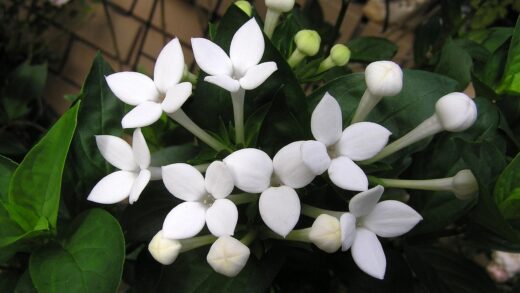
Successfully establishing a brazilian jasmine in your garden or on your patio begins with the crucial first step of planting. This initial process sets the stage for the plant’s entire life, and careful attention to its requirements at this point will pay significant dividends in the form of vigorous growth and abundant, beautiful blooms. The choice of location is paramount, as this tropical vine craves warmth and light to truly flourish. Similarly, preparing the soil or potting medium to provide the perfect balance of moisture retention and excellent drainage is a non-negotiable foundation for a healthy root system. By getting these fundamental aspects of planting right from the outset, you are creating an environment where your Mandevilla will not just survive, but actively thrive, quickly becoming a stunning centerpiece of your horticultural efforts.
When selecting the ideal location for planting your brazilian jasmine, consider its native tropical habitat. The plant performs best when it receives at least six hours of bright sunlight each day. An east-facing location, where it can soak up the gentle morning sun while being protected from the harsh, scorching rays of the late afternoon, is often perfect. In hotter climates, some afternoon shade is beneficial to prevent leaf scorch and stress. It is also important to choose a spot that offers some protection from strong winds, which can damage the delicate flowers and dry out the foliage, putting unnecessary strain on the plant and hindering its development.
The preparation of the planting site itself is a critical task that directly impacts the establishment of the root system. If you are planting directly into a garden bed, it is essential to amend the soil to improve its structure and fertility. Incorporating a generous amount of organic matter, such as well-rotted compost or manure, will enrich the soil with nutrients and improve its ability to hold moisture. At the same time, adding materials like coarse sand or perlite will enhance drainage, which is vital for preventing root rot, a common ailment for Mandevilla planted in heavy, clay-like soils that retain too much water.
For those choosing to plant in containers, the selection of the right pot and potting medium is equally important. Choose a container that is sufficiently large to accommodate the plant’s root ball with some room for growth, and ensure it has ample drainage holes at the base. A high-quality, well-draining potting mix is the best choice for containerized Mandevilla. You can create your own mix by combining standard potting soil with perlite and peat moss or compost. This combination provides the ideal environment for the roots: fertile, moisture-retentive, yet airy enough to prevent waterlogging and allow the roots to breathe and grow strong.
The physical act of planting requires a gentle touch. Carefully remove the Mandevilla from its nursery pot, taking care not to damage the root ball. If the roots are tightly coiled, a condition known as being ‘root-bound’, gently tease them apart to encourage them to grow outwards into the new soil. Place the plant in the prepared hole or container, ensuring that the top of the root ball is level with the surrounding soil surface. Planting it too deep can lead to stem rot. Backfill the hole with the prepared soil, firming it gently around the roots to eliminate any air pockets, and then water the plant thoroughly to help it settle into its new home.
More articles on this topic
Choosing the right support from the start
As a natural climbing vine, providing a suitable support structure for your brazilian jasmine at the time of planting is not an afterthought but a crucial component of its initial setup. Integrating the support from day one prevents the need to disturb the root system later on and encourages the plant to grow in the desired direction from its earliest stages. A trellis, arbor, obelisk, or even a simple set of wires or netting can serve as an excellent support system. The choice of support should reflect the mature size of the plant and the aesthetic you wish to achieve in your garden design.
When installing the support, ensure it is firmly anchored in the ground or attached securely to a wall or fence. A fully grown Mandevilla, laden with leaves and flowers, can become quite heavy, especially after rain or when buffeted by wind. A flimsy support structure can collapse under the weight, potentially causing significant damage to the plant. For container-grown specimens, a support that can be inserted directly into the pot is often the most practical solution, but it must still be sturdy enough to handle the plant’s vigorous growth throughout the season.
Once the support is in place and the Mandevilla is planted at its base, you can begin the initial training process. Gently weave the existing stems of the plant through the lower sections of the trellis or loosely tie them to the support using soft plant ties or twine. Be careful not to tie them too tightly, as this can constrict the stems and inhibit growth as they thicken over time. The goal is to guide the plant upwards, encouraging its natural twining habit to take over as it produces new growth.
This initial guidance is critical for establishing a strong framework for the plant’s future growth. A well-trained plant will have its main stems evenly distributed across the support structure, which maximizes its exposure to sunlight and promotes good air circulation through the foliage. This not only results in a more attractive and fuller display but also significantly reduces the risk of fungal diseases that can thrive in stagnant, humid conditions. Starting the training process early sets the foundation for a healthy, beautifully shaped vine that will reward you with a magnificent vertical display.
More articles on this topic
The art of propagation through stem cuttings
Propagating brazilian jasmine from stem cuttings is an incredibly rewarding and effective method for creating new plants, allowing you to easily multiply your stock or share this beautiful vine with fellow gardeners. The best time to take cuttings is during the late spring or early summer when the plant is in a state of active growth. This ensures that the stems have enough vitality and hormonal activity to successfully develop new roots. You should select healthy, vigorous stems from the current season’s growth for the highest chance of success. Avoid using old, woody stems or any that show signs of disease or pest damage.
To take a cutting, use a clean, sharp pair of pruning shears or a knife to snip a 4- to 6-inch section from the tip of a stem. It is best to make the cut just below a leaf node, which is the small bump on the stem where a leaf emerges. These nodes contain a concentration of cells that can differentiate into roots. Once you have your cutting, carefully remove the leaves from the lower half, leaving only two or three leaves at the very top. This reduces the amount of moisture the cutting loses through transpiration and focuses its energy on root production rather than sustaining a large amount of foliage.
To further increase the likelihood of successful rooting, you can dip the cut end of the stem into a rooting hormone powder or gel. While this step is not strictly necessary, as Mandevilla can root without it, using a rooting hormone can significantly speed up the process and lead to the development of a more robust root system. Gently tap off any excess powder before planting the cutting. This simple application provides the cutting with synthetic auxins that stimulate adventitious root formation, giving your new plant a strong start in life.
For planting, prepare a small pot filled with a sterile, well-draining rooting medium, such as a mix of perlite and peat moss or coarse sand. Use a pencil or a dibber to make a hole in the medium, and then gently insert the prepared cutting, ensuring that the lower nodes are buried. Firm the medium around the stem to hold it in place. To create a humid environment that is conducive to rooting, you can cover the pot with a clear plastic bag or the top half of a plastic bottle. Place the pot in a warm location with bright, indirect light, and keep the medium consistently moist but not waterlogged. With patience, roots should begin to form within a few weeks.
Propagation by layering
Layering is another effective, albeit less common, method for propagating brazilian jasmine, which has the distinct advantage of allowing the new plant to remain attached to the parent plant while it develops roots. This continuous supply of water and nutrients from the parent significantly increases the success rate. This technique is best performed in the spring or early summer and involves selecting a long, flexible stem that is close to the ground or the soil level of the pot. The key is to choose a healthy, pliable stem that can be bent down to make contact with the soil without snapping.
Once you have selected a suitable stem, you will need to encourage it to form roots at a specific point. To do this, locate a leaf node on the section of the stem that will be buried. At this point, you can carefully wound the stem by making a small, shallow cut or by gently scraping away a small portion of the outer bark on the underside of the stem. This minor injury stimulates the plant’s natural healing response and encourages the formation of roots at the wounded site. Applying a small amount of rooting hormone to the wound can further enhance this process.
The next step is to secure the wounded section of the stem in contact with the soil. You can do this by bending the stem down and burying the wounded node under a few inches of soil in the same pot or in a nearby patch of prepared garden soil. It is important to hold the stem firmly in place so that it does not become dislodged. A bent piece of wire, often called a layering pin, or even a small rock can be used to anchor the stem securely in the soil. The tip of the stem with its leaves should be left exposed to the light, continuing to grow as normal.
Over the following weeks and months, you should keep the soil around the layered section consistently moist. The buried part of the stem, supported by the parent plant, will begin to develop its own root system. You can check for rooting by gently tugging on the layered stem after about six to eight weeks; if you feel resistance, it means that roots have formed. Once a strong and healthy root system has developed, you can sever the new plant from its parent with a clean cut. The newly independent brazilian jasmine can then be carefully dug up and transplanted to its permanent location.
Starting from seed
While propagation from cuttings or layering is more common and generally provides faster results, growing brazilian jasmine from seed can be a fascinating and rewarding experience for the patient gardener. The first challenge is often obtaining viable seeds, which can be collected from the long, bean-like seed pods that form on the plant after the flowers have faded. It is important to allow these pods to mature and dry on the vine before harvesting them. Once the pods are brown and brittle, you can split them open to collect the seeds inside, which typically have a fluffy attachment, similar to a dandelion seed, that aids in wind dispersal.
Before sowing, it is often beneficial to prepare the seeds to improve their germination rate. Many gardeners recommend soaking the seeds in warm water for about 12 to 24 hours. This process helps to soften the hard outer seed coat, which can inhibit germination, and signals to the seed that conditions are favorable for sprouting. After soaking, the seeds should be sown immediately. This simple pre-treatment can significantly reduce the time it takes for the seeds to germinate and increase the overall number of successful seedlings.
For sowing, use a sterile, high-quality seed-starting mix in a tray or small pots with good drainage. Plant the seeds shallowly, only about a quarter of an inch deep, and cover them lightly with the mix. Gently water the medium to ensure it is moist but not saturated. To maintain the necessary high humidity and warmth for germination, cover the seed tray with a clear plastic dome or a plastic bag. Place the tray in a warm location that receives bright, indirect light. A consistent temperature of around 24 to 27 degrees Celsius is ideal for encouraging the seeds to sprout.
Patience is key when growing Mandevilla from seed, as germination can be slow and sometimes erratic, taking anywhere from a few weeks to a couple of months. During this time, it is crucial to monitor the moisture level of the soil, ensuring it never dries out completely. Once the seedlings have emerged and developed their first true set of leaves, you can remove the plastic cover to improve air circulation. When the seedlings are large enough to handle and have developed a small root system, they can be carefully transplanted into individual pots to continue their growth, ready to be planted out once they are well established.