The concept of overwintering love-in-a-mist requires a shift in perspective from the traditional sense of keeping a single plant alive through the cold months. As a true hardy annual, an individual love-in-a-mist plant is genetically programmed to complete its entire life cycle—from seed to flower to seed—within a single growing season, and it will naturally die with the first hard frosts of autumn. Therefore, overwintering this plant is not about preserving the parent plant itself, but about ensuring the successful continuation of its lineage into the next year. The entire strategy revolves around the plant’s prolific seed production and its remarkable ability to self-sow, a process that allows it to effectively “overwinter” as dormant seeds in the soil, ready to burst forth with new life when spring arrives.
The plant’s annual life cycle is a beautifully efficient and self-sustaining process. It invests all of its energy throughout the spring and summer into producing a spectacular but relatively brief floral display, the sole purpose of which is to attract pollinators. Once this mission is accomplished, the plant’s focus shifts entirely to developing its distinctive, papery seed pods. These pods act as protective nurseries for the next generation. As autumn approaches and the plant’s life draws to a close, it leaves behind this vital legacy of seeds, which are the key to its survival through the winter and its reappearance in the garden year after year.
Understanding this natural cycle is fundamental to successfully managing its presence in your garden. Instead of viewing the dying back of the plants in autumn as an end, it should be seen as a crucial transitional phase. The dried, brown stems and rattling seed pods may look untidy to some, but they are a sign of a successful season and the promise of future beauty. By allowing at least some of the plants to remain in the garden to complete this final stage, you are actively participating in and facilitating the overwintering of the species as a whole, rather than just an individual specimen.
This self-seeding strategy is what makes love-in-a-mist such a cherished component of informal and cottage-style gardens. It creates a dynamic and ever-changing display, as seedlings may pop up in unexpected but often delightful new combinations with other plants. Embracing this serendipitous nature is part of the joy of growing this plant. The process requires very little from the gardener beyond an initial planting and a willingness to let nature take its course, making it a perfect choice for those who appreciate a garden that has a touch of wild, self-sustaining charm.
The annual life cycle of love-in-a-mist
The life of a love-in-a-mist plant is a condensed and rapid journey, perfectly adapted to making the most of a single growing season. The cycle begins with the germination of a seed, a process triggered by a combination of moisture and suitable temperatures. For this hardy annual, germination can occur either in the autumn or in the very early spring. Autumn-germinated seeds will often form a small, low-lying rosette of foliage that remains dormant through the coldest parts of winter before bursting into vigorous growth as the days lengthen. Spring-germinated seeds simply get a slightly later start on the same journey.
More articles on this topic
Once germinated, the seedling enters a phase of rapid vegetative growth. During this period, all of the plant’s energy is directed towards developing a strong root system and producing the characteristic feathery foliage needed to capture sunlight for photosynthesis. This leafy growth phase is crucial, as the plant needs to build up sufficient energy reserves to support the demanding process of flowering that is to come. The speed of this growth is remarkable; in just a few short weeks, a tiny seedling can transform into a lush, bushy plant ready to produce its first buds.
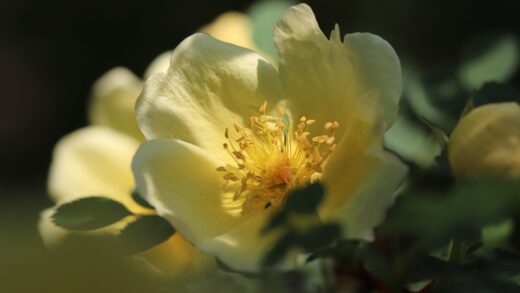
The transition to the reproductive phase is the pinnacle of the plant’s life. Triggered by environmental cues like day length and temperature, the plant begins to form its intricate and beautiful flowers. The flowering period can last for several weeks, with the plant producing a succession of blooms to maximize its chances of successful pollination. Each flower is a short-lived but spectacular event, designed to attract pollinators and fulfill its biological destiny. This is the most energy-intensive part of the plant’s life, and it marks the beginning of the end of its vegetative growth.
After pollination, the final phase begins: seed production. The flower’s petals fade, and the ovary at its base swells to become the inflated seed pod. The plant now diverts all its remaining resources into nurturing the developing seeds within this protective capsule. As the seeds ripen, the foliage begins to yellow, and the plant’s overall vigor declines. Once the pods have dried and the seeds have been dispersed, the plant’s life’s work is complete. Having successfully created the next generation, the parent plant withers and dies, its energy spent, its purpose fulfilled.
The role of seeds in overwintering
The seed is the brilliant evolutionary solution that allows an annual plant like love-in-a-mist to bridge the gap between one growing season and the next, effectively conquering the inhospitable conditions of winter. Each small, black seed is a tiny, self-contained survival package. It contains a miniature, dormant plant embryo, complete with a food reserve (the endosperm) to fuel its initial growth upon germination. This entire package is wrapped in a tough, protective seed coat that shields the embryo from physical damage, dehydration, and predation.
More articles on this topic
This dormant state is a remarkable biological adaptation. It allows the seed to remain viable in the soil for extended periods, waiting patiently for the right environmental signals to break dormancy and begin to grow. The seeds of love-in-a-mist are classified as hardy, meaning they are capable of withstanding freezing temperatures without being damaged. This is why seeds scattered in the autumn can survive the winter buried in the soil or lying on its surface, ready to spring to life at the first touch of spring warmth.
The process of seed dispersal is the final act of the parent plant to ensure the success of the next generation. The “salt shaker” mechanism of the dried seed pods, which releases seeds when agitated by the wind, is designed to scatter the seeds over a small area around the parent plant. This allows the colony to gradually expand its territory over time. Some seeds may fall directly below the parent plant, while others might be carried further afield by strong gusts of wind or even by adhering to the fur of passing animals, facilitating a wider distribution.
For the gardener, this natural seeding process is a gift. It means that after an initial sowing, the plant will often perpetuate itself with no further effort required. The overwintering seeds create a “seed bank” in the soil, ensuring a continuous supply of new plants each year. The density and location of the resulting seedlings can be unpredictable, but this randomness is what contributes to the charming, informal character of a garden where love-in-a-mist is allowed to naturalize and make itself at home.
Protecting self-sown seeds in autumn
While the seeds of love-in-a-mist are naturally hardy and well-equipped to survive the winter, there are a few simple steps a gardener can take to help improve the success rate of self-sown seedlings. One of the biggest threats to overwintering seeds is not the cold itself, but the disturbance of the soil. Vigorous autumn cleanup, which involves heavy raking or cultivation of the soil, can bury the seeds too deeply or remove them from the garden entirely. Therefore, a more gentle approach to tidying up in the areas where you want love-in-a-mist to reappear is beneficial.
Instead of clearing the entire plant away at the end of the season, consider leaving the dried stems and seed pods in place for as long as possible. They provide a degree of winter interest in the garden and, more importantly, they allow the seed dispersal to happen naturally and gradually over a longer period. The standing stems can also help to trap fallen leaves, which act as a natural, lightweight mulch over the soil surface. This layer of leaves provides a small amount of insulation and helps to protect the scattered seeds from being eaten by birds or washed away by heavy winter rains.
If you prefer a tidier look for the winter, you can cut the dead plants down at the base but leave the soil surface largely undisturbed. Before removing the cut stems, give them a good shake over the desired area to ensure the seeds are released onto the soil. After this, you can apply a very thin layer of a light organic mulch, such as shredded leaves or fine compost. This thin layer will help to protect the soil and the seeds without creating a barrier so thick that it prevents the seedlings from emerging in the spring.
It is also important to be mindful of where the seeds have fallen when performing other autumn and winter gardening tasks. Avoid walking on or compacting the soil in these areas unnecessarily. When the first green shoots of the self-sown seedlings appear in early spring, they will be very small and delicate. It is crucial to be able to recognize their distinctive feathery foliage so that you do not mistake them for weeds and accidentally remove them during your first spring cleanup.
Collecting and storing seeds for spring
For gardeners who prefer more control over where their plants grow, or who wish to share seeds with others, collecting and storing them is an excellent alternative to relying solely on self-seeding. This practice ensures you have a fresh supply of viable seeds ready for a planned sowing in the spring. The key to this process is harvesting the seed pods at the right time. You must wait until the pods are fully mature and have turned a dry, papery brown color. If you shake a stem, you should be able to hear the seeds rattling inside, which is the definitive sign that they are ripe and ready for collection.
To harvest the seeds, simply snip the dry seed pods from the plant with a pair of scissors or secateurs. It is best to do this on a dry, sunny day to ensure the pods are not damp. You can collect the pods in a paper bag or a bucket. Once you have gathered all the pods you need, bring them indoors to a dry, well-ventilated location. Spread them out on a tray or a sheet of newspaper and allow them to air dry for another week or two to remove any residual moisture, which is crucial for preventing mold during storage.
Once the pods are thoroughly dry, you can extract the seeds. The pods can be easily broken open with your hands over a bowl or sheet of paper. The small, black seeds will pour out, along with some of the lighter, papery debris from the pod itself. You can separate the seeds from this chaff by gently blowing on it, as the lighter debris will blow away while the heavier seeds remain. This cleaning step is not strictly necessary for home saving, but it results in a cleaner seed sample that is easier to store and sow.
Proper storage is the final and most critical step. The seeds must be kept cool, dark, and, above all, dry. Place the cleaned, dry seeds into a paper envelope or a small, airtight glass jar. Be sure to label the container clearly with the plant’s name and the year of harvest. Store the container in a cool, dark place, such as a closet, a drawer, or a dry basement. For the best long-term viability, storing the seeds in a sealed container in the refrigerator is the ideal method, as this will keep them dormant and protected until you are ready to bring them back to life in the spring.