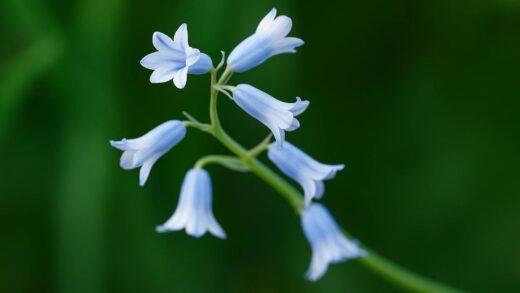
To achieve the lush foliage and breathtaking floral displays for which azaleas are renowned, a thoughtful and well-timed fertilization strategy is essential. These acid-loving plants have specific nutritional needs that differ from many other common garden shrubs. They are not heavy feeders, and in fact, are quite sensitive to over-fertilization, which can lead to root damage and poor health. The key is to provide a balanced diet of essential nutrients in a form the plant can readily absorb within its preferred low-pH soil environment. Understanding what to feed, when to feed, and how to recognize signs of deficiency will empower you to nourish your azaleas for optimal performance and long-term vitality.
Azaleas belong to the ericaceous family of plants, which means they have evolved to thrive in acidic, woodland soils that are naturally rich in organic matter but often low in certain readily available nutrients. Their fine, fibrous root systems are highly efficient at extracting what they need from this environment, but they are also easily burned by excessive concentrations of chemical salts found in many general-purpose fertilizers. Therefore, the most important rule is to always use a fertilizer specifically formulated for acid-loving plants. These products are carefully balanced to provide the right nutrients without raising the soil pH.
The primary goal of fertilizing is to supplement the natural nutrients present in the soil, ensuring the plant has everything it needs for key biological processes. This includes promoting strong root development, encouraging vigorous vegetative growth, and, most importantly, supporting the formation of an abundance of flower buds for the following season. A good azalea fertilizer will provide a balanced ratio of the three macronutrients: Nitrogen (N) for leaf growth, Phosphorus (P) for root and flower development, and Potassium (K) for overall plant vigor and resilience. It should also contain essential micronutrients like iron, magnesium, and manganese.
It is also crucial to recognize that fertilization is not a cure for a poorly sited or improperly planted azalea. If your plant is struggling due to issues like alkaline soil, poor drainage, or inadequate sunlight, adding more fertilizer will not solve the problem and may even exacerbate it. Fertilization should be seen as one component of a holistic care regimen that includes proper site selection, soil preparation, watering, and mulching. When all these elements are in place, a sensible feeding program can elevate a healthy plant to a truly spectacular one.
Understanding azalea nutrition
Azaleas require a range of nutrients to perform all their life functions, which are broadly categorized into macronutrients and micronutrients. The macronutrients, needed in larger quantities, are Nitrogen (N), Phosphorus (P), and Potassium (K). Nitrogen is the primary driver of vegetative growth, responsible for the development of healthy, green leaves and stems. Phosphorus is vital for energy transfer within the plant and plays a crucial role in root formation and the production of flowers. Potassium contributes to the overall hardiness of the plant, helping it regulate water, withstand temperature stress, and resist diseases.
More articles on this topic
The micronutrients, while needed in much smaller amounts, are just as essential for the plant’s health. For azaleas, the most critical micronutrient is iron (Fe). Iron is a key component in the production of chlorophyll, the pigment that gives leaves their green color and allows the plant to perform photosynthesis. An iron deficiency is one of the most common problems seen in azaleas, particularly those planted in soil with a pH that is too high. Other important micronutrients include manganese (Mn), zinc (Zn), and copper (Cu), all of which act as catalysts for various enzymatic processes within the plant.
The availability of these nutrients is directly tied to the pH of the soil. In alkaline soils (with a pH above 6.5), essential nutrients like iron and manganese become chemically “locked up,” meaning they are present in the soil but in a form that the azalea’s roots cannot absorb. This is why you can have a plant showing clear signs of a nutrient deficiency even if the soil contains adequate levels of that nutrient. Maintaining an acidic soil pH between 4.5 and 6.0 is therefore the absolute cornerstone of proper azalea nutrition, as it ensures that all the necessary elements are available for the plant to take up.
When selecting a fertilizer, look for one that uses sources of nitrogen that are beneficial for acid-loving plants, such as ammonium sulfate, which has an acidifying effect on the soil. Avoid fertilizers that contain high levels of nitrate nitrogen, which is less effective in low-pH soils and can be detrimental to azalea health. Many organic options, such as cottonseed meal or specially formulated organic ericaceous feeds, are also excellent choices as they release nutrients slowly and contribute to the overall health and structure of the soil.
The timing of fertilization
The timing of your fertilizer applications is critically important to ensure that you are supporting the azalea’s natural growth cycle. Feeding at the wrong time of year can be ineffective at best and harmful at worst. The primary period for fertilization is in the late winter or early spring, just as the buds begin to swell and new growth is initiated. This application provides the plant with the energy it needs to fuel its spring growth flush and to produce a vibrant and bountiful display of flowers.
More articles on this topic
A second, often beneficial, application can be made immediately after the flowering period has concluded. This post-bloom feeding is crucial for two reasons. Firstly, it helps the plant replenish the significant energy reserves it expended during flowering. Secondly, and more importantly, this is the time when the azalea begins the process of setting its flower buds for the following year. Providing nutrients at this stage directly supports the development of a greater number of higher-quality buds, effectively determining the quality of next spring’s show.
It is imperative to cease all fertilization by mid to late summer. Applying fertilizer late in the growing season can stimulate a new flush of tender, succulent growth. This new growth will not have sufficient time to “harden off,” or become woody and mature, before the arrival of the first frosts in autumn. As a result, this late-season growth is extremely susceptible to being damaged or killed by cold winter temperatures, which can weaken the overall health of the plant and create entry points for diseases.
For newly planted azaleas, it is generally best to be cautious with fertilization during their first year. The priority for a new plant is to establish a strong root system. Often, the amended soil used during planting provides sufficient nutrients for the first season. If you do choose to fertilize a new plant, wait at least a month after planting and use a half-strength solution of a gentle, balanced fertilizer. The focus should always be on encouraging root growth rather than forcing excessive top growth in the first year.
Application methods and tips
When it comes to applying fertilizer to your azaleas, it is crucial to follow the instructions on the product label precisely. The adage “if a little is good, a lot must be better” absolutely does not apply here. Over-fertilizing can lead to the buildup of salts in the soil, which can severely damage or even kill the plant’s sensitive, shallow roots. Always measure the recommended amount carefully based on the size of your plant or the area to be treated.
For granular fertilizers, ensure the soil around the base of the plant is moist before application. Never apply fertilizer to dry soil, as this can concentrate the chemical salts and increase the risk of root burn. Sprinkle the granular product evenly on the soil surface under the plant’s canopy, extending out to the drip line. Be careful to avoid getting the fertilizer granules on the leaves or against the main stem. After applying the granules, use a cultivator to lightly scratch them into the top inch of soil or mulch, and then water the area thoroughly. This watering helps to dissolve the fertilizer and carry the nutrients down into the root zone where they can be absorbed.
Liquid fertilizers or water-soluble powders that are mixed with water offer a method of feeding that provides nutrients in a readily available form. These are often used for a quick boost or for correcting a specific nutrient deficiency. When using a liquid feed, apply it to the soil over the root zone as you would when watering. Some liquid feeds can also be used as a foliar spray, where the nutrient solution is sprayed directly onto the leaves. While foliar feeding can provide a rapid green-up for a plant suffering from chlorosis, it is a temporary fix and not a substitute for addressing the underlying soil health and nutrient availability.
An often-overlooked but highly effective long-term fertilization strategy is the regular use of organic matter. Incorporating compost into the soil at planting time and annually applying a two- to three-inch layer of organic mulch like pine bark or leaf mold creates a healthy, living soil. As these materials decompose, they provide a slow, steady release of a wide spectrum of nutrients in a natural form. This approach not only feeds the plant but also improves soil structure, aeration, and water retention, creating a robust foundation for a thriving azalea.
Recognizing nutrient deficiencies
Learning to identify the visual signs of common nutrient deficiencies is a valuable skill that allows you to provide targeted care for your azaleas. The most frequently encountered issue is iron chlorosis. This condition is characterized by the yellowing of the newest leaves, particularly between the veins, while the veins themselves remain dark green, creating a distinct, netted pattern. Iron chlorosis is almost always a symptom of a soil pH that is too high, rather than a lack of iron in the soil itself. The solution involves lowering the soil pH with amendments like elemental sulfur and potentially using a chelated iron supplement for a faster, though temporary, recovery.
A nitrogen deficiency will present itself differently, typically affecting the older, lower leaves on the plant first. The leaves will turn a uniform pale green or yellow, and the plant will exhibit stunted growth and a general lack of vigor. This occurs because nitrogen is a mobile nutrient within the plant, meaning the plant can move it from older tissues to support new growth. A balanced, acid-forming fertilizer applied in the spring should prevent or correct this issue.
Magnesium deficiency can sometimes be confused with iron chlorosis, but it has a distinct pattern. With a magnesium deficiency, the yellowing (chlorosis) will also occur between the veins, but it often appears on the older, lower leaves first. A characteristic triangular green area may also remain at the base of the leaf blade. Applying Epsom salts (magnesium sulfate) as a soil drench or a foliar spray can be an effective way to remedy a magnesium deficiency once it has been correctly identified.
While less common, other deficiencies can also occur. A lack of phosphorus can sometimes result in dull, undersized leaves and poor flower production, while a potassium deficiency may cause scorching or browning along the edges of the older leaves. However, it is important to not jump to conclusions. Before assuming a nutrient deficiency, always check the other aspects of your plant’s care first. Ensure the soil is adequately moist, the drainage is good, and the plant is receiving the correct amount of light, as these environmental stressors can often produce symptoms that mimic nutritional problems.