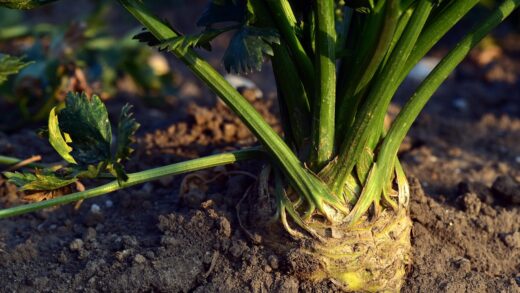
The clustered tulip, a multi-flowered gem originating from the mountains of Central Asia, is a relatively low-maintenance yet spectacular addition to any spring garden. Its ability to produce several vibrant scarlet-orange blooms from a single stem sets it apart from its single-flowered relatives, creating a full and dazzling display with minimal effort. Understanding its basic needs is the first step towards cultivating a thriving patch of these unique tulips that will return year after year. Proper care ensures not only a beautiful floral show but also the long-term health and vigour of the bulbs, allowing them to naturalise and spread over time. This involves a holistic approach, considering everything from the initial site selection to post-blooming maintenance, all of which contribute to the plant’s life cycle.
To achieve the best results, it is crucial to mimic the natural habitat of the clustered tulip as closely as possible. These tulips thrive in conditions that offer excellent drainage and plenty of sunlight, reminiscent of the rocky slopes they call home. Therefore, selecting a suitable location in the garden is paramount for their success. A spot that receives at least six hours of direct sunlight per day is ideal for promoting strong growth and abundant flowering. Poorly chosen sites, such as those with heavy, waterlogged soil or deep shade, will invariably lead to weak plants, sparse blooms, and an increased risk of bulb rot and other diseases.
Once the blooming season is over, the care routine for the clustered tulip shifts focus from flowering to energy storage for the following year. It is critically important to allow the foliage to die back naturally, resisting any temptation to cut it down while it is still green. The leaves are actively photosynthesizing during this period, creating and sending vital nutrients down to the bulb for storage. This energy reserve is what fuels the next season’s growth and flower production. Prematurely removing the foliage effectively starves the bulb, resulting in diminished performance and potentially no flowers in the subsequent spring.
General maintenance throughout the year also involves keeping the tulip bed free from weeds and monitoring for any signs of pests or diseases. Weeds compete with the tulips for essential resources such as water, nutrients, and light, so regular but gentle weeding is beneficial. A light layer of mulch can help to suppress weed growth and also aids in retaining soil moisture and regulating temperature. However, one must be careful not to apply too thick a layer, as this can create an overly moist environment that encourages fungal diseases. Regular observation allows for early intervention if any problems arise, ensuring the plants remain healthy and robust.
General maintenance tasks
Proper care for the clustered tulip begins with selecting the right planting location, a decision that profoundly impacts its entire life cycle. These tulips require a position that receives full sun, meaning at least six to eight hours of direct sunlight daily, to perform at their best. This exposure to sunlight is crucial for the process of photosynthesis, which not only fuels the current season’s growth and vibrant blooms but also allows the bulb to store sufficient energy for the following year. A south-facing slope or an open garden bed that is not overshadowed by large trees or buildings would be an ideal environment. Without adequate light, the stems may become leggy and weak, and the number and quality of flowers will be significantly reduced.
More articles on this topic
Soil condition is another cornerstone of successful clustered tulip cultivation, with excellent drainage being the most critical factor. The bulbs are highly susceptible to rot if they sit in waterlogged soil, a common issue in heavy clay substrates. To prevent this, it is often necessary to amend the soil before planting by incorporating organic matter like compost, leaf mould, or well-rotted manure, which improves soil structure and aeration. Adding coarse sand or fine grit can also enhance drainage significantly. The ideal soil pH is neutral to slightly alkaline, which facilitates optimal nutrient uptake by the bulbs, contributing to their overall health and flowering potential.
Throughout the growing season, consistent attention to the plant’s environment will yield the best results. Keeping the area around the tulips free from weeds is essential, as these competitors can rob the tulips of vital water and nutrients, stunting their growth. Hand-weeding is preferable to using a hoe, as it is less likely to damage the shallow roots or the bulbs themselves. Furthermore, a light layer of organic mulch, such as shredded bark or compost, can be beneficial in suppressing weeds and conserving soil moisture. This also helps to moderate soil temperature, protecting the bulbs from extreme fluctuations.
After the vibrant floral display has faded, post-blooming care becomes the primary focus, and this is where many gardeners make critical errors. It is absolutely essential to resist the urge to remove the foliage immediately after the flowers die. The leaves must be allowed to yellow and wither naturally, a process that can take several weeks. During this time, the plant is channelling all its energy from the leaves back into the bulb, a vital process for ensuring a robust display the following spring. Once the foliage has completely died back, it can be safely removed at the base.
Preparing for the dormant period
As the vibrant spring display of the clustered tulip concludes and the flowers begin to fade, the plant’s energy focus shifts from blooming to bulb replenishment. This post-flowering period is a critical phase in the tulip’s annual cycle, laying the groundwork for the next season’s growth. The primary task for the gardener at this stage is to practice patience and allow the plant’s foliage to senesce naturally. The leaves, though they may look untidy as they start to yellow and droop, are working hard, photosynthesizing and transferring energy reserves to the bulb below ground. This stored energy is crucial for the bulb’s survival through dormancy and for initiating growth and flowering in the following year.
More articles on this topic
To aid this energy-storing process, it is beneficial to deadhead the spent flowers by snapping or cutting off the flower heads, including the seed pod that begins to form. This prevents the plant from expending its valuable energy on seed production, redirecting all available resources towards fortifying the bulb instead. When deadheading, it is important to remove only the flower head and a small portion of the stem, leaving the main stalk and all the leaves intact. The foliage is the powerhouse of the plant at this stage, and its preservation is non-negotiable for the long-term health and perennial performance of the tulips.
Once the foliage has completely withered and turned brown or yellow, it has served its purpose and can be safely removed. This is typically about six to eight weeks after the blooming period has ended. At this point, the leaves will come away from the base of the plant with a gentle tug. Tidying the garden bed by removing the dead foliage not only improves its appearance but also helps to reduce the chances of fungal diseases overwintering in the decaying plant material. This act signals the official start of the bulb’s dormant period, during which it will rest until the cooling temperatures of autumn trigger new root growth.
During the summer dormancy, the clustered tulip bulbs require a warm and dry environment, which mimics the conditions of their native habitat in Central Asia. For this reason, excellent soil drainage is paramount, as bulbs left in damp, cool soil during their dormant phase are highly prone to rot and disease. In regions with wet summers, some gardeners choose to lift the bulbs after the foliage has died back, store them in a dry, ventilated place, and then replant them in the autumn. However, in climates with relatively dry summers and in well-drained soil, Tulipa praestans can be left in the ground to naturalise and multiply over the years.
Monitoring health throughout the season
Vigilant observation throughout the growing season is key to maintaining a healthy stand of clustered tulips and preventing minor issues from escalating into major problems. Regular inspection of the leaves, stems, and flowers can help in the early detection of common pests and diseases. Look for any signs of discoloration, such as yellowing or brown spots on the leaves, which could indicate a fungal infection like tulip fire. Also, check for distortions in growth, streaking on the petals, or any unusual patterns, as these can be symptoms of viral infections, which are often spread by aphids.
Pest management is an integral part of health monitoring. Aphids are one of the most common pests affecting tulips, and they can be found clustered on the undersides of leaves or on new growth, sucking sap and potentially transmitting viruses. Early infestations can often be managed by simply washing them off with a strong jet of water or by using insecticidal soap. Slugs and snails can also be a nuisance, especially in damp conditions, as they chew holes in the leaves and flowers. Using organic slug pellets, beer traps, or creating barriers with crushed eggshells can help to control their population.
Beyond pests and diseases, it is also important to monitor the plants for signs of environmental or nutritional stress. Yellowing leaves during the active growing season, for instance, might not always be a sign of disease but could indicate a nutrient deficiency, particularly a lack of nitrogen. Conversely, overly lush, weak foliage with few flowers might suggest an excess of nitrogen. Poor flowering can also be a result of insufficient sunlight or planting the bulbs too shallowly. Observing these cues allows the gardener to make necessary adjustments to their care routine, such as amending the soil, adjusting fertilizer application, or even considering transplanting the bulbs to a more suitable location.
A proactive approach is always more effective than a reactive one when it comes to plant health. This includes practicing good garden hygiene to minimize the risk of disease transmission. Always remove and dispose of any diseased plant material promptly, and avoid composting it. When working among the plants, ensure that tools are clean to prevent spreading pathogens from one area to another. By combining regular monitoring with sound cultural practices, you can ensure your clustered tulips remain vigorous and provide a spectacular display of colour each spring, contributing to the overall health and beauty of the garden ecosystem.
Long-term care and naturalising
One of the most rewarding aspects of growing clustered tulips is their ability to naturalise, meaning they can be left in the ground to perennialize and multiply over the years. To encourage this, it is essential to provide them with the right long-term conditions that support their life cycle. This starts with the initial planting in a well-drained, sunny location where they can remain undisturbed. Unlike many hybrid tulips that tend to decline in vigour after a few years, species tulips like Tulipa praestans are more resilient and, when happy, will slowly spread to form attractive drifts of colour.
For successful naturalisation, the post-blooming care mentioned earlier is of utmost importance. Allowing the foliage to die back completely each year is non-negotiable, as this is how the bulbs gather the energy needed to survive dormancy and produce flowers and new offset bulbs for the following season. Additionally, a light application of a balanced, low-nitrogen fertilizer after blooming can provide the bulbs with the nutrients they need to thrive and multiply. A granular fertilizer rich in phosphorus and potassium is ideal for promoting strong bulb and root development, which is the foundation of a healthy, perennial tulip colony.
Over time, as the parent bulbs produce smaller offset bulbs, the clumps of tulips will become denser. After several years, you may notice a decrease in the size or number of flowers, which is often a sign of overcrowding. When this occurs, it is a good time to lift and divide the bulbs. The best time to do this is in late summer or early autumn, after the bulbs have completed their dormant period but before they start to send out new roots. Carefully dig up the entire clump, gently separate the individual bulbs, and replant them at the correct depth and spacing, allowing them room to grow and develop.
By adopting a long-term care strategy, you are not just cultivating individual plants but are fostering a self-sustaining and expanding community of clustered tulips in your garden. This approach embraces the natural life cycle of the plant, working with its inherent tendencies rather than against them. The result is a low-maintenance and enduring display that becomes more impressive with each passing year. The initial investment in proper site selection and soil preparation pays dividends for seasons to come, rewarding the patient gardener with a spectacular and reliable spring show that truly signifies the awakening of the garden.
Adapting care for container cultivation
Growing clustered tulips in containers is an excellent option for those with limited garden space, such as on patios, balconies, or terraces. However, container cultivation requires a slightly different approach to care compared to growing them in the ground. The most critical factor for success in pots is providing exceptional drainage. Ensure the chosen container has ample drainage holes at the bottom. The potting medium should be specifically formulated for bulbs or a mix of high-quality potting compost with a generous addition of grit or perlite to prevent waterlogging, which is a primary cause of bulb rot in containers.
Watering is another key aspect that needs careful management when tulips are grown in pots. Containers dry out much faster than garden beds, so they will require more frequent watering, especially during the active growth period in spring. Check the moisture level of the compost regularly by inserting a finger into the top inch; if it feels dry, it is time to water thoroughly until water begins to run out of the drainage holes. However, it is equally important to avoid overwatering, so always allow the top layer of compost to dry out slightly between waterings. During their summer dormancy, the pots should be kept in a dry location to prevent the bulbs from rotting.
Nutrient management is also more intensive for container-grown tulips. The limited volume of soil in a pot means that nutrients are depleted more quickly. To ensure the bulbs have the resources they need for a spectacular display, it is advisable to feed them during the growing season. Start feeding with a balanced liquid fertilizer when the shoots first appear and continue every couple of weeks until the flowers begin to fade. After flowering, switch to a high-potassium liquid feed, such as a tomato fertilizer, to help the bulbs build up their energy stores for the following year, and continue this until the foliage starts to yellow.
Overwintering container-grown tulips presents a unique challenge, as the bulbs are more exposed to freezing temperatures than those insulated by the ground. In regions with harsh winters, the containers will need protection to prevent the soil from freezing solid, which can kill the bulbs. This can be achieved by moving the pots into an unheated garage or shed, wrapping them in bubble wrap or burlap, or plunging the pots into the ground in a sheltered part of the garden. This protection ensures the bulbs experience a necessary cold period for flower development without being subjected to damaging freeze-thaw cycles.