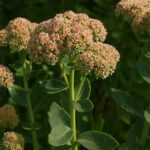
Elecampane is a striking and historically significant perennial that commands attention in any garden setting with its towering stature and vibrant, sunflower-like blooms. To cultivate this robust plant successfully, one must appreciate its preference for specific environmental conditions and its relatively low-maintenance, yet particular, needs. Proper care involves more than just occasional watering; it encompasses a holistic approach that considers soil composition, light exposure, and seasonal changes to ensure the plant not only survives but thrives. Understanding the fundamental requirements from the outset provides a strong foundation for a healthy, vigorous specimen that will reward the gardener with its majestic presence for years to come. This guide delves into the essential aspects of nurturing elecampane, from initial site selection to ongoing maintenance throughout its life cycle.
Providing the correct growing conditions is paramount for the long-term health of elecampane, and this begins with choosing the right location. This plant flourishes in a spot that receives full sun to partial shade, with a preference for at least six hours of direct sunlight per day to encourage robust growth and prolific flowering. While it can tolerate some shade, particularly in hotter climates, insufficient light may lead to leggy stems and reduced blooming. The chosen site should also offer ample space, as elecampane can grow to an impressive height of up to two meters and develop a substantial clump over time. Therefore, consider its mature size when planting to avoid overcrowding and ensure good air circulation, which is vital for disease prevention.
The soil environment is another critical factor in the successful cultivation of this herb. Elecampane prefers a deep, moist, and well-draining loam that is rich in organic matter. It is quite adaptable to various soil types, including heavier clay soils, as long as they do not become waterlogged, which can lead to root rot. Before planting, it is highly beneficial to amend the soil with well-rotted compost or manure to improve its structure, fertility, and water-retention capabilities. A slightly acidic to neutral pH is ideal, so testing the soil beforehand can provide valuable insights and allow for any necessary adjustments to create the perfect growing medium for this stately perennial.
Once established, elecampane is a surprisingly resilient plant that requires minimal intervention, but consistent moisture is key, especially during its first growing season and in periods of drought. The large leaves have a significant surface area, leading to increased transpiration, so ensuring the soil remains consistently moist but not saturated is crucial for its well-being. A thick layer of organic mulch, such as wood chips or straw, applied around the base of the plant can greatly assist in conserving soil moisture, suppressing weeds, and keeping the root zone cool. This simple step reduces the frequency of watering and contributes to a healthier soil ecosystem around the plant.
Soil and site selection
Selecting the optimal site is the most crucial decision for ensuring the long-term vitality of your elecampane. The plant’s preference for sunlight is a primary consideration, as it directly impacts its growth habit and flowering potential. An ideal location will offer full sun exposure, meaning it receives at least six to eight hours of unfiltered sunlight each day. This level of light encourages the development of strong, sturdy stems capable of supporting the large flower heads and promotes the most vibrant display of its characteristic yellow blooms. Without adequate sunlight, the plant may become etiolated, stretching towards the light and resulting in weaker stems that are prone to flopping over.
More articles on this topic
While full sun is preferred, elecampane demonstrates a reasonable degree of adaptability and can also perform well in partial shade. This is particularly true in regions with intensely hot summers, where some afternoon shade can provide a welcome respite from scorching temperatures, preventing leaf scorch and reducing water stress. However, it is important to note that in shadier conditions, the overall size of the plant and the quantity of flowers may be somewhat diminished compared to those grown in full sun. The key is to strike a balance that provides enough light for vigorous growth without subjecting the plant to excessive heat stress.
The physical space allocated to elecampane is another vital aspect of site selection. This is not a plant for a small, confined border, as it develops into a substantial clump both in height and width. Mature plants can easily reach heights of 1.5 to 2 meters and spread to a width of nearly a meter. Planning for this eventual size is essential to prevent it from overwhelming neighboring plants and to maintain good air circulation throughout the garden bed. Providing adequate space from the outset eliminates the need for future relocation, which can be stressful for the plant and labor-intensive for the gardener.
Finally, consider the soil profile of the potential planting location. Elecampane thrives in deep, fertile soils that allow its large taproot to penetrate downwards without obstruction. Avoid shallow, compacted, or rocky soils, as these will inhibit root development and limit the plant’s ability to access water and nutrients effectively. The ideal soil should be rich in organic material, which helps to retain moisture while also ensuring good drainage. A location with a naturally loamy soil is perfect, but heavier soils can be improved with the addition of organic amendments to create a suitable environment for this magnificent herb.
Watering and moisture management
Proper watering is fundamental to the care of elecampane, particularly as it establishes its extensive root system. During the first year after planting, the plant is most vulnerable to drought stress, and consistent moisture is required to encourage deep root growth. You should aim to keep the soil consistently moist, but never waterlogged, by checking the soil moisture every few days, especially during warm and dry spells. A good method is to insert a finger about two inches into the soil; if it feels dry at that depth, it is time to water thoroughly, allowing the water to soak deep into the ground to reach the entire root zone.
More articles on this topic
Once mature, elecampane is notably more drought-tolerant thanks to its deep taproot, which can access moisture from lower soil layers. However, even established plants will benefit from supplemental watering during prolonged periods of drought or extreme heat. The plant’s large leaves will often be the first indicator of water stress, showing signs of wilting during the hottest part of the day. While they may recover as temperatures cool in the evening, persistent wilting is a clear signal that the plant requires a deep and thorough soaking to replenish its water reserves and maintain its vigor.
The method of irrigation can significantly impact the plant’s health. It is always best to water elecampane at the base of the plant, delivering water directly to the soil and avoiding the foliage as much as possible. Wetting the leaves, especially in the evening, can create a humid environment that is conducive to the development of fungal diseases such as powdery mildew. Using a soaker hose or drip irrigation system is an excellent way to provide slow, deep watering efficiently while keeping the leaves dry. This approach also minimizes water loss through evaporation.
To aid in moisture management and reduce the need for frequent watering, the application of organic mulch is highly recommended. A layer of mulch, about 5 to 7 centimeters deep, spread around the base of the plant helps to insulate the soil, keeping it cooler in summer and warmer in winter. This layer also significantly reduces water evaporation from the soil surface, suppresses the growth of competing weeds, and gradually breaks down to enrich the soil with organic matter. Materials like shredded bark, compost, or straw work exceptionally well for this purpose, contributing to a stable and moisture-retentive soil environment.
Nutrition and fertilization
Elecampane is not an excessively heavy feeder, but it performs best in soil that is rich in organic matter and nutrients. The foundation of a good nutrition plan is laid before planting by enriching the soil with a generous amount of well-rotted compost or aged manure. This initial soil preparation often provides enough nutrients to sustain the plant through its first growing season without the need for additional fertilizers. The organic matter improves soil structure, enhances its ability to hold water and nutrients, and fosters a healthy population of beneficial soil microorganisms that aid in nutrient cycling.
In subsequent years, an annual top-dressing with compost is typically sufficient to meet the plant’s nutritional needs. In early spring, just as new growth begins to emerge, apply a layer of compost around the base of the plant, gently working it into the top few centimeters of soil. This slow-release source of nutrients will break down over the season, providing a steady supply of essential elements to support the plant’s vigorous growth and impressive flowering display. This organic approach is preferable as it builds long-term soil health rather than providing a short-lived chemical boost.
If your soil is particularly poor or if the plant shows signs of nutrient deficiency, such as yellowing leaves or stunted growth, a balanced, all-purpose granular fertilizer can be applied in the spring. Follow the manufacturer’s instructions for application rates to avoid over-fertilizing, which can lead to excessive foliage growth at the expense of flowers and can even harm the plant. A single application in the spring is usually all that is required; feeding the plant late in the season is not recommended as it can encourage new growth that may not harden off sufficiently before winter.
Observing the plant is one of the best ways to gauge its nutritional status. Healthy elecampane will have deep green, robust foliage and strong stems. If the leaves appear pale green or yellow (a condition known as chlorosis), it could indicate a nitrogen deficiency. Conversely, lush, dark green foliage with few flowers might suggest an excess of nitrogen. By paying attention to these visual cues, you can adjust your fertilization practices accordingly, ensuring the plant receives a balanced diet that supports both healthy vegetative growth and abundant blooming.
Pest and disease management
While elecampane is generally a hardy and resilient plant, it is not entirely immune to pests and diseases. The most effective approach to managing these issues is through proactive and preventative measures that create an environment where problems are less likely to arise in the first place. This includes ensuring proper spacing between plants to promote good air circulation, watering at the base of the plant to keep foliage dry, and maintaining good garden hygiene by removing and disposing of any diseased plant material promptly. A healthy, vigorous plant is always better equipped to fend off attacks from pests and pathogens.
One of the most common diseases that can affect elecampane is powdery mildew, a fungal disease that appears as a white, powdery coating on the leaves. It is most prevalent in humid conditions with poor air circulation. To manage it, ensure plants are not overcrowded and consider thinning out some of the lower foliage to improve airflow. If an infection occurs, it can often be managed by spraying the affected leaves with a solution of neem oil or a horticultural fungicide. For a more organic approach, a simple spray made from one part milk to nine parts water can also be effective in controlling its spread.
In terms of pests, slugs and snails can be a nuisance, particularly on young plants in the spring. They are attracted to the tender new growth and can cause significant damage by chewing holes in the leaves. There are several methods to control them, including setting beer traps, using slug pellets (with caution if pets or wildlife are present), or creating a barrier of crushed eggshells or diatomaceous earth around the base of the plants. Hand-picking the pests off the plants in the evening or early morning when they are most active is also a very effective, albeit labor-intensive, method.
Occasionally, aphids may be found clustered on the new growth or undersides of the leaves. These small, sap-sucking insects can weaken the plant and can sometimes transmit diseases. A strong jet of water from a hose can often be enough to dislodge a small infestation. For more persistent problems, insecticidal soap or neem oil sprays are effective and are gentler on beneficial insects compared to broad-spectrum chemical pesticides. Encouraging natural predators like ladybugs and lacewings into your garden by planting a diversity of flowering plants will also help to keep aphid populations in check naturally.
Seasonal care and maintenance
The care regimen for elecampane evolves with the changing seasons, requiring different tasks to ensure the plant remains healthy and productive throughout the year. In the spring, as new shoots emerge from the ground, the primary focus is on providing a good start for the growing season. This is the ideal time to apply a top-dressing of compost or a balanced fertilizer to fuel the plant’s rapid growth. It is also a crucial period for monitoring for slugs and snails, which are particularly active in the damp spring weather and can cause considerable damage to the tender new leaves.
As summer arrives, the plant enters its most dramatic phase of growth, culminating in its impressive floral display. The main task during this period is to ensure consistent moisture, especially during dry spells, as the large leaves can lose a significant amount of water through transpiration. Deadheading, or removing the spent flowers, can encourage a longer blooming period and prevent the plant from self-seeding excessively if you wish to control its spread. Taller plants may also require staking, especially in windy locations, to prevent the flower-laden stems from bending or breaking under their own weight.
Autumn signals the end of the growing season and is a time for preparing the plant for winter dormancy. After the first hard frost has caused the foliage to die back, the stems should be cut down to about 10-15 centimeters above the ground. This not only tidies up the garden bed but also helps to prevent pests and diseases from overwintering in the dead plant material. Applying a thick layer of mulch around the base of the plant after cutting it back will provide essential insulation for the root crown, protecting it from the harshest winter temperatures.
During the winter, elecampane is dormant and requires very little care. The mulch applied in the autumn should provide sufficient protection for the roots, even in cold climates. This is a quiet period in the garden, but it offers a good opportunity for planning. You can assess the plant’s location and decide if it needs to be divided in the upcoming spring to manage its size or to propagate new plants. By following this cycle of seasonal care, you can ensure your elecampane remains a healthy and spectacular feature in your garden for many years.