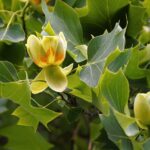
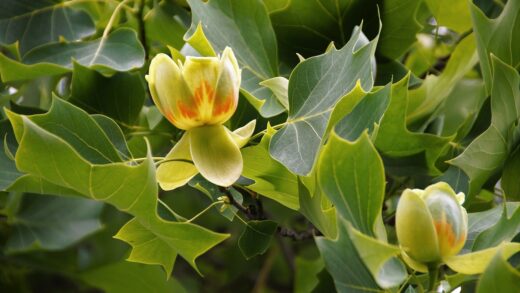
Successfully establishing Virginia creeper in a garden landscape begins with thoughtful planting and is sustained through effective propagation techniques. This vigorous vine, known for its rapid growth and brilliant autumn color, is remarkably easy to introduce to a new environment, provided a few key principles are followed. The process is not merely about placing a plant in the ground; it involves selecting an appropriate site, preparing the soil meticulously, and understanding the plant’s growth habits from the very start. Proper planting ensures the development of a strong root system, which is the foundation for a healthy, resilient, and visually stunning specimen that will thrive for decades.
Selecting the ideal planting site
The first and most critical step in planting Virginia creeper is the selection of an appropriate site. This decision will influence the plant’s health, growth rate, and aesthetic impact for its entire life. The vine is highly adaptable but has preferences that should be accommodated for optimal results. Consider the amount of sunlight the location receives throughout the day. While Virginia creeper can tolerate deep shade, its most vibrant and breathtaking autumn foliage is produced when it receives at least half a day of direct sun. A south- or west-facing wall is often ideal for maximizing this colorful display.
Beyond light exposure, the physical support for the vine must be carefully considered. Virginia creeper climbs by means of adhesive pads on its tendrils, which can attach firmly to a variety of surfaces. A sturdy, structurally sound support such as a brick or stone wall, a concrete fence, or a large, well-anchored trellis is essential. It is crucial to avoid planting it against wooden siding, as the vine can trap moisture and promote rot, or against walls with crumbling mortar, which can be dislodged when the vine is eventually removed or pruned. Plan the vine’s path to keep it away from gutters, soffits, and windows to prevent future maintenance issues.
Soil condition at the chosen site is another vital consideration. The vine is tolerant of a wide range of soil types, from sandy to clay, but it will establish itself much faster and grow more vigorously in fertile, well-drained soil. Avoid areas where water tends to collect and stand after rainfall, as poor drainage can lead to root rot, one of the few problems that can seriously harm this otherwise hardy plant. Before making a final decision, observe the site after a heavy rain to see how quickly the water drains away.
Finally, consider the plant’s mature size and its relationship with the surrounding landscape. Virginia creeper is an aggressive grower and can easily overwhelm nearby shrubs, perennials, or small trees if planted too close. Ensure there is ample space for it to spread without interfering with other plants or essential garden features like pathways or utility access points. Thinking ahead and visualizing the vine’s extensive coverage in five or ten years can prevent a great deal of future work and potential conflicts in the garden design.
More articles on this topic
The process of planting young vines
Once the ideal location has been chosen, the next stage is the physical act of planting. The best time to plant container-grown or bare-root Virginia creeper is in the spring or early autumn. These seasons provide moderate temperatures and sufficient moisture, allowing the plant to establish its root system without the stress of extreme summer heat or winter cold. Proper soil preparation is a non-negotiable prerequisite for success. The planting hole should be dug to be at least twice as wide as the plant’s root ball and just as deep.
When digging the hole, break up the soil at the bottom and sides to loosen it, which makes it easier for the young roots to penetrate and expand. It is highly beneficial to amend the soil that was removed from the hole. Mix it with a generous amount of organic matter, such as compost, well-rotted manure, or leaf mold. This amendment improves soil structure, enhances drainage in heavy soils, increases water retention in sandy soils, and provides a slow-release source of essential nutrients to fuel the plant’s initial growth.
Carefully remove the young vine from its container, making sure to handle the root ball gently to minimize disturbance. If the roots are tightly coiled or pot-bound, gently tease them apart with your fingers or a small hand tool to encourage them to grow outwards into the new soil. Place the plant in the center of the hole, ensuring that the top of the root ball is level with the surrounding ground. Planting it too deep can lead to stem rot, while planting it too high can cause the roots to dry out.
After positioning the plant, backfill the hole with the amended soil, firming it down gently around the root ball to eliminate any large air pockets. Once the hole is filled, create a shallow basin or “well” of soil around the base of the plant to help direct water to the roots. Water the newly planted vine thoroughly and deeply, allowing the water to soak in and settle the soil. This initial watering is crucial for establishing good contact between the roots and the soil and reducing transplant shock.
More articles on this topic
Propagation through softwood cuttings
Propagation from softwood cuttings is a highly effective and popular method for creating new Virginia creeper plants. This technique is best performed in late spring or early summer when the plant is in a state of active growth. Softwood refers to the new, flexible growth from the current season that is still green and has not yet become woody. Select healthy, vigorous stems for your cuttings, looking for shoots that are about the thickness of a pencil. The ideal cutting should be four to six inches long and have several sets of leaves.
Using a sharp, sterile pair of pruners or a knife, take the cuttings early in the morning when the plant is well-hydrated. Make a clean, angled cut just below a leaf node (the point on the stem where a leaf emerges). Carefully remove the leaves from the lower half of the cutting, leaving only two or three leaves at the top. This reduction in foliage minimizes water loss through transpiration while the cutting is developing roots. If the remaining leaves are very large, they can be cut in half to further conserve moisture.
To encourage root formation, you may dip the bottom inch of the cutting into a rooting hormone powder or gel, tapping off any excess. While Virginia creeper often roots readily without it, using a rooting hormone can significantly increase the success rate and speed up the process. Prepare a pot or tray filled with a sterile, well-draining rooting medium, such as a mix of perlite and peat moss or coarse sand. Moisten the medium thoroughly before inserting the cuttings.
Insert the prepared cuttings into the rooting medium, burying them about one to two inches deep, ensuring that at least one or two of the stripped leaf nodes are below the surface, as this is where roots will form. Space the cuttings far enough apart so that their leaves do not touch. To maintain high humidity, you can cover the pot with a clear plastic bag or place it in a propagator. Keep the medium consistently moist but not waterlogged, and place the cuttings in a warm location with bright, indirect light. Roots should begin to form within a few weeks.
Propagation using hardwood cuttings
Another reliable method for propagating Virginia creeper is through hardwood cuttings, which are taken during the plant’s dormant season, from late autumn to late winter. Hardwood cuttings are taken from the mature, woody stems of the previous season’s growth. This method is often considered even easier than using softwood cuttings, as the dormant stems are less prone to drying out and require less intensive care. Look for healthy, straight stems from the last year that are about the diameter of a pencil.
Using clean, sharp loppers or secateurs, cut sections of the stem that are between six and twelve inches long. Each cutting should have at least three or four nodes. It is important to keep track of which end is the top and which is the bottom. A common practice is to make a straight cut at the top end of the cutting and an angled cut at the bottom end. This simple trick helps with orientation and ensures the cutting is planted the right way up, which is essential for rooting.
The prepared hardwood cuttings can be planted directly into the ground in a sheltered, well-drained spot in the garden, or they can be started in a deep pot filled with a sandy compost mix. Insert the cuttings into the soil so that about two-thirds of their length is buried, with only one or two buds remaining above the surface. If planting directly into the ground, a slit trench can be created with a spade, and the cuttings can be placed against the vertical side before backfilling with soil.
Firm the soil around the cuttings and water them well. If started in pots, they can be placed in a cold frame or an unheated greenhouse over winter. If planted directly in the garden, they generally require no further protection in most climates. The cuttings will remain dormant through the winter, and by spring, they will begin to develop roots and show signs of new leaf growth. They can then be left to grow in their location for a full season before being transplanted to their final positions.