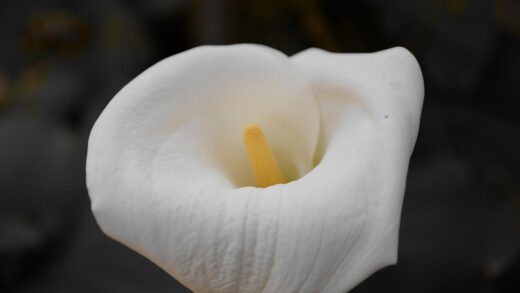
Embarking on the journey of planting Hypericum androsaemum is a gratifying experience, laying the groundwork for a shrub that provides year-round interest with minimal fuss. The success of this endeavor hinges on a thoughtful approach to the initial stages, from selecting a robust specimen to preparing its new home with care. This process is not merely about placing a plant in the ground; it is about creating an environment where it can establish a strong root system and thrive for years to come. A well-executed planting strategy ensures the shrub adapts quickly, minimizing transplant shock and setting it on a path to vigorous growth, abundant flowering, and the production of its signature ornamental berries.
The initial selection of the plant itself is a foundational step that should not be overlooked. Whether purchasing from a nursery or receiving a division from another garden, it is important to choose a specimen that looks healthy and vigorous. Inspect the plant for strong, sturdy stems and lush, well-colored foliage, avoiding any with yellowing leaves, signs of pest damage, or a root system that is heavily congested and circling the pot. A plant with a well-developed but not pot-bound root system will have a much easier time establishing itself once planted in the garden.
Timing the planting correctly can make a significant difference in the plant’s ability to establish itself successfully. The most opportune times for planting are typically in the autumn or early spring. Autumn planting allows the root system to grow and establish itself in the warm soil before the onset of winter, giving the plant a head start for the following spring. Spring planting is also highly effective, particularly in regions with very harsh winters, as it allows the plant the entire growing season to develop its roots and acclimatize before facing its first cold period. Planting during the peak heat of summer should be avoided as it places immense stress on the plant.
The physical act of planting requires care and attention to detail to give the shrub the best possible start. The planting hole should be dug to be at least twice as wide as the plant’s root ball but no deeper. This width allows the new roots to easily penetrate the surrounding soil. It is crucial to ensure the plant is situated at the same depth it was in its container; planting it too deep can lead to stem rot and other complications. After placing the plant in the hole, the excavated soil, ideally amended with some organic compost, should be backfilled gently but firmly around the root ball to eliminate any large air pockets.
Selecting the ideal planting site
Choosing the right location for Hypericum androsaemum is arguably the most critical decision in the planting process, as it dictates the plant’s access to its fundamental needs: light, water, and suitable soil. This shrub exhibits a commendable level of tolerance, but it will truly flourish in a spot that strikes a balance between sun and shade. While it can withstand full sun, a location with morning sun and some protection from the harsh afternoon sun is often the sweet spot, promoting lush foliage and preventing potential leaf scorch in hotter climates. Conversely, in deep shade, the plant may become leggy and produce fewer flowers and berries.
More articles on this topic
The soil conditions of the chosen site are of paramount importance. Tutsan demands soil that is well-drained and will not tolerate having its roots sitting in waterlogged ground for extended periods. Before finalizing a location, it is wise to assess the soil’s drainage capacity. This can be done by digging a small hole and filling it with water; if the water remains for many hours, the drainage is likely poor. In such cases, it is necessary to either choose a different location or take significant steps to amend the soil by incorporating grit and copious amounts of organic matter to improve its structure.
Consideration should also be given to the plant’s mature size and its relationship with neighboring plants in the garden. Hypericum androsaemum typically grows into a rounded shrub of about one meter in height and spread. It is important to provide it with adequate space to grow to its full potential without being crowded by other plants. Good air circulation is vital for preventing fungal diseases like rust, so avoid planting it in a cramped, stagnant corner. Planning for its future size ensures it will not outgrow its space or require constant, aggressive pruning to keep it in bounds.
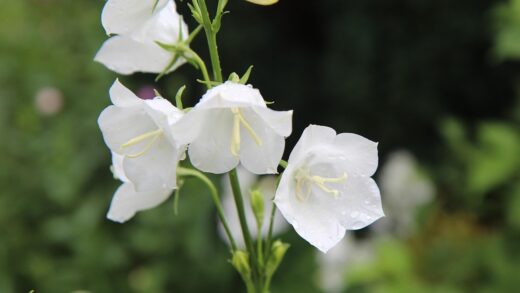
Finally, think about the role the plant will play in the overall garden design. Its multi-season interest, from the bright yellow summer flowers to the striking red and black autumn berries, makes it a versatile design element. It can be used effectively as part of a mixed shrub border, in a woodland garden setting, or even as an informal hedge. Placing it where its changing attributes can be appreciated throughout the year, perhaps along a pathway or visible from a window, will maximize its ornamental value and the enjoyment it brings to the garden.
The planting process step-by-step
The journey from a potted plant to a thriving garden shrub begins with meticulous preparation of the planting hole. Once the ideal site has been selected, clear the area of any weeds or turf, creating a clean slate. The hole should be dug with care, aiming for a depth that matches the height of the root ball and a width that is at least double. This generous width is not about depth but about providing loosened soil on all sides, making it easy for the new roots to spread out and anchor the plant. It’s helpful to use the pot the plant came in as a guide for the correct depth.
More articles on this topic
With the hole prepared, gently remove the plant from its container. If it is in a flexible plastic pot, squeezing the sides can help loosen it; for more rigid containers, it may be necessary to tip it on its side and tap the rim firmly. Once the plant is out, take a moment to inspect the root ball. If the roots are tightly coiled and circling the bottom, a condition known as being pot-bound, it is crucial to gently tease them apart with your fingers or even make a few vertical cuts with a clean knife. This encourages the roots to grow outwards into the new soil rather than continuing to circle in on themselves.
Positioning the plant correctly in the hole is the next critical step. Place the root ball in the center of the hole and use a straight edge, like a shovel handle, placed across the top of the hole to check the depth. The top of the root ball should be level with or even slightly above the surrounding soil surface. This prevents the plant from being buried too deeply, which can lead to the crown rotting. Once you are satisfied with the positioning, begin to backfill the hole with the excavated soil, preferably mixed with a good quality compost to add nutrients.
After the hole has been filled, the final steps are to secure the plant and provide it with its first essential drink of water. Gently firm the soil around the base of the plant with your hands or feet to eliminate any large air pockets and to ensure good contact between the roots and the soil. Create a shallow basin or “moat” of soil around the plant to help direct water to the root zone. Finally, water the newly planted shrub thoroughly and deeply, allowing the water to soak in and settle the soil completely. This initial watering is vital for reducing transplant shock and helping the plant begin its establishment process.
Propagation through seeds
Propagating Hypericum androsaemum from seed is a rewarding process that allows for the creation of a large number of new plants, although it requires patience and attention to detail. The first step is the collection of viable seeds, which can be harvested in late autumn or early winter once the berries have fully ripened and turned a dark, glossy black. Each berry contains numerous small seeds. The berries should be crushed, and the pulp washed away in a fine sieve under running water to separate the seeds, which can then be dried on a paper towel.
Once collected and cleaned, the seeds require a period of cold stratification to break their natural dormancy and encourage germination. This process mimics the natural winter conditions the seeds would experience outdoors. The dry seeds can be mixed with a small amount of a slightly damp medium like sand or vermiculite, placed in a sealed plastic bag, and stored in a refrigerator for a period of about three to four months. It is important to label the bag with the date and plant species to keep track of the process.
Following the cold stratification period, typically in early spring, the seeds are ready to be sown. A well-draining seed-starting mix should be used to fill seed trays or small pots. The seeds are very small and should be sown sparingly on the surface of the compost and then covered with a very fine layer of the mix or vermiculite. The trays should be watered gently from below or with a fine mist sprayer to avoid dislodging the tiny seeds. Placing the trays in a warm, bright location, such as a greenhouse or on a sunny windowsill, will provide the ideal conditions for germination.
Patience is key during the germination phase, which can be somewhat variable and may take several weeks or even longer. Throughout this time, it is crucial to keep the compost consistently moist but not waterlogged. Once the seedlings have emerged and developed their first true set of leaves, they can be carefully pricked out and transplanted into individual pots to grow on. They should be gradually acclimatized to outdoor conditions, a process known as hardening off, before being planted out into their final garden positions once they are large enough and the risk of frost has passed.
Vegetative propagation methods
Vegetative propagation offers a faster and often more reliable way to produce new plants that are genetically identical to the parent. One of the most common and effective methods for Hypericum androsaemum is taking softwood cuttings during the late spring or early summer. This involves selecting healthy, non-flowering shoots from the current season’s growth. Each cutting should be about 10-15 centimeters long, with the cut made just below a leaf node. The lower leaves should be stripped off, leaving just two or three pairs at the top.
Once the cuttings are prepared, their chances of rooting can be enhanced by dipping the base in a rooting hormone powder or gel, which encourages the development of new roots. The cuttings should then be inserted into a pot or tray filled with a high-quality, well-draining cutting compost, a mix of peat-free compost and perlite or coarse sand works well. The cuttings should be spaced so that their leaves do not touch, which helps to prevent the spread of any potential fungal diseases.
Creating a humid environment is critical for the success of rooting softwood cuttings, as it prevents them from drying out before they have a chance to develop their own root systems. This can be achieved by covering the pot or tray with a clear plastic bag, propped up with sticks to keep it from touching the leaves, or by placing it in a propagator. The cuttings should be situated in a bright location but out of direct sunlight, which can cause them to scorch. The compost should be kept consistently moist but not overly wet.
Roots will typically begin to form within a few weeks. A gentle tug on a cutting can be used to check for resistance, which indicates that roots have developed. Once the cuttings have a well-established root system, they can be carefully potted on into individual containers with standard potting compost. They should be grown on for a few more months, allowing them to build strength, before being hardened off and planted out into the garden, usually in the autumn or the following spring. This method reliably produces strong, healthy new plants.