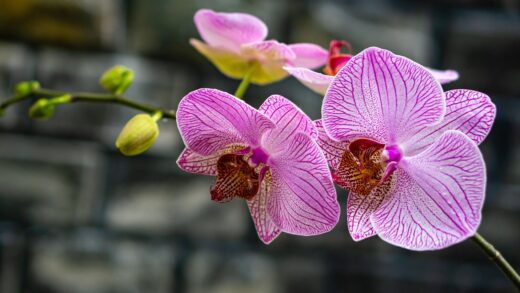
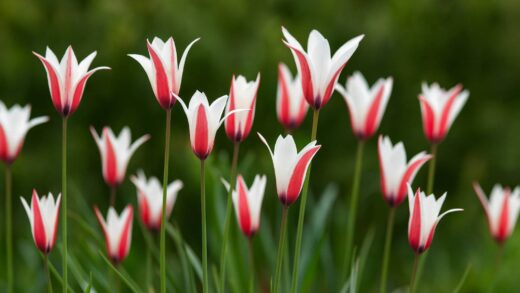
Successfully establishing a colony of wild tulips begins with a foundational understanding of proper planting and propagation techniques. This species, with its inherent desire to naturalize, responds beautifully to methods that honor its wild origins. Unlike the precise, formal arrangements often sought with hybrid tulips, the goal here is to create a more organic, scattered effect that mimics how they would appear in a meadow or woodland edge. The initial planting is a critical moment that sets the stage for years of returning beauty, so careful consideration of timing, location, and technique is paramount. From the simple act of setting a bulb in the ground to the more patient process of raising them from seed, each method offers a unique way to cultivate this charming wildflower.
The journey of propagating the wild tulip is one that rewards patience and an appreciation for the plant’s natural rhythms. The most common and quickest method is through the division of offsets, which allows for a rapid increase in your stock of flowering-sized bulbs. However, propagation from seed, while a much longer process, can result in a more genetically diverse and resilient colony over time. Understanding both methods provides a comprehensive toolkit for expanding your planting. This knowledge enables you to tailor your approach based on your goals, whether you aim to quickly fill a space or to cultivate a truly naturalized and long-lasting patch.
Effective planting goes beyond just digging a hole; it involves creating the ideal subterranean environment for the bulb. This means focusing on soil structure and composition to ensure the perfect balance of moisture retention and drainage. Wild tulips are particularly intolerant of waterlogged conditions, especially during their summer dormancy, so amending the soil to improve its porosity is a non-negotiable step for long-term success. This preparation ensures that the bulbs are not only safe from rot but also have the loose soil structure needed to easily send out their characteristic stolons and spread.
Ultimately, the act of planting and propagating wild tulips is an investment in the future of your garden. Each bulb planted and every seed sown is a step towards creating a dynamic and self-sustaining display that will evolve with each passing year. By employing the correct techniques, you are not just placing a plant in the ground; you are initiating a process of natural colonization. This approach fosters a deeper connection to the garden, transforming it from a static collection of plants into a living, breathing ecosystem that unfolds with new surprises each spring.
The optimal timing for planting
Timing is one of the most critical factors for success when planting wild tulip bulbs. The ideal window for planting is in the autumn, generally from mid-September through to late November, depending on your specific climate. Planting during this period allows the bulbs ample time to establish a healthy root system before the ground freezes solid. This initial root growth is vital, as it anchors the bulb and enables it to absorb moisture and nutrients efficiently once spring growth begins. Planting too early, when the soil is still warm, can risk premature sprouting, while planting too late may not give the roots enough time to develop.
More articles on this topic
The temperature of the soil is a more accurate indicator for planting time than the calendar date alone. The perfect time to plant is when the soil temperature at planting depth has consistently cooled to below 15 degrees Celsius (around 60°F). This cooler temperature signals to the bulb that it is time to start producing roots, while being cool enough to inhibit the growth of the top shoot. This prevents the vulnerable foliage from emerging before the harsh winter weather sets in. Monitoring soil temperature can help you pinpoint the optimal planting week for your local conditions, ensuring the bulbs get the best possible start.
There is some flexibility in the autumn planting window, and late planting is generally preferable to early planting. If you find yourself with bulbs later in the season, even into December, it is still worth getting them in the ground as long as the soil is workable and not frozen. The bulbs have a remarkable will to survive and will do their best to root, even in cold conditions. However, be aware that very late-planted bulbs may produce smaller flowers or flower slightly later in their first year, as they have had less time to establish a robust root system before spring.
Avoid the temptation to plant wild tulip bulbs in the spring. Tulips require a significant period of cold temperatures, known as vernalization, to trigger the biochemical process that leads to flowering. Bulbs planted in the spring will not have experienced this necessary cold dormancy and will likely only produce leaves, if they grow at all. For a reliable and beautiful spring display, autumn planting is the only viable option, aligning with the natural life cycle the bulbs are genetically programmed to follow.
Preparing the planting site
The success of your wild tulips is largely dependent on the quality of the soil and the preparation of the planting site. These tulips thrive in well-drained, humus-rich soil that mimics the floor of a deciduous woodland. The first step is to select a location that receives ample sun in the spring but becomes more shaded as the season progresses, such as beneath a high-canopied deciduous tree or on the east side of a building. It is crucial to avoid areas where water collects or the soil remains soggy for extended periods, as this will inevitably lead to bulb rot.
More articles on this topic
Once you have selected the site, the next step is to improve the soil structure. Wild tulips perform poorly in heavy, compacted clay soils, which retain too much moisture and restrict root and stolon growth. To remedy this, work the soil to a depth of at least 25-30 centimeters (10-12 inches). Incorporate a generous amount of organic matter, such as well-rotted leaf mold, compost, or composted bark. This will not only improve drainage but also add vital nutrients and create a looser, more friable soil structure that the roots can easily penetrate.
In addition to organic matter, you may need to add materials to further enhance drainage, especially if you are starting with heavy clay. Coarse sand, fine gravel, or horticultural grit are excellent amendments for this purpose. Mix a few shovelfuls into the soil along with the compost to create a more porous medium. The goal is to create a soil composition where water can pass through freely, ensuring the bulbs do not sit in water, particularly during their summer dormancy. A simple test is to dig a hole and fill it with water; if it takes more than a few hours to drain, your soil needs further amendment.
Before planting, it is also beneficial to ensure the soil pH is within a suitable range. Wild tulips are quite adaptable but generally prefer a soil that is neutral to slightly alkaline. If your soil is known to be highly acidic, incorporating a small amount of garden lime or wood ash during preparation can help to raise the pH to a more favorable level. By taking the time to thoroughly prepare the planting site, you are creating a long-lasting and hospitable home for your tulips, setting them up for decades of healthy growth and naturalization.
Bulb planting techniques
When it comes to planting wild tulip bulbs, the correct depth and spacing are crucial for their development and ability to naturalize. A general rule of thumb for tulips is to plant them at a depth of two to three times the height of the bulb itself. For the relatively small bulbs of Tulipa sylvestris, this typically translates to a depth of about 10-15 centimeters (4-6 inches) from the base of the bulb to the soil surface. Planting them this deep helps to protect the bulbs from winter cold and summer heat, as well as from accidental disturbance by garden tools or foraging animals.
Proper spacing is key to achieving a natural, “drifted” appearance rather than a formal, rigid planting. Instead of placing them in straight rows, scatter the bulbs gently across the prepared area and plant them where they fall. This randomization creates a much more pleasing and organic effect. Aim for an average spacing of about 10-15 centimeters (4-6 inches) apart. This gives each bulb enough room to grow and receive adequate light and nutrients, while also being close enough to create a visually impactful display once they mature and begin to form a colony.
The orientation of the bulb in the planting hole is also important. Each bulb has a pointed end, which is where the shoot will emerge, and a flatter end, where the roots will grow. It is essential to place the bulb in the hole with the pointed end facing upwards. If planted upside down, the shoot will eventually find its way to the surface, but it will expend a great deal of energy doing so, which can weaken the plant and result in a less impressive first-year bloom. Take a moment to ensure each bulb is correctly positioned before backfilling the hole.
After placing the bulbs in their holes, carefully backfill with the prepared soil, ensuring there are no air pockets around the bulbs. Gently firm the soil down with your hands to ensure good contact between the bulb and the soil. Once all the bulbs are planted, water the area thoroughly. This initial watering helps to settle the soil around the bulbs and provides the moisture needed to encourage the start of root development. Unless the autumn is exceptionally dry, you will not need to water them again until spring.
Propagation through offsets and stolons
One of the most rewarding characteristics of the wild tulip is its ability to propagate itself and form natural colonies. The primary method it uses for vegetative propagation is the production of offsets, which are small daughter bulbs that form at the base of the main, or mother, bulb. After a few seasons of growth, a single planted bulb can develop into a small clump of several bulbs. This natural division is the easiest way to increase your stock, as the plant does most of the work for you, steadily increasing the density of your planting over the years.
In addition to producing offsets, Tulipa sylvestris has a unique method of spreading: it sends out underground runners called stolons. At the end of these stolons, new bulbs will form, sometimes appearing a surprising distance from the parent plant. This stoloniferous habit is what allows the wild tulip to “wander” and colonize an area, creating the beautiful, naturalized drifts that are so highly prized. To encourage this behavior, ensure the soil is loose and friable, which allows the stolons to travel easily beneath the surface. Heavy, compacted soil will inhibit this natural spreading tendency.
If you wish to speed up the process of colonization or start a new patch elsewhere, you can manually divide the clumps. The best time to do this is in late summer or early autumn when the bulbs are fully dormant. Carefully lift a mature clump from the ground using a garden fork, taking care to dig deeply enough to get under the bulbs without damaging them. Once lifted, you can gently break the clump apart with your hands, separating the individual bulbs and offsets. Discard any bulbs that feel soft or show signs of disease.
After dividing the clumps, you can immediately replant the offsets and larger bulbs in their new locations. Plant the larger, flowering-sized bulbs at the standard depth of 10-15 centimeters. The smaller offsets, which may take a year or two to reach flowering size, can be planted a little more shallowly. This process of lifting and dividing every four to five years not only helps you propagate your plants but also invigorates the colony by reducing overcrowding, ensuring the plants remain healthy and continue to flower profusely for years to come.
Seed propagation for the patient gardener
Propagating wild tulips from seed is a fascinating and rewarding process, though it requires a significant amount of patience. Unlike vegetative propagation through offsets, growing from seed allows for genetic diversity, which can lead to a stronger and more resilient colony over the long term. The first step is to collect the seeds. After the flowers fade, allow the seed pods to develop and ripen on the plant. You will know they are ready for harvest in mid to late summer when the pods turn brown and begin to split open. Collect the papery seeds before they are dispersed by the wind.
Once harvested, the seeds of Tulipa sylvestris need to go through a period of stratification to germinate successfully. This means they require a period of both warm, moist conditions followed by cold, moist conditions, mimicking the natural seasonal cycle. The easiest way to achieve this is to sow the seeds in pots in late summer or early autumn and leave them outdoors in a protected spot, like a cold frame. This allows them to experience the warmth of late summer followed by the natural chilling of winter, which will break their dormancy.
Prepare a seed-starting pot with a well-draining, sterile compost mix. Sow the seeds thinly on the surface and cover them with a fine layer of grit or coarse sand. This top layer helps to keep the seeds in place, prevents moss growth, and provides good drainage around the seed. Water the pot gently and ensure the compost remains consistently moist but not waterlogged throughout the autumn and winter. Be sure to label the pot clearly, as it will be a long-term project.
Germination will typically occur in the spring following the winter chill. The initial seedlings will look like small blades of grass, and it is crucial to keep them well-watered and protected during their first year. The tiny bulb will begin to form underground, but it can take anywhere from four to seven years for a plant grown from seed to reach a sufficient size to produce its first flower. While it is undoubtedly a slow process, watching a colony of your own seed-grown wild tulips bloom for the first time is an unparalleled experience for any dedicated gardener.