The successful establishment of a sweet chestnut tree begins long before the sapling is placed in the ground; it starts with a deep understanding of propagation methods and meticulous planning of the planting process. Whether you are starting from a seed, nurturing a young sapling, or grafting a desired cultivar, each step is critical in laying the groundwork for a healthy and productive tree that can live for centuries. This journey involves selecting the right genetic material, preparing the perfect site, and employing careful techniques to ensure the young tree not only survives but thrives in its new environment. A well-executed planting is the single most important investment one can make in the future of the tree.
Site selection and soil preparation
Choosing the correct location is arguably the most critical decision in the entire process of planting a sweet chestnut. These trees require a position that receives full sun for at least six to eight hours a day to facilitate robust growth and maximize nut production. Equally important is protection from strong, prevailing winds, which can damage young trees and interfere with pollination in mature ones. Furthermore, consideration must be given to the tree’s eventual size; a sweet chestnut will grow into a large, wide-spreading tree, so it must be planted well away from buildings, overhead power lines, and other trees to allow it to reach its full potential without conflict.
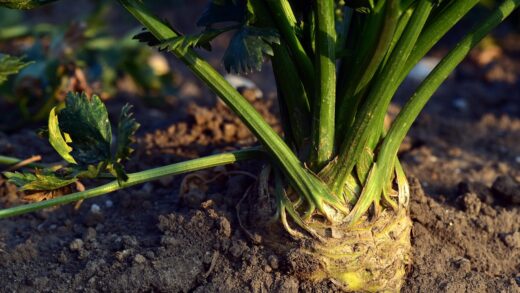
The soil itself is the next major consideration, as sweet chestnuts have very specific requirements. They demand deep, fertile, and, most importantly, well-drained soil with a slightly acidic to neutral pH, typically in the range of 5.5 to 6.5. They will not tolerate heavy, waterlogged clay or shallow, alkaline soils, which can lead to fatal conditions like root rot and severe nutrient deficiencies. Before planting, it is highly advisable to conduct a soil test to assess the pH and nutrient content, which will inform any necessary amendments needed to create the ideal growing environment.
Once a suitable site has been identified, thorough preparation of the soil is essential to give the young tree the best possible start. The planting area should be cleared of all weeds and grass in a wide circle, at least one meter in diameter, to eliminate competition for water and nutrients. If the soil is compacted, it should be loosened and aerated to a considerable depth to allow the roots to penetrate easily. Incorporating a generous amount of organic matter, such as well-rotted compost or leaf mold, will improve the soil’s structure, fertility, and water-retention capabilities.
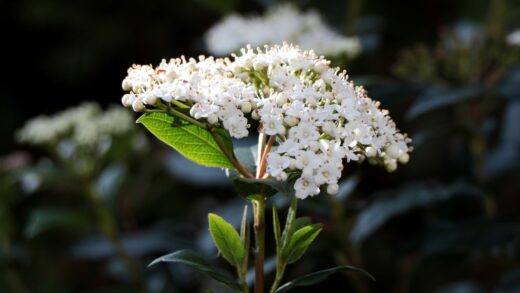
Finally, planning for pollination must be part of the site selection process if nut production is a goal. Most sweet chestnut cultivars are not self-fertile and require a different, compatible cultivar nearby for cross-pollination to occur. These trees are wind-pollinated, so planting at least two different varieties within about 50 meters of each other is generally recommended. This crucial detail must be factored into the initial layout of the orchard or garden to ensure that the mature trees will be able to produce a reliable harvest of nuts in the future.
More articles on this topic
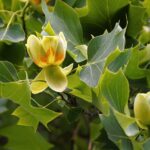
Propagation from seed
Growing a sweet chestnut from seed is a patient but deeply rewarding process that connects the grower to the entire life cycle of the tree. The first step is to source fresh, high-quality seeds from a reliable source or collect them from a healthy, productive tree in the autumn. The nuts should be large and feel heavy for their size, and it is crucial to test them for viability by placing them in water; viable seeds will sink, while those that float are likely empty or damaged and should be discarded. This simple test saves a great deal of time and effort.
Chestnut seeds require a period of cold, moist stratification to break their natural dormancy before they will germinate. This process mimics the natural winter conditions the seeds would experience outdoors. To stratify the seeds, they can be mixed with a slightly damp medium like sand, peat moss, or vermiculite, and placed in a plastic bag in the refrigerator for a period of two to three months. It is important to check on them periodically to ensure the medium remains moist but not wet, and to watch for any signs of mold or premature sprouting.
After the stratification period, the seeds are ready to be sown. They can be planted in deep pots filled with a well-draining potting mix or directly into a prepared nursery bed outdoors if the risk of frost has passed. The seeds should be planted on their side, about two to three centimeters deep. Planting them on their side helps the root and shoot to orient themselves correctly as they emerge. The soil should be kept consistently moist, and germination can typically be expected within a few weeks to a month.
It is important to understand that trees grown from seed will be genetically unique and will not be identical to the parent tree. This means that characteristics such as nut size, flavor, and disease resistance can be highly variable. While this can be an exciting process of discovery, if the goal is to produce a tree with specific, known qualities, then vegetative propagation methods like grafting are necessary. Seed-grown trees also typically take longer to begin producing nuts compared to grafted trees, often requiring ten years or more to reach maturity.
More articles on this topic
Grafting for desirable traits
Grafting is the preferred method of propagation for commercial chestnut growers and serious hobbyists who wish to cultivate trees with specific, proven characteristics. This horticultural technique involves joining a piece of a desired variety, known as the scion, onto the root system of another tree, known as the rootstock. This ensures that the resulting tree will be a genetic clone of the parent tree from which the scion was taken, faithfully replicating its nut quality, yield, and disease resistance. It also significantly reduces the time it takes for the tree to begin bearing nuts, often cutting the waiting period in half compared to a seedling tree.
The selection of both the scion and the rootstock is critical to the success of the graft. Scion wood should be collected during the dormant winter season from healthy, vigorous, one-year-old shoots of the desired cultivar. The rootstock should typically be a healthy, well-established seedling tree, usually one to two years old, that is known to be compatible with the scion variety. Using a disease-resistant rootstock can also confer additional protection to the grafted tree, providing a dual benefit.
The most common method for grafting chestnuts is the whip-and-tongue graft, which is typically performed in early spring just as the rootstock is beginning to show signs of new growth. This technique involves making corresponding cuts on both the scion and the rootstock so they interlock tightly, maximizing the contact between the cambium layers of both pieces. The cambium is a thin layer of living cells just beneath the bark, and its alignment is essential for the graft union to heal and for nutrients and water to flow between the rootstock and the scion.
Once the scion is fitted securely onto the rootstock, the graft union must be tightly wrapped with grafting tape or rubber to hold it in place and prevent it from drying out. The entire union, including the cut tip of the scion, is then often coated with a layer of grafting wax or sealant to provide a waterproof barrier against moisture loss and infection. The newly grafted tree requires careful attention, including protection from drying winds and removal of any shoots that emerge from the rootstock below the graft union, to ensure all the plant’s energy is directed into healing the union and growing the scion.
The planting process
The optimal time to plant a young sweet chestnut tree is during its dormant season, either in the autumn after the leaves have dropped or in early spring before new buds begin to open. Planting during this period minimizes transplant shock and allows the tree’s root system to begin establishing itself before the onset of summer heat and water demands. Autumn planting is often preferred in milder climates, giving the roots a longer period to grow, while spring planting is safer in regions with harsh winters.
When ready to plant, dig a hole that is at least twice as wide as the tree’s root ball but no deeper. It is crucial that the tree is not planted any deeper than it was growing in its nursery container or field. Planting too deep is a common and often fatal mistake, as it can lead to root suffocation and bark decay at the base of the trunk. Roughen the sides of the hole with a spade or fork to prevent the roots from being confined and to encourage them to grow outwards into the surrounding soil.
Carefully remove the tree from its container, gently teasing out any circling roots to encourage them to spread. Place the tree in the center of the hole, making sure the top of the root ball is level with or slightly above the surrounding ground. Backfill the hole with the native soil that was removed, gently firming it around the roots to eliminate any large air pockets. It is generally not recommended to add large amounts of fertilizer or rich compost directly into the planting hole, as this can discourage the roots from growing out into the less fertile native soil.
Immediately after planting, water the tree thoroughly to settle the soil around the roots and eliminate any remaining air pockets. This initial, deep watering is critical for establishing good root-to-soil contact. Applying a two- to three-inch layer of organic mulch, such as wood chips or bark, in a wide circle around the tree will help conserve moisture, suppress weeds, and regulate soil temperature. Be sure to keep the mulch from directly touching the trunk of the tree to prevent moisture buildup and potential rot.
Initial care for young trees
Once in the ground, a young sweet chestnut tree requires diligent care for the first few years to ensure its successful establishment. Consistent watering is the most important task during this period. The soil should be kept evenly moist but not waterlogged, especially throughout the first growing season. Deep, infrequent watering is more effective than shallow, frequent applications, as it encourages the development of a deeper and more resilient root system. The frequency will depend on rainfall and soil type, but a weekly check is a good practice during dry weather.
Protecting the young tree from potential threats is also paramount. The tender bark of a sapling is highly attractive to rabbits, deer, and other herbivores, which can cause severe damage or even kill the tree by girdling the trunk. Installing a protective tree guard or wire cage around the trunk is an essential preventative measure. In addition, staking may be necessary for the first year or two if the tree is planted in a windy location, to provide stability while the root system anchors itself. The stakes should be removed as soon as the tree is stable enough to support itself to avoid restricting trunk development.
Weed control continues to be important after planting. A wide, weed-free area should be maintained around the base of the tree to minimize competition for essential resources like water, nutrients, and sunlight. A thick layer of organic mulch is the most effective way to suppress weeds, and it provides the additional benefits of conserving moisture and improving the soil as it decomposes. Any weeds that do manage to grow through the mulch should be removed by hand to avoid damaging the tree’s shallow roots with tools.
Finally, the initial pruning of the young tree is focused on establishing a good structure for its future growth. In the first winter after planting, it is often beneficial to select a strong central leader and begin developing a well-spaced framework of scaffold branches. Any broken or damaged branches should be removed, as should any suckers that grow from the base of the trunk or from the rootstock below the graft union on grafted trees. This early structural guidance sets the stage for a strong, healthy, and productive mature tree.