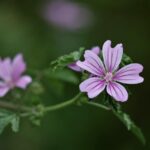
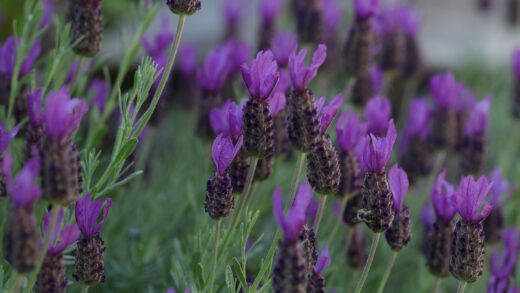
Successfully establishing cape daisies in your garden begins with a solid understanding of the ideal planting procedures and the various methods of propagation. Whether you are starting with young plants purchased from a nursery or aiming to create new plants from your existing stock, following the correct techniques is crucial for their long-term health and vitality. Proper planting ensures the root system develops quickly and efficiently, providing a stable foundation for vigorous growth and prolific flowering. Furthermore, mastering propagation allows you to multiply your collection cost-effectively, share with fellow gardeners, and preserve your favorite varieties from one year to the next. This comprehensive guide will explore the essential steps for both planting and propagating these beautiful flowers.
The timing of your planting activities is a critical factor that can greatly influence the success of your cape daisies. These plants thrive in mild weather and are sensitive to frost, so it is essential to wait until all danger of frost has passed in the spring before planting them outdoors. Planting too early, when the soil is still cold and the risk of a late frost looms, can shock the young plants, stunt their growth, or even kill them. The ideal time to plant is when nighttime temperatures are consistently staying above 10 degrees Celsius. This ensures that the soil has warmed up sufficiently to encourage active root growth and helps the plants to acclimate to their new environment without undue stress.
Selecting the perfect location is just as important as the timing of the planting. As sun-loving plants, cape daisies require a spot in the garden that receives at least six to eight hours of direct sunlight each day. Insufficient light will result in weak, leggy stems and a significant reduction in the number of flowers produced. In addition to sunlight, you must consider the soil conditions. Cape daisies demand well-draining soil to prevent their roots from rotting. If you are planting in a garden bed with heavy clay soil, you will need to amend it with organic matter like compost and materials like sand or perlite to improve its drainage capacity before planting.
When you are ready to plant your nursery-bought cape daisies, proper technique is key to a smooth transition. Start by digging a hole that is slightly wider and the same depth as the root ball of the plant. Gently remove the plant from its container, being careful not to damage the roots. If the roots are tightly coiled or “root-bound,” gently tease them apart with your fingers to encourage them to spread out into the new soil. Place the plant in the hole, ensuring that the top of the root ball is level with the surrounding soil surface. Planting too deep can lead to stem rot, while planting too high can cause the roots to dry out.
After positioning the plant in the hole, backfill the space around the root ball with soil, firming it down gently to eliminate any large air pockets. Once the plant is securely in place, water it thoroughly and deeply. This initial watering is crucial as it helps to settle the soil around the roots and provides the immediate moisture needed for the plant to begin establishing itself. Applying a thin layer of organic mulch, such as shredded bark or compost, around the base of the plant can help to conserve soil moisture, suppress weed growth, and keep the root zone cool, further aiding in the establishment process.
More articles on this topic
Preparing the ideal planting site
The success of your cape daisies is largely determined before the plant even goes into the ground, making site preparation a vital first step. The primary goal of preparation is to create a root-friendly environment that offers both excellent drainage and adequate nutrition. You should begin by clearing the chosen area of any weeds, rocks, or other debris that could compete with your new plants for resources or impede root growth. Once the area is clear, the next step is to improve the soil structure, especially if you are working with compacted or heavy clay soil.
To improve the soil, you will need to loosen it and incorporate amendments. Use a garden fork or tiller to break up the soil to a depth of at least 12 to 15 inches. This process, known as double digging, creates a deeper zone of loose soil, which encourages the roots to grow downward, making the plant more stable and drought-tolerant. After loosening the soil, spread a two to four-inch layer of organic matter over the surface. Excellent choices for organic matter include well-rotted compost, aged manure, or leaf mold, as these materials improve soil tilth, aeration, and fertility simultaneously.
In addition to organic matter, you may need to add materials specifically to enhance drainage if your native soil is particularly heavy. Coarse sand, fine gravel, or perlite are effective amendments for increasing the porosity of the soil, allowing water to percolate through more easily. Mix these materials thoroughly into the loosened soil along with the organic matter. The end result should be a light, friable soil that crumbles easily in your hand. This improved soil structure will provide the optimal balance of moisture retention and drainage that cape daisies require to thrive.
The final step in preparing the planting site is to consider the soil’s pH level. Cape daisies perform best in a slightly acidic to neutral pH range, typically between 5.5 and 6.5. You can use a simple soil testing kit to determine the pH of your garden bed. If the test reveals that your soil is too alkaline (pH above 7.0), you can lower it by incorporating elemental sulfur or peat moss. If the soil is too acidic (pH below 5.5), adding dolomitic lime will help to raise the pH into the ideal range. Adjusting the pH ensures that essential nutrients in the soil will be readily available for the plant to absorb.
More articles on this topic
Propagation from cuttings
Propagating cape daisies from cuttings is a highly effective and popular method for creating new plants that are genetically identical to the parent plant. This technique, also known as vegetative propagation, is the best way to preserve the specific characteristics of a particular hybrid variety, such as its unique flower color or growth habit. The ideal time to take cuttings is in late spring or late summer when the plant is actively growing but is not under the stress of extreme heat. Using healthy, vigorous parent plants will significantly increase your chances of success, as these will provide the most viable cutting material.
To take a cutting, select a healthy, non-flowering stem from the parent plant. A non-flowering stem is preferred because its energy is focused on vegetative growth rather than bloom production, making it more likely to root. Using a clean, sharp knife or pruning shears, cut a three to four-inch section from the tip of the stem. It is best to make the cut just below a leaf node, which is the point on the stem where a leaf emerges, as this area contains a high concentration of hormones that encourage rooting.
Once you have your cutting, you need to prepare it for planting. Carefully remove the leaves from the lower half of the stem, leaving only two or three sets of leaves at the very top. This step is important because it reduces the amount of moisture the cutting loses through transpiration and allows it to focus its energy on developing new roots instead of supporting excess foliage. To further enhance the rooting process, you can dip the cut end of the stem into a rooting hormone powder or gel, tapping off any excess before planting.
For the rooting medium, use a light, sterile mix such as a combination of perlite and peat moss or a specialized seed-starting mix. Fill a small pot or tray with this medium and moisten it thoroughly. Use a pencil or a dibber to make a small hole in the medium, then insert the prepared cutting into the hole, ensuring that the stripped leaf nodes are below the surface. Gently firm the medium around the stem to provide support. To create a humid environment that promotes rooting, you can cover the pot with a clear plastic bag or a plastic dome, ensuring it does not touch the leaves. Place the cuttings in a warm location with bright, indirect light and keep the medium consistently moist but not waterlogged. Roots should begin to form within three to six weeks.
Growing from seeds
Growing cape daisies from seed offers a rewarding experience and can be a more economical way to produce a large number of plants, although it may not preserve the exact traits of hybrid parent plants. If you choose to start seeds, it is best to begin indoors approximately six to eight weeks before the last expected frost date in your area. This early start gives the seedlings enough time to develop into strong, healthy plants that are ready for transplanting into the garden once the weather warms up. Using a high-quality, sterile seed-starting mix will help prevent damping-off disease, a common fungal issue that can kill young seedlings.
To sow the seeds, fill seed trays or small pots with the moistened seed-starting mix. Place one or two seeds on the surface of the mix in each cell or pot. Osteospermum seeds require light to germinate, so do not cover them with soil. Instead, gently press the seeds onto the surface of the mix to ensure good contact. After sowing, lightly mist the surface with water from a spray bottle to avoid dislodging the seeds. To maintain the necessary humidity for germination, cover the trays with a clear plastic dome or a sheet of plastic wrap.
Place the seed trays in a warm location that receives bright, indirect light. A consistent temperature of around 21 to 24 degrees Celsius is ideal for promoting germination, which typically occurs within seven to fifteen days. During this time, it is crucial to keep the growing medium consistently moist but not saturated. Check the trays daily and mist with water as needed. Once the seeds have germinated and the first true leaves appear, you can remove the plastic cover to increase air circulation and prevent fungal growth.
As the seedlings grow, they will require plenty of light to prevent them from becoming thin and leggy. A south-facing windowsill is a good option, but supplementing with a grow light will ensure they receive at least 12 to 16 hours of light per day, resulting in stockier, healthier plants. Once the seedlings have developed at least two sets of true leaves and are large enough to handle, they can be transplanted into individual pots to give their roots more space to develop. Before planting them outdoors, it is essential to harden them off by gradually exposing them to outdoor conditions over a period of one to two weeks.
Transplanting and aftercare
The process of moving your young cape daisies, whether they are nursery-bought, propagated from cuttings, or grown from seed, into their final garden location is a critical transition. Before transplanting, you must harden off the plants. This involves gradually acclimating them to the outdoor environment over the course of 7 to 14 days. Start by placing the plants in a sheltered, shady spot for a few hours on the first day, then gradually increase the duration and intensity of their exposure to direct sunlight and outdoor temperatures each day. This process toughens the plant’s cellular structure, reducing the risk of transplant shock.
When you are ready to transplant, choose a cool, overcast day or wait until the late afternoon to minimize stress on the plants. Water the plants thoroughly in their pots about an hour before moving them to ensure their root balls are well-hydrated. Prepare the planting holes in your garden bed as previously described, ensuring they are spaced appropriately to allow for mature growth. Cape daisies should typically be spaced about 12 to 18 inches apart, depending on the specific variety’s mature size, to ensure good air circulation between plants.
Carefully remove each plant from its container, preserving the integrity of the root ball as much as possible. Place the plant into the prepared hole so that the top of its root ball is flush with the surrounding garden soil. Backfill the hole with soil, gently tamping it down to remove air pockets and secure the plant. Once all the plants are in the ground, give them another deep watering to help settle the soil and provide immediate moisture to the roots. This initial watering is crucial for establishing good root-to-soil contact.
In the first few weeks after transplanting, providing consistent aftercare is vital for helping the young plants establish themselves. Keep the soil consistently moist but not waterlogged, as the root systems are still developing and are vulnerable to both drying out and rotting. Monitor the plants closely for any signs of stress, such as wilting or yellowing leaves. It is best to wait a few weeks before applying any fertilizer to give the roots time to adjust and start growing into the new soil. After about three to four weeks, you can begin a regular feeding schedule to encourage vigorous growth and abundant flowering.