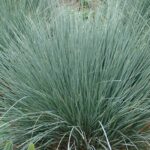
Successfully establishing bluebeard in your garden begins with a thoughtful planting process that sets the stage for years of vibrant, late-season color. The key to a thriving shrub lies in choosing the right location and preparing the soil to meet its specific needs, particularly its demand for excellent drainage. This initial investment of time and effort will be rewarded with a resilient, low-maintenance plant that performs reliably. Similarly, understanding the methods of propagation allows you to easily multiply your stock, sharing this wonderful plant with others or expanding its presence in your own landscape.
The optimal time for planting bluebeard is in the spring, after the last frost has passed, which allows the plant to dedicate the entire growing season to developing a robust root system before winter arrives. Autumn planting is also possible in milder climates, provided it is done early enough for the roots to establish before the ground freezes. When selecting a plant from a nursery, look for a specimen with healthy, vibrant foliage and a well-developed root system, avoiding any plants that show signs of stress, disease, or being pot-bound. This careful selection process is the first step toward a healthy garden addition.
Soil preparation is a non-negotiable step for the successful cultivation of bluebeard. This shrub is highly intolerant of waterlogged conditions, making well-draining soil an absolute necessity. Before planting, you should dig a hole that is at least twice as wide as the plant’s root ball but no deeper. Amending the backfill soil with organic materials like compost or finely shredded bark will improve the soil structure and provide a gentle source of nutrients for the newly establishing plant. This preparation ensures the roots have a hospitable environment in which to spread out and grow.
Propagation is an exciting way to create new plants from your existing bluebeard, and the most common and effective method is through softwood cuttings taken in late spring or early summer. This technique allows you to create genetically identical clones of the parent plant, preserving the unique characteristics of your chosen cultivar. With just a few simple tools and a bit of patience, you can easily expand your collection of this beautiful and versatile shrub, ensuring a continuous supply of late-season blue in your garden.
Selecting the ideal planting site
The first and most critical decision in the planting process is choosing the right spot in your garden. Bluebeard is a sun-loving shrub and requires a location that receives at least six hours of direct sunlight each day to perform at its best. This exposure to full sun is what fuels the prolific blooming that makes the plant so desirable. A site with southern or western exposure is often ideal. Insufficient light will result in a plant that is sparse, leggy, and produces significantly fewer flowers, so compromising on sunlight is not recommended for this particular species.
More articles on this topic
Beyond sunlight, the character of the soil is paramount. Bluebeard has a strong preference for soil that is loose and drains exceptionally well. It is naturally adapted to leaner soils and will not tolerate heavy clay or any area where water tends to pool after rain. Before you even dig a hole, observe how the area drains. If you have dense, clay-based soil, you must be prepared to amend it heavily with organic matter to improve its porosity. Alternatively, consider planting bluebeard in a raised bed or on a slope where gravity can assist with drainage.
Consider the mature size of the bluebeard cultivar you have chosen when spacing it among other plants. Most varieties form a rounded mound approximately one meter tall and wide. Providing adequate space around the shrub ensures good air circulation, which is crucial for disease prevention. Proper spacing also allows the plant to develop its natural, graceful form without being crowded by its neighbors. This foresight prevents future maintenance headaches and allows each plant in your design to be showcased effectively.
Finally, think about the plant’s role in your overall garden design. Bluebeard works wonderfully as a specimen plant, in small groups, or as part of a mixed perennial border. Its fine texture and silvery-green foliage contrast beautifully with plants that have large, dark green leaves. Because it blooms late in the season, it is perfect for adding a splash of color when summer-blooming perennials are starting to fade. Placing it where you can enjoy its late-season show from a patio or window will maximize its impact and your enjoyment.
The step-by-step planting process
Once you have selected the ideal site and prepared the soil, the physical act of planting your bluebeard is quite straightforward. Begin by digging a hole that is twice the width of the container the plant came in, but just as deep as the root ball. It is a common mistake to dig the hole too deep, which can cause the shrub to settle over time, leading to the crown being buried and potentially rotting. The width of the hole is important as it loosens the surrounding soil, making it easier for the new roots to penetrate and expand.
More articles on this topic
Carefully remove the bluebeard from its nursery pot, taking care not to damage the root ball. If the plant is pot-bound, meaning the roots are circling tightly around the soil mass, it is crucial to gently tease them apart with your fingers or make a few vertical cuts with a sharp knife. This encourages the roots to grow outwards into the new soil rather than continuing to circle, which can strangle the plant over time. This simple step can make a significant difference in how quickly the plant establishes itself in its new home.
Place the plant in the center of the prepared hole, ensuring that the top of the root ball is level with or even slightly above the surrounding soil grade. Backfill the hole with the amended soil, gently firming it down around the root ball to eliminate any large air pockets. Avoid compacting the soil too much, as this can impede both water penetration and root growth. Once the hole is filled, create a shallow basin or “moat” of soil around the base of the plant to help direct water to the root zone during irrigation.
Immediately after planting, water the bluebeard thoroughly to settle the soil and provide essential moisture to the roots. A slow, deep watering is much more effective than a quick splash. For the first few weeks, and throughout its first growing season, monitor the soil moisture regularly and water whenever the top few inches of soil feel dry to the touch. This consistent care during the establishment phase is vital for developing a strong, healthy plant that will be drought-tolerant in the future.
Propagation through softwood cuttings
Propagating bluebeard from softwood cuttings is a highly effective and rewarding method for creating new plants. The best time to take these cuttings is in late spring or early summer when the new growth is still flexible but mature enough to root. This type of growth is known as softwood; it should snap when bent sharply but is not yet tough and woody. You should select healthy, vigorous stems from the current season’s growth, avoiding any that are producing flowers or show signs of disease or pest damage.
To prepare the cuttings, use a clean, sharp pair of pruners or a knife to snip off 10-15 centimeter sections from the tips of the selected stems. Make each cut just below a leaf node, which is the point on the stem where a leaf emerges. Carefully remove the leaves from the lower half of the cutting, as these would rot if buried in the rooting medium. It is also a good practice to snip off any large remaining leaves by about half to reduce moisture loss through transpiration while the cutting is developing roots.
While not strictly necessary, dipping the base of each cutting into a rooting hormone powder can significantly increase the success rate and speed of root development. The hormone encourages the formation of adventitious roots from the stem tissue. After dipping, gently tap off any excess powder. The prepared cuttings can then be inserted into a pot or tray filled with a sterile, well-draining rooting medium, such as a mix of perlite and peat moss or coarse sand.
Place the potted cuttings in a warm, bright location that is out of direct sunlight, which could scorch the delicate leaves. To maintain high humidity, you can cover the pot with a clear plastic bag or place it in a propagator. Check the cuttings regularly, ensuring the medium remains moist but not waterlogged. Roots typically begin to form within a few weeks. You can test for rooting by giving a gentle tug on a cutting; if you feel resistance, roots have formed, and the new plant can soon be potted up individually to grow on.
Post-planting and initial care
The care provided in the first few weeks and months after planting is critical for the long-term success of your bluebeard shrub. The primary focus during this establishment period is on watering. Newly planted shrubs have a limited root system and are more vulnerable to drying out than established plants. You must monitor the soil moisture carefully, providing a deep watering whenever the top 5-7 centimeters of soil become dry. This consistent moisture helps the roots to grow and expand into the surrounding soil, anchoring the plant and tapping into a larger reserve of water and nutrients.
Applying a layer of organic mulch around the base of the newly planted bluebeard is a highly beneficial practice. A 5-7 centimeter layer of shredded bark, wood chips, or compost will help to conserve soil moisture by reducing evaporation from the surface. Mulch also helps to suppress weed growth, which is important as weeds compete with the new shrub for water and nutrients. Additionally, as the organic mulch breaks down over time, it will gradually improve the soil structure and fertility. Be sure to keep the mulch a few inches away from the main stem of the plant to prevent rot.
During the first year, it is best to be conservative with fertilization. The amended soil you used for backfilling should provide sufficient nutrients for the initial establishment phase. Adding too much fertilizer, especially nitrogen-rich formulas, can force rapid, weak top growth before the root system is ready to support it. A light application of a balanced, slow-release fertilizer in the spring following planting is usually sufficient. The goal is to encourage strong root development, not just lush foliage.
Keep a watchful eye on your new plant for any signs of stress, such as wilting, yellowing leaves, or pest activity. Addressing any potential issues early can prevent them from becoming major problems. For example, if the leaves are consistently wilting even with adequate soil moisture, it could be a sign of transplant shock, and providing some temporary shade during the hottest part of the day might help it recover. This attentive care in the first season will lay a strong foundation for a healthy and floriferous shrub in the years to come.