Successfully establishing a fernleaf peony in your garden begins with meticulous planting, a process that sets the stage for the plant’s long-term health and performance. Unlike many other perennials, peonies are long-term investments that resent disturbance, so getting the initial placement and planting depth correct is absolutely critical. The plant is most commonly acquired and planted as a dormant, bare-root tuber in the autumn, which allows it to establish its root system before the onset of winter. This careful attention to detail during the planting phase will be rewarded with decades of beauty from this exceptional garden specimen.
The ideal time to plant fernleaf peonies is in the autumn, from September through to October, as this provides the plant with the best possible start. Planting during this period allows the newly placed tuberous roots to develop fine feeder roots before the ground freezes solid, giving them a significant advantage for the following spring. While it is possible to plant container-grown peonies in the spring, autumn planting of bare roots is overwhelmingly recommended by experts for stronger establishment and better first-season performance. This timing aligns perfectly with the plant’s natural dormant period, minimizing stress and maximizing root growth.
When your bare-root fernleaf peony arrives, it will typically consist of a section of crown with several thick, fleshy roots attached. It is important to inspect the root division upon arrival, ensuring it looks healthy and firm, not mushy or dried out. The division should have at least three to five prominent reddish buds, often called “eyes,” on the crown portion. These eyes are the points from which next year’s stems will emerge, and their presence is a crucial indicator of the plant’s viability and future vigor.
Before you proceed with planting, it is beneficial to soak the bare-root division in a bucket of water for a few hours, although not overnight, to rehydrate it. This is especially important if the root seems a bit dry from shipping. Some gardeners also choose to soak the root in a fungicide solution as a preventative measure against fungal infections, which can be a wise precaution. Proper preparation of the planting material itself is the final step before committing it to its new home in the garden bed.
Selecting the perfect site
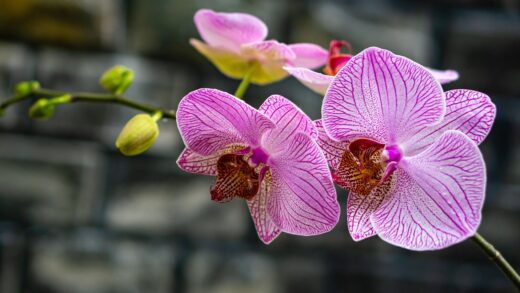
Choosing the right location for your fernleaf peony is arguably the most important decision you will make in its cultivation journey. This plant requires a permanent home, as it develops a deep and extensive root system over time and reacts very poorly to being transplanted. The selected site must receive at least six hours of direct sunlight each day. Full sun is essential for developing a strong plant structure, sturdy stems, and, most importantly, for ensuring a prolific display of its signature crimson flowers.
More articles on this topic
The chosen location must also provide excellent air circulation, which is vital for disease prevention. Good airflow around the foliage helps it to dry quickly after rain or morning dew, significantly reducing the risk of fungal diseases like botrytis blight, to which peonies can be susceptible. Avoid planting in crowded garden beds where air becomes stagnant or in low-lying areas where cold, damp air tends to collect. A spot with gentle breezes is ideal for keeping the delicate foliage healthy.
Soil drainage is another non-negotiable requirement for the site. Fernleaf peonies will not tolerate “wet feet,” and their tuberous roots will quickly succumb to rot in soil that remains waterlogged. To test the drainage in a potential spot, you can dig a hole about 30 centimeters deep and fill it with water. If the water has not drained away within a few hours, the drainage is inadequate, and you should either choose a different location or take significant steps to amend the soil or create a raised bed.
Finally, consider the plant’s mature size and its placement relative to other garden inhabitants. Fernleaf peonies typically form a clump around 45 to 60 centimeters in height and spread. Give it ample space to grow to its full size without being overshadowed or crowded by more aggressive neighboring plants. Also, be mindful not to plant it too close to trees or large shrubs whose extensive root systems will compete fiercely for water and nutrients, leaving the peony at a disadvantage.
The critical aspect of planting depth
The depth at which you plant a fernleaf peony is a critical factor that directly influences its ability to flower. Planting the crown too deeply is one of the most common reasons for a healthy-looking plant to fail to produce blooms. The rule of thumb is that the “eyes” or reddish growth buds on the crown of the tuber should be positioned no more than 2.5 to 5 centimeters below the soil surface. This shallow placement ensures that the buds receive the necessary winter chill to initiate flower development for the following season.
More articles on this topic
To achieve this precise depth, start by digging a wide, generous planting hole, typically about 45 centimeters wide and deep, in your well-prepared garden bed. Backfill the hole with some of the amended soil, creating a cone or mound in the center. Carefully place the bare-root division on top of this mound, spreading the fleshy roots out and down along the sides of the cone. This technique helps to ensure that the roots are well-distributed and not cramped or bent.
Next, you need to adjust the height of the soil mound so that when the hole is filled, the eyes on the crown will be at the correct shallow depth. You can use a straightedge, like a bamboo cane or a rake handle, placed across the top of the planting hole as a guide. The tips of the eyes should be just below this guide. Once you are satisfied with the positioning, you can begin to gently backfill the hole with the amended soil, working it in around the roots to eliminate any air pockets.
After the hole is filled, lightly firm the soil with your hands, but avoid compacting it heavily. Water the newly planted peony thoroughly to help settle the soil around the roots and remove any remaining air pockets. The soil level may sink slightly after this initial watering, so be prepared to add a little more soil if necessary, re-checking to ensure the crown has not sunk too deep. This meticulous attention to planting depth is the key to unlocking the fernleaf peony’s spectacular flowering potential.
Propagation through division
Division is the most common and reliable method for propagating fernleaf peonies, allowing you to create new plants that are genetically identical to the parent. However, this should not be undertaken frequently, as established clumps are best left undisturbed for many years. The ideal time to divide a fernleaf peony is in the autumn, once the plant has entered dormancy and the foliage has completely died back. Attempting to divide the plant at any other time of the year, especially in spring, can severely damage or even kill it.
To begin the process, you must first carefully excavate the entire plant clump. Start by digging a wide trench around the perimeter of the plant, well away from the crown, to minimize root damage. Using a sturdy spade or garden fork, gently work your way underneath the root ball and carefully lift the entire clump from the ground. The tuberous roots are brittle, so this process should be done with patience and care to preserve as much of the root system as possible.
Once the clump is lifted, gently remove the excess soil by hand or with a gentle stream of water from a hose. This will allow you to clearly see the crown and the arrangement of the growth eyes. Using a sharp, sterilized knife or a spade, you can then cut the clump into sections. Each new division must have at least three to five prominent eyes and a substantial portion of the fleshy root system attached to support its growth. Discard any old, woody parts of the crown or any sections that show signs of rot or disease.
After dividing the clump, the new divisions should be planted immediately in their new, prepared locations, following the same critical guidelines for planting depth as you would for a new plant. It is very common for a newly divided peony not to flower in its first spring after division, as it will be directing all of its energy into re-establishing a strong root system. With proper care, you can expect it to resume its normal flowering pattern in the second or third year after being divided.
Growing from seed
Growing fernleaf peonies from seed is a fascinating but lengthy process that requires a great deal of patience, making it a project for the truly dedicated gardener. Unlike propagation by division, which creates clones, growing from seed can result in variations in flower color and form. The seeds require a specific sequence of temperature changes to break dormancy, a phenomenon known as double dormancy. This means they need a period of warmth followed by a period of cold before they will germinate.
The first step is to harvest the seeds as soon as the pods begin to split open in late summer, as fresh seed has the highest viability. If the seeds are allowed to dry out completely, they may enter a deep dormancy that is even more difficult to break. Plant the fresh seeds immediately, either directly into a prepared seedbed in a protected part of the garden or in pots filled with a sterile, well-draining seed-starting mix. The seeds should be planted about 2.5 centimeters deep.
The planted seeds now need to undergo their natural stratification process. The initial warm period during the late summer and early autumn encourages the seed to develop a root. Following this, the cold temperatures of winter will fulfill the second requirement, which allows the first leaf to emerge in the spring. If you are growing them in pots, you can mimic this by keeping the pots in a warm place for a few months and then moving them to a cold frame or even placing them in the refrigerator for the winter.
Be prepared for a long wait. Even with perfect conditions, germination can be erratic, and it is not uncommon for the first leaf to appear one or even two years after planting. From that point, it can take an additional four to seven years for the seedling to mature into a plant large enough to produce its first flower. While it is a slow and challenging endeavor, successfully raising a fernleaf peony from seed to flower is an incredibly rewarding experience for the patient horticulturalist.