Successfully overwintering Dutch irises is a critical step in ensuring their return and spectacular floral performance year after year. The specific approach required depends heavily on the severity of the winter in your particular climate zone. For some gardeners, overwintering is a simple matter of providing a protective layer of mulch, while for others in colder regions, it involves the more hands-on process of lifting and storing the bulbs indoors. Understanding the hardiness of these bulbs and providing them with the appropriate level of protection is essential for their long-term survival and continued presence in the garden.
The hardiness of Dutch iris bulbs is a key factor in determining the necessary overwintering strategy. Generally, they are considered reliably perennial in USDA hardiness zones 6 through 9, where winter temperatures do not typically drop to extreme levels. In these milder climates, the bulbs can be safely left in the ground throughout the winter. The primary challenge in these zones is often not the cold itself, but rather the potential for the soil to become waterlogged during wet winter seasons, which can lead to bulb rot. Therefore, excellent drainage remains the most important consideration for in-ground overwintering.
In transitional or borderline climates, such as USDA zone 5, the survival of Dutch irises left in the ground can be unpredictable. Success in these areas often depends on the specific microclimate of the garden, the consistency of insulating snow cover, and the depth to which the ground freezes. A thick layer of winter mulch becomes absolutely essential in these regions to provide the necessary insulation to protect the bulbs from the harshest cold and from the damaging effects of repeated freeze-thaw cycles.
For gardeners in colder regions, typically USDA zones 4 and below, Dutch iris bulbs are not considered winter-hardy and are very unlikely to survive if left in the ground. The extreme cold temperatures will freeze and destroy the bulbs. In these climates, the only reliable way to preserve the bulbs for the following season is to treat them as tender perennials. This involves digging them up in the autumn after the foliage has died back and storing them in a protected, frost-free location over the winter.
Preparing the bulbs for winter in the ground
For those gardening in zones where Dutch irises can be overwintered in the ground, a few preparatory steps in the autumn can significantly increase their chances of success. The first step is to ensure proper garden cleanup. After the foliage has completely yellowed and died back naturally following the first few frosts, it should be cut back to just a few inches above the soil line. Removing this dead foliage is important as it eliminates potential overwintering sites for pests and fungal diseases that could pose a threat to the bulbs in the spring.
More articles on this topic
The next and most crucial step is the application of a protective layer of winter mulch. This mulch serves not to keep the ground warm, but rather to keep it consistently cold and frozen, protecting the bulbs from damaging freeze-thaw cycles that can heave them out of the ground. The ideal time to apply the mulch is in the late autumn or early winter, after the ground has already frozen solid. Applying it too early, while the ground is still warm, can trap heat and moisture, potentially leading to rot, and may also provide a cozy winter home for voles or mice that might feed on the bulbs.
A variety of organic materials can be used effectively as winter mulch. Shredded leaves, pine needles, straw, or even evergreen boughs are all excellent choices. Apply a loose, airy layer approximately 4 to 6 inches thick over the entire iris bed. This layer will provide a substantial amount of insulation, moderating the soil temperature and shielding the dormant bulbs from the worst of the winter cold. This simple practice can make the difference between survival and loss, especially in borderline hardiness zones.
In the spring, it is important to remember to remove the winter mulch at the appropriate time. As the threat of hard frosts has passed and the soil begins to warm, gently rake back the mulch layer. This will allow the sunlight to reach the soil and warm it up, signaling to the bulbs that it is time to break dormancy. Removing the mulch also ensures that the new emerging shoots are not smothered and have a clear path to grow towards the light.
The process of lifting and storing bulbs
In colder climates where Dutch irises will not survive the winter outdoors, the process of lifting and storing the bulbs is the standard procedure. This process should begin in the autumn, but only after the plant’s foliage has been allowed to die back completely. This is a critical waiting period because it is during this time that the leaves are transferring energy back down into the bulb for storage. Lifting the bulbs while the foliage is still green will result in a weak bulb that is unlikely to perform well the following year.
More articles on this topic
Once the foliage is brown and withered, it is time to carefully dig up the bulbs. Use a garden fork or a spade, inserting it into the soil several inches away from the base of the plant to avoid accidentally spearing or damaging the bulbs. Work your way around the clump, gently loosening the soil, and then carefully lift the entire cluster from the ground. Once lifted, gently shake or brush off the loose soil from the bulbs and their roots. Avoid washing the bulbs with water, as this introduces excess moisture that can lead to rot during storage.
The next crucial step is curing. Spread the bulbs out in a single layer on a screen, in a shallow tray, or on a sheet of newspaper in a warm, dry, and well-ventilated location that is protected from direct sunlight. A garage, a covered porch, or a garden shed are often ideal places for this. Allow the bulbs to cure for one to two weeks. This drying process hardens the outer skin of the bulb, heals any minor cuts or scrapes, and reduces the moisture content, all of which are essential for preventing decay during their long winter storage.
After the curing process is complete, the final preparation for storage involves cleaning them up. The withered foliage and stems should now be completely dry and can be trimmed off close to the top of the bulb. The old, dried-up roots can also be trimmed away. Give the bulbs a final gentle brushing to remove any remaining soil and inspect them one last time, discarding any that show signs of softness, mold, or significant damage. Only healthy, firm bulbs should be put away for the winter.
Optimal storage conditions for bulbs
Creating the right environment is the key to successfully storing Dutch iris bulbs through the winter months. The ideal storage location must be cool, dark, and dry, with good air circulation. A basement, an unheated garage, a cellar, or a closet on an unheated wall are all suitable options. The most important factor is temperature; the storage location must remain consistently cool but, crucially, must stay above freezing at all times. The optimal temperature range for storing dormant bulbs is between 40 and 50 degrees Fahrenheit (4-10°C).
The method of storage is also important for maintaining the health of the bulbs. They should never be stored in airtight plastic bags or sealed containers, as this will trap moisture and lead to mold and rot. Instead, place the cured bulbs in materials that allow for good air exchange. Mesh bags, such as those used for onions, are an excellent choice. Alternatively, you can place them in paper bags with several holes punched in them for ventilation or lay them out in a single layer in a shallow cardboard box or a wooden tray.
To further protect the bulbs and regulate moisture, it can be beneficial to pack them in a loose, dry medium. Materials like peat moss, vermiculite, sand, or even shredded newspaper can be used to surround the bulbs. Place a layer of the medium in the bottom of your storage container, arrange the bulbs so that they are not touching each other, and then cover them with more of the medium. This helps to cushion the bulbs, prevent the spread of any potential rot from one bulb to another, and absorbs any excess humidity.
Throughout the winter, it is a good practice to check on your stored bulbs periodically, perhaps once a month. This allows you to inspect them for any signs of trouble, such as mold, rot, or dehydration. If you find any bulbs that have become soft or moldy, they should be discarded immediately to prevent the problem from spreading. If the bulbs seem to be shriveling excessively, a very light misting of the packing medium with water can help to reintroduce a small amount of humidity, but this should be done with extreme caution to avoid making them too wet.
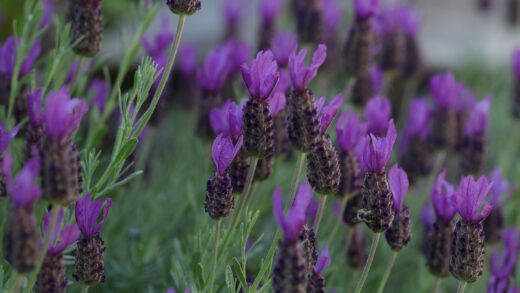
📷: Oleg Yunakov via Wikipedia CC BY-SA 4.0