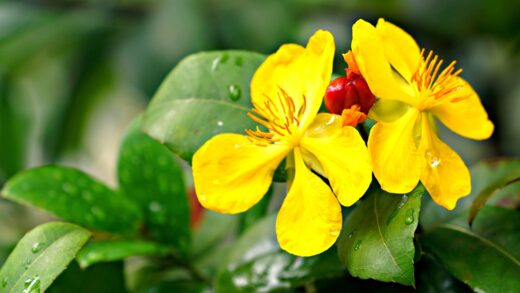
Successfully guiding a white calla lily through its winter dormancy is a critical procedure that ensures its survival and paves the way for a spectacular display of blooms the following season. This period of rest is not a passive state but an essential phase in the plant’s life cycle, during which it conserves energy and prepares for future growth. The specific method of overwintering depends largely on the climate and whether the calla is grown in a garden bed or in a container. Understanding how to properly manage this dormant phase, whether by protecting the plant in the ground or by lifting and storing the rhizome, is a key skill that underpins the long-term cultivation of this elegant species.
The need to provide special winter protection for white calla lilies is determined by the severity of the local climate. Zantedeschia aethiopica is native to southern Africa and is not tolerant of prolonged freezing temperatures or frozen ground. In horticultural zones that are frost-free or experience only very light, infrequent frosts (typically USDA zones 8 and above), the rhizomes can often be safely left in the ground over winter. The primary requirement in these milder climates is to ensure the soil does not become waterlogged during winter rains, as wet, cold soil is the biggest threat, leading to rot.
In these milder regions, preparing the in-ground calla for winter is relatively straightforward. After the foliage has naturally yellowed and died back in the autumn following the first light frosts, it should be cut back to just a few centimeters above the soil line. It is then highly beneficial to apply a thick layer of mulch, about 10-15 centimeters deep, over the planting area. This mulch, which can consist of materials like straw, shredded leaves, or bark chips, acts as a blanket, insulating the soil and protecting the rhizomes from any unexpected cold snaps.
This insulating layer of mulch serves a dual purpose. Not only does it protect the rhizomes from freezing, but it also helps to regulate soil moisture, preventing the ground from becoming completely saturated during periods of heavy winter precipitation. This simple act of mulching is often all that is required to ensure the calla lily survives the winter and re-emerges with vigor in the spring. The mulch can be gradually pulled back as the weather warms and the threat of hard frost has passed, allowing the soil to warm up and stimulating the rhizome to break dormancy.
For calla lilies grown in containers in these same mild climates, the process is even simpler. Once the foliage has died back, watering should be ceased completely. The pot can then be moved to a sheltered location, such as against a protected wall or under the eaves of a house, where it will be shielded from the worst of the winter rains. This ensures the soil in the pot remains dry, which is the most important factor for preventing the rhizome from rotting during its dormant state.
More articles on this topic
Lifting and storing rhizomes in cold climates
In regions where the ground freezes solid during the winter (typically USDA zones 7 and below), leaving white calla lily rhizomes in the garden is not a viable option, as the frost will destroy them. In these colder climates, the rhizomes must be lifted from the ground and stored indoors for the duration of the winter. This process should be undertaken in the autumn, after the first light frost has caused the foliage to yellow and die back, but before the ground freezes.
To lift the rhizomes, use a garden fork or spade to carefully dig around the clump, giving it a wide berth to avoid accidentally spearing or damaging the rhizomes. Gently loosen the soil and lift the entire clump from the ground. Once it is out, carefully shake and brush off as much of the excess soil as possible. At this stage, you can cut the remaining foliage back to about 5-8 centimeters from the top of the rhizome. It is important not to wash the rhizomes with water at this point, as they need to dry out for storage.
The next step is to cure the rhizomes, which is a critical process for preparing them for storage. Place the rhizomes in a warm, dry, and well-ventilated area, such as a garage, shed, or a sunny windowsill, for a period of one to two weeks. This curing process allows the surface of the rhizomes to dry completely and helps to heal any minor cuts or scrapes sustained during the lifting process. This creates a protective barrier that reduces the risk of rot and disease developing during storage.
After curing, the rhizomes are ready for winter storage. The ideal storage container is one that allows for some air circulation, such as a cardboard box, a paper bag, or a mesh onion sack. Place the cured rhizomes in the container and surround them with a dry, insulating medium like peat moss, vermiculite, coconut coir, or even crumpled newspaper. This medium helps to cushion the rhizomes, prevents them from touching each other, and wicks away any excess moisture that could lead to mold or rot.
More articles on this topic
Creating the ideal storage environment
The environment in which the calla lily rhizomes are stored throughout the winter is crucial for their survival. The primary requirements for a successful storage location are that it must be cool, dark, and dry. An ideal temperature range for storing the rhizomes is between 7 and 12 degrees Celsius. Locations that often meet these criteria include an unheated basement, a frost-free garage, a root cellar, or a cool closet. It is important to avoid locations with significant temperature fluctuations.
The storage area must be dark, as exposure to light can signal the rhizomes to break dormancy and begin sprouting prematurely. If the rhizomes start to sprout too early in the winter, the new growth will be weak and spindly, and it will deplete the energy reserves that are needed for strong growth in the spring. Storing them in a box with a lid or in a dark corner of a room will help to prevent this premature awakening.
Maintaining a dry environment with low humidity is also essential. Dampness is the greatest enemy of stored rhizomes, as it creates the perfect conditions for the development of mold, mildew, and rot. The packing medium, such as peat moss or vermiculite, plays a key role in maintaining a dry environment by absorbing any ambient moisture. The storage location itself should be free from leaks or condensation. Avoid storing the rhizomes in a damp basement or in a refrigerator, where humidity levels are typically too high.
Throughout the winter storage period, it is a good practice to check on the rhizomes periodically, perhaps once a month. Gently inspect them for any signs of trouble. Look for any rhizomes that have become soft and mushy, which indicates rot, or any that have become overly shriveled and desiccated, which suggests the storage conditions are too dry. Promptly remove and discard any rotting rhizomes to prevent the problem from spreading to the others. If the rhizomes appear to be shriveling excessively, a very light misting of the packing medium with water can help, but this should be done with extreme caution to avoid introducing too much moisture.
Overwintering callas in containers
For white calla lilies that are grown in pots, the overwintering process can be significantly simpler, especially in cold climates. Instead of lifting the rhizomes from the soil, you can choose to store the entire pot with the dormant rhizome inside it. This method avoids the disturbance of digging up the plant and reduces the risk of damaging the rhizome during the lifting and handling process. This is often the preferred method for many gardeners due to its convenience.
The preparation for overwintering a potted calla begins in the same way as for garden-grown plants. As autumn approaches and the blooming period ends, gradually reduce watering to signal the plant to enter its dormant phase. Allow the foliage to yellow and die back naturally. Once the foliage is completely brown, it can be cut off at the soil level. At this point, all watering should cease completely for the duration of the winter. The soil must be allowed to become completely dry.
Once the plant is fully dormant and the soil is dry, the pot can be moved to a suitable storage location. The environmental requirements are the same as for storing lifted rhizomes: the location must be cool, dark, and dry. A frost-free garage, a cool basement, or a shed are all excellent choices. There is no need to do anything further with the pot until the spring. The dry soil and the protection of the pot itself will keep the rhizome safe and dormant through the winter months.
In the spring, when you are ready for the calla lily to begin its new growth cycle, the pot can be brought out of storage. This is an ideal time to repot the rhizome into fresh soil, which provides a renewed supply of nutrients for the upcoming season. If repotting, you can inspect the rhizome for health at this time. If you choose not to repot, you can simply begin watering the pot sparingly. Place the pot in a warm, bright location, and as new shoots emerge, you can resume your regular watering and fertilization schedule.