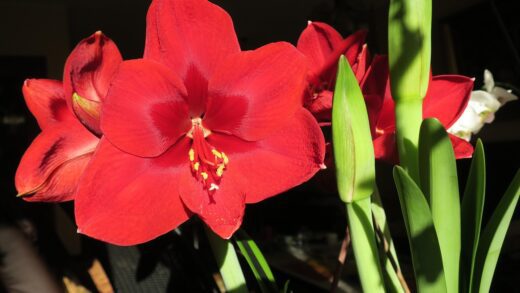
The successful cultivation of Asiatic lilies begins long before the first vibrant bloom unfurls. It is rooted in the fundamental practices of proper planting and thoughtful propagation. These initial steps are paramount, as they establish the foundation for healthy, vigorous plants that will grace your garden for years to come. Understanding the specific needs of Asiatic lily bulbs regarding their placement in the soil, the timing of planting, and the methods for increasing your stock is the first and most critical chapter in their life story. By mastering these techniques, you ensure that these botanical gems not only survive but truly thrive, multiplying their beauty season after season.
The journey to a spectacular lily display starts with selecting high-quality bulbs. Look for bulbs that are plump, firm, and free from any signs of mold, soft spots, or significant damage. The size of the bulb matters, as larger bulbs generally contain more stored energy and will produce more robust plants with a greater number of flowers in their first year. While it may be tempting to choose smaller, less expensive bulbs, investing in larger, healthier ones will pay dividends in the form of a more impressive floral show. Once you have your bulbs, it is best to plant them as soon as possible to prevent them from drying out.
Timing is a critical factor when planting Asiatic lily bulbs. The ideal time to plant is in the autumn, approximately four to six weeks before the ground freezes. This allows the bulbs sufficient time to develop a strong root system before winter dormancy sets in. A well-established root system is crucial for the plant’s ability to absorb nutrients and water efficiently come spring. Alternatively, bulbs can also be planted in early spring as soon as the soil is workable. Spring-planted bulbs may bloom slightly later than those planted in the fall, but they will still put on a beautiful display.
The planting location must be chosen with care to meet the specific needs of Asiatic lilies. These plants demand excellent drainage, as their bulbs are highly susceptible to rot in waterlogged soil. Choose a site that receives at least six hours of direct sunlight per day. To prepare the planting area, loosen the soil to a depth of at least twelve inches and amend it with organic matter such as compost or peat moss. This not only improves drainage in heavy clay soils but also enhances moisture retention in sandy soils, creating the perfect loamy texture that lilies adore.
The mechanics of planting
Once you have selected a suitable location and prepared the soil, the actual process of planting the bulbs is straightforward but requires attention to detail. The general rule for planting depth is to dig a hole that is three times the height of the bulb itself. For a typical two-inch Asiatic lily bulb, this means a planting depth of about six inches from the base of the bulb to the soil surface. This depth helps to anchor the tall stems, provides insulation from temperature extremes, and encourages the development of stem roots, which are crucial for nutrient and water absorption.
More articles on this topic
When placing the bulb in the hole, ensure that the pointed end is facing upwards and the flatter, root-bearing side is facing down. If it is difficult to distinguish the top from the bottom, placing the bulb on its side is a safe alternative; the stem will naturally find its way up towards the sun. Space the bulbs approximately six to nine inches apart. This spacing gives each plant adequate room to mature and develop a healthy clump without being overcrowded, which can lead to competition for resources and poor air circulation, increasing the risk of disease.
After positioning the bulbs at the correct depth and spacing, backfill the hole with the amended soil. Gently firm the soil around the bulbs to eliminate any large air pockets that could dry out the roots. It is important not to compact the soil too tightly, as this can impede drainage and root growth. The goal is to ensure good contact between the bulb and the surrounding soil, which facilitates the uptake of moisture and nutrients.
The final step in the planting process is to water the area thoroughly. This initial watering is crucial as it settles the soil around the bulbs and provides the necessary moisture to stimulate root growth. For autumn-planted bulbs, this watering helps them to get established before winter. For spring-planted bulbs, it gives them the kick-start they need to begin their seasonal growth cycle. After this initial soaking, you will not need to water again until you see the first shoots emerge in the spring, unless you are experiencing an unusually dry autumn.
Propagation through bulb division
One of the most rewarding aspects of growing Asiatic lilies is their natural tendency to multiply, allowing you to easily expand your collection through bulb division. Over time, a single lily bulb will produce smaller offset bulbs, known as bulblets, around its base. After about three to four years, the original clump may become overcrowded, leading to smaller plants and fewer flowers. This is the ideal time to lift and divide the clump, which not only provides you with new plants but also rejuvenates the original planting.
More articles on this topic
The best time to divide Asiatic lilies is in the early autumn, after the foliage has died back but before the ground freezes. This timing gives the newly separated bulbs a chance to establish their roots in their new location before winter. To begin, carefully dig around the entire clump with a garden fork, giving it a wide berth to avoid damaging the bulbs. Gently lift the entire clump of bulbs from the soil and shake off the excess dirt so you can clearly see the individual bulbs.
Once the clump is lifted, you can carefully separate the bulbs by hand. The smaller bulblets should detach easily from the parent bulb. Larger bulbs that are fused together may need to be gently twisted or pried apart. Discard any bulbs that appear soft, diseased, or damaged. You now have a collection of new bulbs that can be replanted immediately in other areas of the garden or shared with fellow gardeners. It is a simple and cost-effective way to propagate your favorite varieties.
When replanting the divided bulbs, follow the same planting guidelines as you would for new bulbs. Prepare the new planting site with well-drained, amended soil and plant the bulbs at a depth three times their height. The larger, parent bulbs will likely flower in the following season, while the smaller bulblets may take a year or two to reach flowering size. This regular division not only increases your stock of lilies but also ensures the long-term health and vigor of your lily patch, promoting more robust plants and a more spectacular floral display.
Propagation from bulbils
Another fascinating method of propagating Asiatic lilies involves the collection of bulbils. Bulbils are small, dark, pea-sized aerial bulbs that form in the leaf axils (where the leaf joins the stem) of certain types of lilies, including many Asiatic hybrids. These are essentially miniature clones of the parent plant. Not all Asiatic lilies produce bulbils, but for those that do, it offers an incredibly easy way to generate a large number of new plants. This method requires a bit more patience than division, but it is a highly effective propagation technique.
The bulbils typically mature in late summer or early autumn, around the time the plant’s flowers are fading. You will know they are ready to be harvested when they can be easily detached from the stem with a gentle touch. Simply run your hand up the lily stalk, and the ripe bulbils will fall off into your palm. It is best to collect them before they drop to the ground on their own, where they might get lost or eaten by garden critters. Each stem can produce a surprising number of these tiny future lilies.
Once harvested, the bulbils can be planted immediately. You can plant them in a designated nursery bed in the garden or in pots filled with a well-draining potting mix. Plant them about one to two inches deep and about the same distance apart. The nursery bed should be in a protected spot with well-prepared soil. Keep the soil consistently moist but not waterlogged. The bulbils will begin to sprout roots and may even produce a small leaf before winter sets in.
Patience is key when growing lilies from bulbils. In their first year, they will focus on developing a small bulb and root system, producing only a single leaf or two. It will typically take two to three years for the bulbs to grow large enough to produce a flowering stem. During this time, keep the area weed-free and provide consistent moisture. Once the young plants have developed a more substantial bulb, they can be transplanted to their permanent locations in the garden. Propagating from bulbils is a slow but immensely satisfying process.
Propagation from scales
For the truly dedicated lily enthusiast, propagation from scales offers a method to produce a very large number of new plants from a single bulb. This technique is more involved than division or growing from bulbils but is the preferred method for commercial growers and hybridizers. Every scale on a lily bulb has the potential to form new bulblets at its base. This means that a single large bulb can be used to generate dozens of new, identical plants.
The best time to scale a lily bulb is in late summer or early autumn, when the bulb is dormant and at its largest. Carefully dig up a healthy, mature bulb and clean off the soil. Gently snap off several of the large, outer scales from the bulb, breaking them as close to the base as possible. The parent bulb, now slightly smaller, can be immediately replanted and will recover and grow as usual. The goal is to take enough scales to make the effort worthwhile, without taking so many that you compromise the health of the mother bulb.
Place the harvested scales in a plastic bag with a handful of slightly damp, sterile medium like vermiculite or peat moss. Shake the bag to coat the scales with the medium. Seal the bag and store it in a warm, dark place, with a temperature of around 70°F (21°C). Check the bag periodically for signs of mold or rot, and to ensure the medium remains slightly moist. Within a few weeks to a couple of months, tiny bulblets should begin to form at the base of each scale.
Once the bulblets have formed and are large enough to handle, they can be separated from the scale and planted. Plant them in pots or a nursery bed, about an inch deep. They will grow similarly to plants grown from bulbils, taking two to three years to reach flowering size. This method requires careful attention to hygiene to prevent fungal infections, but it is an incredibly efficient way to rapidly increase your stock of a particularly prized Asiatic lily variety, turning one bulb into a potential multitude.