Successfully establishing a dog rose in the garden begins with proper planting techniques, which lay the groundwork for a healthy and vigorous shrub. This resilient species is forgiving, but providing it with the right start will pay dividends in terms of growth, flowering, and hip production for many years to come. The ideal time for planting is during the dormant season, either in the autumn after leaf drop or in early spring before new growth begins. Autumn planting is often preferred in milder climates, as it allows the root system to establish itself over the winter, giving the plant a head start in the spring. Regardless of the season, the fundamental principles of site preparation and planting depth remain the same, ensuring the young plant has the best possible opportunity to thrive in its new environment.
Before the plant even goes into the ground, thorough preparation of the planting site is essential for long-term success. This involves clearing the area of all weeds and grass, which would otherwise compete with the young rose for water and nutrients. The next step is to dig a planting hole that is significantly larger than the plant’s root ball—ideally twice as wide and just as deep. This loosens the surrounding soil, making it easier for the new roots to penetrate and expand. It is also a good opportunity to improve the soil structure by incorporating a generous amount of organic matter, such as compost or well-rotted manure, into the excavated soil.
When you are ready to plant, carefully remove the dog rose from its container, taking care to disturb the root ball as little as possible. If the plant is bare-root, it is beneficial to soak the roots in a bucket of water for a few hours before planting to rehydrate them. Place the plant in the center of the prepared hole, ensuring that the point where the roots meet the stem (the crown) is level with the surrounding soil surface. Planting too deeply can cause the stem to rot, while planting too shallowly can leave the roots exposed and vulnerable to drying out.
Once the plant is correctly positioned, begin backfilling the hole with the amended soil, gently firming it down around the root ball to eliminate any large air pockets. After the hole is completely filled, create a shallow basin or “moat” of soil around the base of the plant to help direct water to the root zone. The final and most critical step is to water the newly planted shrub thoroughly, providing a deep soaking to settle the soil and ensure good contact between the roots and their new environment. This initial watering is vital, even if the soil is already moist.
Selecting the ideal planting site
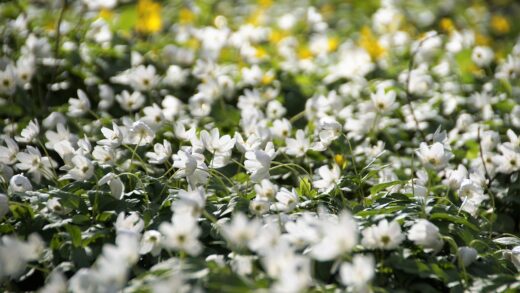
The selection of an appropriate planting site is a foundational step that will profoundly influence the health and productivity of a dog rose. This sun-loving species requires a location that receives at least six hours of direct sunlight each day. This exposure is not merely a preference but a necessity for the plant to carry out efficient photosynthesis, which fuels its growth and, most importantly, the development of an abundant display of flowers. A location with full sun also helps to dry the foliage quickly after rain or morning dew, reducing the incidence of common fungal diseases that thrive in damp conditions.
More articles on this topic
Beyond sunlight, the physical characteristics of the soil are a primary consideration. The dog rose is adaptable to various soil types but has a strong preference for soil that is well-draining. It is intolerant of waterlogged conditions, which can lead to root rot and the ultimate demise of the plant. Before deciding on a spot, it is wise to assess the soil’s drainage capacity. Sandy or loamy soils are generally ideal, but heavier clay soils can be made suitable by amending them generously with organic materials like compost, which improves both structure and drainage.
Consider the mature size of the dog rose when choosing its permanent home. This is not a small, compact shrub; it can easily grow to a height and spread of three meters or more, with long, arching canes. Planting it too close to a building, fence, or other plants will result in an overcrowded space that restricts airflow and necessitates constant pruning to keep it in bounds. Providing ample space from the outset allows the shrub to develop its natural, graceful habit and ensures it will not become a maintenance issue in the future.
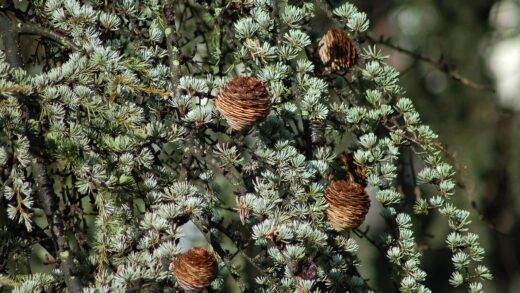
Finally, think about the plant’s role in the wider garden ecosystem. The dog rose provides excellent habitat and food for wildlife. Its dense, thorny structure offers shelter and nesting sites for birds, while its flowers are a valuable source of nectar for pollinators like bees. In the autumn, the vitamin C-rich hips provide an important food source for birds and small mammals. Planting a dog rose in a location where it can be part of a hedgerow or a wildlife-friendly border maximizes these ecological benefits, contributing to a healthier and more balanced garden environment.
Step-by-step planting guide
Planting a dog rose, whether it is a container-grown or bare-root specimen, is a straightforward process when broken down into manageable steps. The first action, particularly for bare-root roses, is to prepare the plant itself. Upon arrival, unpack the bare-root rose immediately and soak its roots in a bucket of water for several hours, but no more than twelve. This rehydrates the roots after their time in transit. For container-grown plants, water the pot thoroughly an hour or so before you intend to plant it, which helps the root ball slide out of the container more easily.
More articles on this topic
The second step is the preparation of the planting hole. Having already selected a suitable site, dig a hole that is approximately twice the width of the root system and of a similar depth. Loosen the soil at the bottom and sides of the hole with a garden fork to break up any compaction, which will encourage the roots to spread out into the surrounding soil. Mix some well-rotted compost or manure into the soil you have removed from the hole. This enrichment provides essential nutrients and improves the soil’s ability to retain moisture.
Step three involves correctly positioning the plant in the hole. For a bare-root rose, create a small mound of the amended soil in the center of the hole and spread the roots out over it, ensuring they are pointing downwards and outwards. For a container-grown plant, carefully remove it from its pot and gently tease out any circling roots at the bottom of the root ball. Place the plant in the hole, and in both cases, use a cane or a straight stick laid across the top of the hole to check that the graft union (the swollen part at the base of the stems) or the soil mark from the pot is level with the ground.
The final step is to backfill the hole and provide water. Gradually add the amended soil back into the hole, working it in around the roots and gently tamping it down to remove air pockets. Once the hole is full, firm the soil around the base of the plant with your feet and then water it in thoroughly. This deep watering is crucial as it settles the soil firmly around the roots, eliminating any remaining air gaps and providing the moisture needed for the plant to begin establishing itself in its new location.
Propagation from seeds
Propagating dog rose from seed is a patient gardener’s reward, offering a cost-effective way to produce a large number of plants. The process begins with the collection of ripe hips in the autumn, once they have developed a deep red color. Inside each hip are several hard seeds, which require a period of both warm and cold stratification to break their dormancy and trigger germination. This process mimics the natural conditions the seeds would experience over winter, ensuring they sprout at the appropriate time in spring.
After harvesting the hips, the first task is to extract the seeds. Cut each hip in half and carefully scoop out the seeds, making sure to separate them from the irritating fine hairs. Once extracted, the seeds should be washed to remove any remaining pulp and then subjected to a period of warm stratification. This can be achieved by mixing the seeds with a small amount of damp compost or vermiculite, placing them in a sealed plastic bag, and keeping them in a warm place, such as a heated propagator or an airing cupboard, for about two to three months.
Following the warm period, the seeds need to undergo cold stratification. The bag containing the seeds and moist medium should be moved to a cold environment, such as a refrigerator, for a further three to four months. It is important to check the bag periodically to ensure the medium remains damp but not wet. This cold, moist treatment simulates the winter season and is the critical trigger that convinces the seed it is time to germinate once conditions become favorable.
At the end of the cold stratification period, the seeds can be sown. Prepare pots or seed trays with a good quality, well-draining seed compost. Sow the seeds thinly on the surface and cover them with a light layer of compost or grit. Water gently and place the containers in a cold frame, an unheated greenhouse, or a sheltered spot outdoors. Germination can be erratic and may take several weeks or even months, but with patience, small seedlings will eventually emerge, ready to be pricked out and grown on into new, robust dog rose plants.
Propagation through cuttings
One of the most reliable and popular methods for propagating dog rose is through cuttings, which produces a new plant that is genetically identical to the parent. This can be done using either softwood cuttings taken in late spring or early summer, or hardwood cuttings taken in autumn or winter when the plant is dormant. Hardwood cuttings are generally considered the easier and more successful method for dog roses and other hardy shrubs. This technique allows gardeners to easily multiply their favorite specimens or create new plants for hedgerows.
To take hardwood cuttings, select healthy, vigorous shoots from the current season’s growth. The ideal cutting should be about the thickness of a pencil and around 20-30 centimeters in length. Using sharp, clean secateurs, make a straight cut just below a bud at the base of the cutting, and a slanted cut just above a bud at the top. The slanted cut at the top not only helps to shed water but also serves as a useful reminder of which end is which, ensuring the cutting is planted the right way up.
Once the cuttings are prepared, they can be treated with a hormone rooting powder to encourage faster and more reliable root development, although this step is not strictly necessary as dog roses often root well without it. The next step is to insert the cuttings into a prepared trench or individual pots. If planting in the ground, dig a narrow trench in a sheltered, well-drained part of the garden and line the bottom with a layer of sharp sand to improve drainage. Insert the cuttings into the trench so that about two-thirds of their length is below the soil surface.
After planting, firm the soil around the cuttings and water them well. They require very little aftercare over the winter months, apart from ensuring the soil does not completely dry out. By the following spring, the cuttings should have started to form roots and show signs of new growth. They can be left in place for a full year to develop a strong root system before being carefully lifted and transplanted to their final growing positions in the garden. This simple method provides a straightforward way to create new, healthy plants.