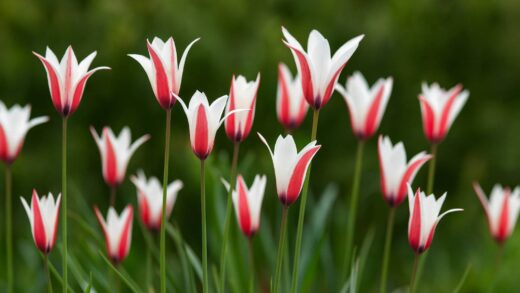
The Dutch iris, a hybrid group derived from species native to Spain and Portugal, is celebrated for its elegant, orchid-like flowers and is a favorite among florists and gardeners alike. Proper care is essential to ensure these bulbs produce their stunning blooms year after year, transforming garden beds and containers with their vibrant colors. Understanding their lifecycle, from planting to dormancy, is the key to cultivating healthy and vigorous plants. This guide provides a comprehensive overview of the essential practices required for successful Dutch iris cultivation, covering everything from soil preparation to post-blooming maintenance.
Cultivating Dutch irises successfully begins long before the first flower appears, with careful selection of the planting site being a primary determinant of future health. These plants thrive in a location that receives ample sunlight, ideally at least six to eight hours of direct sun per day. This exposure is crucial for photosynthesis, which allows the bulb to store the energy needed for the next season’s growth and flowering. Insufficient light can lead to weak, leggy stems and a significant reduction in the quantity and quality of blooms, so choosing an open, sunny spot is non-negotiable for a spectacular display.
The foundation of any healthy Dutch iris planting is the soil, which must be exceptionally well-draining to prevent bulb rot. A heavy, clay-based soil that retains water will almost certainly lead to fungal diseases and the eventual decay of the bulbs, especially during winter dormancy. To improve drainage, you can amend the soil with organic matter such as compost, peat moss, or well-rotted manure, which helps to create a lighter, more friable structure. A sandy loam is considered the ideal medium, as it provides the perfect balance of moisture retention and rapid drainage, ensuring the bulbs remain healthy and dry when they are not in their active growth phase.
Beyond its structural properties, the soil’s pH level also plays a role in the overall well-being of Dutch irises. These plants prefer a slightly acidic to neutral soil, with a pH ranging from approximately 6.0 to 7.0. Conducting a simple soil test before planting can provide valuable insights and allow for any necessary adjustments. If the soil is too alkaline, adding sulfur or incorporating acidic organic matter can help lower the pH, while lime can be used to raise the pH in overly acidic soils. Achieving this optimal pH range ensures that essential nutrients are readily available for the plant to absorb.
Soil preparation and planting depth
Proper soil preparation is a critical step that directly influences the long-term success of your Dutch iris cultivation efforts. Before planting the bulbs, the designated area should be thoroughly worked to a depth of at least 12 inches, or about 30 centimeters. This deep cultivation loosens compacted soil, which facilitates better root development and improves overall drainage, creating an environment where the bulbs can establish themselves quickly. During this process, it is the perfect time to incorporate any amendments needed to enhance the soil’s structure and fertility.
More articles on this topic
Once the soil has been adequately prepared, the next consideration is the correct planting depth, which is vital for both winter survival and proper stem support. A general rule of thumb for Dutch iris bulbs is to plant them about 4 to 5 inches deep, measured from the base of the bulb to the soil surface. Planting them too shallowly can expose them to frost damage and may result in the flower stalks flopping over, as they lack sufficient anchoring. Conversely, planting them too deeply can delay their emergence in the spring and may even inhibit flowering altogether by expending too much energy just to reach the surface.
The spacing between bulbs is just as important as the planting depth for ensuring each plant has enough room to thrive. For a dense, impactful floral display, space the bulbs approximately 3 to 4 inches apart from each other. This proximity allows the plants to support one another as they grow, creating a lush, full appearance in the garden bed. However, if you are planting in an area where air circulation is a concern, you might consider spacing them slightly further apart to help reduce the risk of fungal diseases developing on the foliage.
After placing the bulbs in their holes with the pointed end facing upwards, carefully backfill the holes with the prepared soil. Gently firm the soil around the bulbs to eliminate any large air pockets, which can collect water and lead to rot. Once the bulbs are planted, it is beneficial to water the area thoroughly. This initial watering helps to settle the soil around the bulbs and provides the necessary moisture to encourage the initiation of root growth before the onset of winter.
Watering and moisture control
Effective water management is crucial throughout the active growth cycle of the Dutch iris, particularly from the moment new shoots emerge in the spring until the flowering period concludes. During this time, the soil should be kept consistently moist but never waterlogged, as the bulbs are highly susceptible to rot in saturated conditions. A reliable method is to check the top inch of soil; if it feels dry to the touch, it is time to provide a deep and thorough watering. This approach encourages the roots to grow deeper into the soil in search of moisture, which results in a more resilient and drought-tolerant plant.
More articles on this topic
The frequency of watering will naturally vary depending on several environmental factors, including your local climate, soil type, and the amount of natural rainfall. In regions with regular spring showers, supplemental irrigation may be required only during extended dry spells. However, in drier climates or for irises planted in fast-draining sandy soil, you may need to water once or twice a week to maintain adequate moisture levels for vigorous growth. It is always better to water deeply and less frequently than to provide shallow, frequent waterings, as the latter can promote weak, shallow root systems.
Once the Dutch irises have finished blooming, their water requirements change significantly as the plants begin to enter their dormancy phase. It is essential to gradually reduce the amount of water you provide, allowing the foliage to yellow and die back naturally. This drying-out period is critical for the bulbs to cure and harden, preparing them for either winter dormancy in the ground or for being lifted and stored. Continuing to water heavily after the flowering period is one of the most common mistakes and is a primary cause of bulb rot.
For irises planted in containers, moisture control requires even more vigilance, as pots can dry out much more quickly than garden beds. Check the soil moisture in containers daily, especially during warm and windy weather. Ensure the pots have adequate drainage holes to allow excess water to escape freely. When it is time to reduce watering after flowering, you may need to move the containers to a location where they are sheltered from summer rains to ensure the bulbs can enter their necessary dry dormancy period.
Fertilization for optimal blooms
To support robust growth and a prolific display of flowers, Dutch irises benefit from a balanced fertilization strategy. The ideal fertilizer is one that is low in nitrogen but rich in phosphorus and potassium, which are the key nutrients that promote strong bulb development and vibrant blooms. A formulation specifically designed for bulbs, often with an N-P-K ratio such as 5-10-10 or 3-5-3, is an excellent choice. High-nitrogen fertilizers should be avoided as they encourage excessive leafy growth at the expense of the flowers and can also make the bulbs more susceptible to diseases.
The timing of fertilizer application is critical to ensure that nutrients are available when the plants need them most. The first application should be done at the time of planting in the autumn. Incorporating a granular, slow-release bulb fertilizer or bone meal into the soil at the bottom of the planting hole provides a nutrient reserve that will support initial root development. This early feeding helps the bulbs establish a strong foundation before entering winter dormancy, setting the stage for vigorous growth in the spring.
A second application of fertilizer is beneficial in the early spring, just as the new shoots are beginning to emerge from the ground. A light top-dressing of a balanced, low-nitrogen fertilizer scattered on the soil surface around the plants can provide the extra boost of energy needed for developing strong stems and high-quality flowers. Be careful to avoid direct contact between the fertilizer granules and the plant’s foliage, as this can cause burns. After applying the fertilizer, gently work it into the top layer of soil and water the area well to help the nutrients begin to dissolve and move down into the root zone.
It is important to cease all fertilization once the Dutch irises have finished flowering. Adding nutrients after this point is unnecessary and can even be detrimental. As the plants enter their dormancy phase, they are no longer actively taking up nutrients, and excess fertilizer in the soil can leach into the environment or promote soft growth that is vulnerable to rot. The energy for the next year’s flowers is generated through photosynthesis in the leaves after blooming, not from late-season fertilizer applications, so allowing the foliage to die back naturally is the most important step in preparing the bulbs for the following year.
Post-bloom care and foliage management
After the spectacular floral display of the Dutch iris has faded, proper post-bloom care is essential to ensure the health and longevity of the bulbs for subsequent seasons. The first and most immediate task is deadheading, which involves removing the spent flowers. This can be done by snipping off the individual flower heads or cutting the entire flower stalk back to the point where it meets the main foliage. This practice is not just for aesthetic purposes; it prevents the plant from expending its valuable energy on developing seeds and instead redirects that energy back into the bulb for storage.
One of the most crucial aspects of post-bloom care is the management of the plant’s foliage, and patience is key. It is absolutely vital to allow the leaves to remain on the plant until they have completely yellowed and withered on their own. The leaves continue to photosynthesize long after the flowers have gone, and this process is how the bulb gathers and stores the energy it needs to produce flowers the following year. Cutting the green foliage back prematurely is a common mistake that will significantly weaken the bulb and will likely result in a lack of blooms in the next season.
While the foliage should be left intact, you can tidy up the appearance of the iris patch by tucking the withering leaves amongst neighboring plants if their appearance becomes untidy. For gardeners who prefer a neater look, the leaves can be braided or folded over and secured with a soft tie, although this is purely for aesthetic reasons. The primary goal is to keep the leaves exposed to sunlight for as long as possible to maximize the energy-storing process. Once the leaves are completely brown and dry, they can be easily pulled away from the base of the plant or cut back to the ground level.
This period of foliage die-back coincides with the time when you should significantly reduce watering to facilitate the bulb’s transition into dormancy. A dry summer dormancy period is natural for Dutch irises and helps to prevent the onset of bulb rot and other fungal diseases. By managing the foliage correctly and adjusting your watering practices, you are providing the ideal conditions for the bulb to mature and prepare for a successful return the following spring, rewarding you with another stunning display of elegant flowers.
Overwintering and long-term health
Ensuring the long-term health of Dutch irises largely depends on providing the right conditions for them to survive the winter. In regions with mild winters, typically USDA hardiness zones 6 through 9, the bulbs can usually be left in the ground year-round without any issue. The primary concern in these areas is ensuring the soil remains well-drained during wet winter months to prevent the bulbs from rotting. A protective layer of mulch, such as straw, pine needles, or shredded leaves, applied after the ground has frozen can provide extra insulation against fluctuating temperatures.
In colder climates, specifically in USDA zones 5 and below, Dutch iris bulbs may not reliably survive the harsh winter temperatures if left in the garden. In these regions, the standard practice is to treat them as annuals or to lift the bulbs for indoor storage. The decision to lift them depends on the specific microclimate of your garden and the consistency of snow cover, which can act as a natural insulator. If you choose to risk leaving them in the ground, a thick layer of mulch, around 4 to 6 inches deep, is absolutely essential to offer any chance of survival.
For those in colder zones who wish to preserve their bulbs, the process of lifting and storing them is straightforward. After the foliage has completely died back in the late summer or early autumn, carefully dig up the bulbs using a garden fork, taking care not to damage them. Gently brush off the excess soil and allow the bulbs to cure in a warm, dry, and well-ventilated location for a week or two. This drying process is crucial for preventing mold and rot during storage and prepares the bulbs for their dormant period.
Once the bulbs are fully cured, they can be stored for the winter in a cool, dark, and dry place, such as a basement, garage, or cellar where temperatures remain consistently above freezing, ideally between 40 and 50 degrees Fahrenheit (4-10°C). Place the bulbs in a mesh bag, a paper bag with ventilation holes, or a tray with a medium like peat moss or vermiculite to ensure good air circulation and to prevent them from drying out completely. This careful overwintering practice will protect your investment and allow you to replant the healthy bulbs the following autumn for another season of beautiful blooms.
📷: Oleg Yunakov via Wikipedia CC BY-SA 4.0


