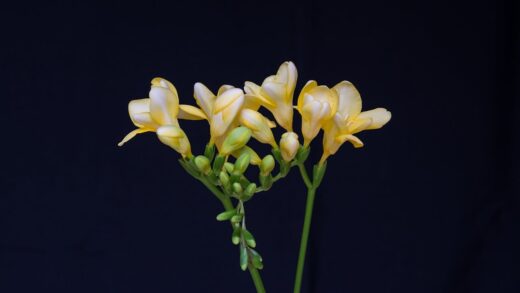
Successfully establishing Anatolian colchicum in your garden begins with the acquisition of high-quality, healthy corms at the correct time of year. These are typically offered for sale in late summer, which coincides perfectly with their ideal planting window, allowing them to establish roots before flowering in the autumn. When selecting corms, look for those that are firm and heavy for their size, avoiding any that feel soft, mushy, or appear to have mould or significant physical damage. A healthy corm is the foundation for a healthy plant, so it is well worth the effort to source them from a reputable nursery or bulb specialist.
Upon bringing the corms home, it is best to plant them as soon as possible to prevent them from drying out or attempting to sprout in storage. If immediate planting is not feasible, they should be kept in a cool, dark, and dry place with good air circulation, such as a paper bag in a garage or shed. It is critically important to remember that all parts of the colchicum are toxic due to the presence of colchicine, so always wear gloves when handling the corms. This simple precaution will protect your skin from potential irritation and ensure a safe planting process.
The appearance of the corm itself provides clues to its orientation for planting. A Colchicum cilicicum corm is somewhat irregular in shape but generally has a flattened base where old roots may be visible and a more pointed tip from which the new growth will emerge. One side of the corm is often flattened or concave, which is a distinctive feature. Proper handling and prompt planting of these unique structures are the first critical steps towards enjoying their spectacular autumn floral display for many years to come.
Do not be alarmed if you purchase corms in late summer and they already show signs of a small, pale tip emerging from the growing point. This is simply the flower bud beginning to develop, eager to grow, and it is a sign of a healthy, viable corm. Planting them at this stage is perfectly fine; just be extra careful during the planting process not to snap off this emerging bud. This eagerness to grow underscores the importance of planting them promptly upon receipt.
Optimal timing and soil preparation
The timing of planting is absolutely crucial for the Anatolian colchicum and its unusual growth cycle. The ideal planting window is a relatively short one, spanning from late summer to very early autumn, generally from August to September. Planting during this period allows the corm sufficient time to settle into the soil and establish a preliminary root system before it expends its energy on producing flowers. If planted too late, the corm may still flower, but it will do so with a weaker foundation, potentially impacting its long-term vigor and ability to produce foliage the following spring.
More articles on this topic
Before a single corm goes into the ground, comprehensive soil preparation is essential for creating an environment where the plant can thrive for decades. This species requires soil that is, above all, superbly well-drained, as the corms are highly prone to rotting if they sit in stagnant water, particularly during their summer dormancy. Begin by digging the planting area to a depth of at least 30 centimeters, breaking up any compacted soil and removing all weeds and large stones. This process of loosening the soil structure is vital for good root development and drainage.
After the initial digging, the next step is to amend the soil to improve its texture and fertility. For heavy clay soils, incorporating generous amounts of coarse grit or small gravel is non-negotiable to enhance drainage. At the same time, enriching the soil with well-rotted organic matter, such as garden compost or leaf mould, will provide a slow release of nutrients and help create a friable, humus-rich structure. The goal is to achieve a balanced medium that retains just enough moisture for the active growing season but allows excess water to percolate away freely.
Once the amendments are spread over the surface, they should be thoroughly mixed into the loosened soil, ensuring they are integrated evenly throughout the entire planting depth. Rake the surface level and gently firm it down to eliminate any large air pockets. Allowing the prepared bed to settle for a few days before planting can be beneficial, but it is not strictly necessary if you are short on time. This initial investment in soil preparation is the single most important factor in the long-term health and success of your colchicum planting.
The planting technique
With the site fully prepared, the physical act of planting the Anatolian colchicum corms is a straightforward process that hinges on getting the depth and spacing correct. A reliable rule of thumb for bulbous plants is to plant them at a depth of two to three times their own height, and this holds true for colchicum. For the average Colchicum cilicicum corm, this translates to a planting depth of approximately 15 centimeters, measured from the base of the corm to the soil surface. This depth helps to anchor the plant, protects the corm from temperature extremes, and ensures the flowers stand tall in the autumn.
More articles on this topic
Proper spacing between corms is equally important to prevent overcrowding and ensure each plant has adequate access to resources. Space the corms about 15 to 20 centimeters apart from each other. This may seem sparse at first, but it allows room for the broad spring foliage to develop without shading its neighbors and, more importantly, provides space for the corms to multiply and form a substantial clump over several years. Planting them too close together will necessitate division much sooner and can lead to reduced flowering due to competition.
When placing the corm in the planting hole, ensure it is oriented correctly with the pointed growing tip facing upwards and the flatter, wider base sitting firmly at the bottom of the hole. Backfill the hole with the prepared soil, being careful not to dislodge the corm, and gently firm the soil around it to eliminate air pockets. There is no need to add any fertilizer directly into the planting hole at this time, as a well-prepared bed will have all the nutrients the corm needs to get started, and concentrated fertilizers can burn the newly developing roots.
After all the corms are planted, the final step is to water the area thoroughly. This initial watering is not just to provide moisture, but it also serves the crucial purpose of settling the soil firmly around the corms, ensuring good contact and encouraging root development. Following this first watering, little to no additional irrigation is typically needed until the leaves emerge in spring, unless the autumn season is exceptionally dry. It is also highly advisable to mark the planting area with a label so you do not accidentally disturb the dormant corms later.
Propagation through division
The most common, reliable, and expedient method for propagating Anatolian colchicum is through the division of established clumps. This vegetative method ensures that the resulting plants are genetically identical to the parent, preserving the exact characteristics of the flower color and form. Over several years, a single corm will produce numerous offset corms, gradually forming a dense and impressive cluster. Division is simply the process of separating these offsets to create new, independent plants, which also serves to rejuvenate the original clump.
The timing for division is critical and must align with the plant’s life cycle. This task should only be performed during the summer dormancy period, from roughly late June to August, after the spring foliage has completely yellowed and withered away. Attempting to divide the clump at any other time, such as when it is in flower or leaf, will severely disrupt its growth cycle and can cause significant stress or even death to the plant. The dormant period is a time of rest, making it the safest window to lift and handle the corms without causing harm.
To divide a clump, use a sturdy garden fork to carefully dig around and underneath the entire mass of corms. Insert the fork well away from the center of the clump to avoid accidentally spearing any corms, and gently lever the whole cluster out of the ground. Once lifted, you can shake and crumble the excess soil away to reveal the interconnected network of corms. The individual offsets can then be gently teased and broken off from the main parent corm; they often separate quite easily with a gentle twist.
Once separated, you have a collection of new corms ready for replanting. It is best to replant them immediately to prevent them from drying out. You can replant some of the larger, healthier corms back into their original location after refreshing the soil with a bit of compost. The remaining corms can be used to start new colonies in other parts of the garden, following the same planting guidelines for depth and spacing. This simple process, repeated every five to seven years, is a sustainable way to increase your stock and ensure continued floral vigor.
Propagation from seed
Propagating Anatolian colchicum from seed is a fascinating and rewarding process, though one that requires a great deal of patience and a long-term perspective. Unlike division, which produces clones, growing from seed can result in slight variations in flower color and form, which can be exciting for the dedicated enthusiast. It is the primary way new cultivars are developed, but for the average gardener, it is a journey measured in years, not months. The first step is to collect the seed, which develops in a three-chambered capsule that emerges from the ground in late spring, nestled among the dying foliage.
Once the seed pod has turned brown and begun to split, the ripe seeds can be harvested. The seeds themselves are small, brown, and often have a sticky, fleshy appendage called an elaiosome, which attracts ants in the wild to aid in seed dispersal. For successful germination, these seeds require a period of cold, moist stratification to break their natural dormancy. The easiest way to achieve this is to sow the seeds in pots of a well-draining seed compost in the autumn and leave the pots outdoors in a sheltered spot over winter, exposed to the natural elements.
The pots should be filled with a gritty, sterile compost mix, and the seeds sown thinly on the surface before being covered with a fine layer of grit. This top dressing of grit helps to prevent the seeds from being washed away by rain, deters pests like slugs, and helps to suppress moss and algae growth. The pots must be kept consistently moist but not waterlogged throughout the winter and into the following spring. Germination is often erratic but typically occurs in the spring as temperatures begin to rise.
After germination, you will see tiny, grass-like leaves emerge. From this point, the real test of patience begins, as the seedlings must be carefully tended for several years before they form a corm large enough to produce a flower. It can take anywhere from four to seven years from sowing to see the first bloom. During this time, the young plants should be grown on in their pots, being fed and watered during their spring growth phase and allowed to go dormant in summer, just like the mature plants, until the corms are large enough to be planted out in the garden.