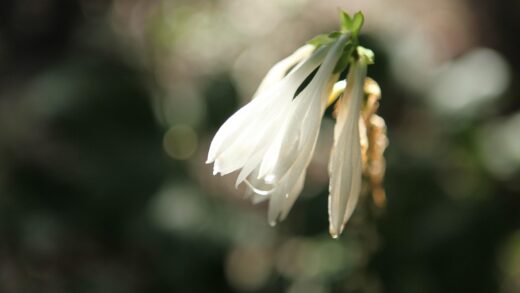
Pruning an amaryllis is a simple but precise task that, when done at the right time, plays a significant role in the plant’s health, energy management, and reblooming potential. Unlike many other plants, amaryllis do not require complex shaping or regular trimming. The pruning process is instead focused on the timely removal of spent flowers and, eventually, the entire flower stalk and foliage as the plant moves through its annual cycle. Correctly timing these cuts ensures that the plant’s energy is directed efficiently, first away from seed production and later into the bulb for storage, setting the stage for a spectacular floral display in the following season. Understanding what to cut and when is key to this process.
The first act of pruning occurs as soon as the individual flowers on the stalk begin to fade and wilt. It is important to remove these spent blooms promptly. This is done by simply snipping them off at the point where the flower meets the main stalk, using a clean pair of scissors or small pruning shears. The primary reason for this deadheading is to prevent the plant from expending its valuable energy on developing seeds. If left on the plant, a pollinated flower will begin to form a seed pod, a process that consumes a significant amount of the resources that should instead be used to nourish the bulb for future growth.
After all the flowers on a single stalk have faded and been removed, you are left with the thick, green flower stalk itself. A common mistake is to cut this stalk down immediately. However, the stalk, much like the leaves, is capable of photosynthesis and will continue to produce energy for the plant as long as it remains green. Therefore, you should leave the flower stalk intact until it begins to yellow and wither on its own. During this time, it will transport the remainder of its stored nutrients and energy back down into the bulb, further contributing to the replenishment process.
Once the flower stalk has turned yellow or brown and has started to shrivel, it has completed its work and can be safely removed. At this point, it can be cut back to about 2-5 centimeters above the neck of the bulb. Use a sharp, clean knife or pruners to make a clean cut. The remaining stump will eventually dry up and detach from the bulb. Removing the stalk only after it has naturally senesced ensures that the bulb has reaped the maximum possible benefit from it, a crucial step in preparing the plant for the next season’s blooms.
Managing the foliage
The foliage of the amaryllis is the engine of the plant, and its management is critical for the bulb’s long-term health. After the flowering period is over, the long, strap-like leaves will continue to grow and should be encouraged to do so. It is absolutely essential that you do not cut off the green leaves. These leaves are working hard through the spring and summer months to capture sunlight and produce the food that will be stored in the bulb, creating the energy reserves needed for the next year’s flowers. Removing the leaves prematurely is the most certain way to prevent the plant from reblooming.
Throughout the active growing season, the leaves should be kept clean and healthy. You can occasionally wipe them with a damp cloth to remove any dust, which can impede light absorption. As long as the leaves remain green, the plant is in its energy-storing phase. You should continue to provide it with optimal conditions, including maximum sunlight, regular watering, and consistent fertilization. The goal is to foster a lush and vigorous set of leaves, as the health of the foliage is directly proportional to the health and energy level of the bulb.
The only time it is appropriate to prune the leaves is if a particular leaf becomes damaged or shows signs of disease. In such a case, the affected leaf can be cut back to the base to prevent any potential spread of pathogens and to keep the plant looking tidy. Otherwise, the foliage should be left entirely intact. The number and size of the leaves are a good indicator of how well the bulb is being nourished; a healthy, well-fed amaryllis can produce a truly impressive canopy of deep green foliage.
The natural time for the leaves to be removed will come at the end of the growing season, in late summer or early autumn. As you begin to prepare the plant for dormancy by reducing water and stopping fertilizer, the leaves will naturally begin to yellow and wither, starting from the tips. This is the signal that the plant is reabsorbing the nutrients from the leaves back into the bulb. You must allow this process to complete naturally. Only when the leaves are fully yellow or brown and have completely flopped over should they be cut off, typically a few centimeters above the bulb, before moving the plant into its cool, dark storage location.
Cutting for floral arrangements
Amaryllis flowers are stunning and long-lasting, making them an excellent choice for cut flower arrangements. If you decide to cut a flower stalk to bring indoors, the timing of the cut can impact the longevity of the blooms. The ideal time to cut the stalk is when the first flower bud is just beginning to show color and is starting to open. At this stage, the other buds on the stalk will still be closed. Cutting the stalk at this point allows you to enjoy the entire flowering sequence indoors in a vase.
To cut the stalk, use a very sharp, clean knife. Make a clean, straight cut across the base of the stalk, as low as possible without damaging the neck of the bulb or any emerging leaves. Immediately after cutting, place the stalk in a tall, sturdy vase filled with fresh, cool water. The hollow stem of the amaryllis can sometimes trap air, which can prevent water uptake. Some florists recommend turning the stalk upside down, filling the hollow stem with water, and plugging the end with a cotton ball before placing it in the vase.
To maximize the life of the cut flowers, it is important to provide proper care. Re-cut the bottom of the stem by a centimeter or two every few days and change the water in the vase daily or every other day. Using a floral preservative in the water can also help to nourish the flowers and keep the water clean, prolonging their freshness. Keep the vase out of direct sunlight and away from heat sources, as a cooler environment will help the blooms last significantly longer.
Cutting the flower stalk for an arrangement will not harm the bulb, provided you continue to care for the plant itself. The leaves must be allowed to grow and develop fully after the flower stalk has been removed. The plant will still need to go through its complete foliage growth and dormancy cycle to be able to bloom again the following year. So, while you enjoy the beautiful flowers in a vase, remember to place the potted base of the plant in the sunniest spot possible to begin its vital energy replenishment phase.
Pruning roots during repotting
Root pruning is another aspect of cutting back an amaryllis, but it is a task that should only be undertaken when you are repotting the bulb, typically every two to three years. The ideal time for repotting and root pruning is at the end of the plant’s dormancy period, just before you are ready to wake it up for a new growing season. At this time, the plant is dormant, and any stress from the pruning will be minimal.
When you remove the bulb from its old pot, gently shake off the excess soil to expose the root system. You will likely see a dense network of roots. Healthy amaryllis roots are fleshy, firm, and whitish in color. First, inspect the roots for any that are dead, damaged, or diseased. These will typically be brown or black, mushy, and may break apart easily. Using a pair of clean, sterilized pruning shears or scissors, carefully trim away all of this unhealthy root material. This sanitation helps to prevent rot from spreading to the healthy parts of the root system.
After removing the dead roots, you can also trim the healthy roots if they are excessively long or densely packed. Trimming the roots by about a third of their length can help to encourage the growth of new, more vigorous feeder roots once the plant is repotted. This is not strictly necessary, and some growers prefer to disturb the healthy roots as little as possible. However, a light trim can be beneficial, especially if the plant was severely pot-bound. Always make clean cuts to minimize damage to the root tissue.
After pruning the roots, the bulb is ready to be placed in its new pot with fresh, well-draining soil. Pot the bulb at the correct depth, with the top third of the bulb remaining above the soil line. The fresh soil and the pruned root system will encourage the plant to establish itself quickly as it breaks dormancy. This periodic root maintenance is an important part of the long-term care of a container-grown amaryllis, contributing to its overall health and vigor.
Post-pruning care
After any pruning activity, it is important to provide the plant with the appropriate care for its current stage in the life cycle. For instance, after deadheading the spent flowers, the plant is entering its most critical energy-storing phase. This is the time to increase light exposure and begin a regular fertilization schedule to support the growth of the foliage. The focus of your care should be entirely on nourishing the leaves and, by extension, the bulb.
When you cut back the yellowed foliage at the start of the dormancy period, the plant’s needs change completely. At this point, all watering and feeding must cease. The pruned plant, now just a bulb in a pot of soil, should be moved immediately to its designated cool, dark, and dry location for its winter rest. The pruning cut signals the final transition into a period of complete inactivity, and the environmental conditions must support this state of dormancy.
If you have performed root pruning during repotting, the post-pruning care involves the careful reawakening of the plant. After potting the bulb in fresh soil, give it one thorough watering and then place it in a warm, bright location. Resist the urge to water it again until new growth is clearly visible. The pruned roots are more susceptible to rot in overly moist soil before they have begun to actively grow and absorb water. Patience at this stage is crucial for a successful start to the new growing season.
In all cases, using clean and sharp tools for any cutting is a vital aspect of post-pruning care, as it is a preventative measure. Clean cuts heal more quickly and are less likely to become entry points for fungal or bacterial diseases. Sterilizing your pruning shears or knife with rubbing alcohol before and after use is a simple habit that can prevent a host of potential problems, ensuring your amaryllis remains healthy and resilient after each pruning task.