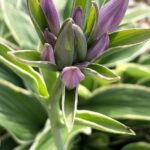
Successfully establishing peach-leaved bellflowers in your garden begins with thoughtful planting and an understanding of their preferred methods of propagation. This beautiful perennial, known for its tall, graceful spires of bell-shaped flowers, is a fantastic addition to borders and cottage-style gardens, and getting it off to the right start is paramount for its long-term health and performance. The process of planting involves more than just digging a hole; it requires careful consideration of timing, location, soil preparation, and spacing to create an environment where the plant can truly thrive. Similarly, understanding how to propagate this species, whether through seed, division, or cuttings, allows you to easily increase your stock and perpetuate its presence in your garden landscape for years to come.
When planting a new peach-leaved bellflower, whether it is a small plant purchased from a nursery or a division from an existing clump, timing is a key factor. The ideal times for planting are in the spring, after the danger of the last frost has passed, or in the early autumn. Spring planting allows the plant the entire growing season to establish a robust root system before winter, while autumn planting in cooler climates gives it a head start for the following spring. Whichever season you choose, ensure the plant is well-watered both before and after being placed in its new home to minimise transplant shock.
Propagation is an exciting aspect of gardening that allows you to create new plants for free, and Campanula persicifolia is quite amenable to several methods. The most common and straightforward method for established plants is division, which also serves to rejuvenate older clumps. For those with patience, growing from seed can be a rewarding experience, allowing you to produce a large number of plants, though you must be aware that cultivars may not come true to type from seed. Basal cuttings, taken in the spring, offer another reliable method for creating genetically identical new plants.
Each method of propagation has its own nuances and requirements for success. From the fine, dust-like seeds that require light for germination to the careful separation of crowns during division, attention to detail is crucial. By mastering these techniques, you not only ensure the continuation of your favourite bellflower varieties but also engage in a deeper, more hands-on relationship with your garden. This knowledge transforms you from a simple plant keeper to a true cultivator, capable of shaping and expanding your garden’s floral tapestry.
Optimal planting times and location
The success of a newly planted peach-leaved bellflower is heavily influenced by when and where it is planted. The two primary windows for planting are in the spring and early autumn. Planting in the spring, after the soil has warmed and the risk of hard frost is over, gives the plant a full season to develop its root system and acclimate to its new environment before facing the rigours of winter. This is often the preferred time, especially in regions with harsh winters. Conversely, early autumn planting, about four to six weeks before the first expected frost, can also be very successful. The soil is still warm, which encourages root growth, and the cooler air temperatures put less stress on the plant’s foliage.
More articles on this topic
The choice of location is just as critical as the timing. Peach-leaved bellflowers flourish in sites that offer full sun to partial shade. In cooler northern climates, a position in full sun is often ideal, promoting strong stems and prolific flowering. However, in hotter southern regions, a location that provides some afternoon shade is highly beneficial, as it protects the plant from the most intense heat of the day, which can cause stress and scorching. Good air circulation is another key consideration, as it helps to keep the foliage dry and minimizes the risk of fungal diseases like powdery mildew.
When preparing the planting site, consider the plant’s mature size. Campanula persicifolia typically forms a clump that spreads to about one to two feet wide, with flower spikes reaching two to three feet in height. To ensure good air circulation and to prevent overcrowding, space individual plants about 12 to 18 inches apart. This spacing allows each plant enough room to grow to its full potential without competing excessively with its neighbours for light, water, and nutrients.
Before digging the planting hole, it is wise to prepare the entire bed. Loosen the soil to a depth of at least 12 inches and incorporate a generous amount of organic matter, such as compost or well-rotted manure. This improves the soil’s structure, fertility, and drainage, creating the ideal foundation for a healthy plant. This upfront investment in site preparation will pay off immensely in the plant’s long-term health and flowering capacity.
The process of planting
Once you have selected the ideal time and location, the physical act of planting your peach-leaved bellflower is straightforward. If you are planting a container-grown plant from a nursery, begin by watering it thoroughly in its pot about an hour before you plan to plant it. This ensures the root ball is well-hydrated and helps it slide out of the container more easily, reducing stress on the plant. Dig a planting hole that is approximately twice as wide as the plant’s container and just as deep. The extra width allows the roots to spread out easily into the surrounding loosened soil.
More articles on this topic
Gently remove the plant from its container by turning it upside down and tapping the bottom, while supporting the base of the plant with your other hand. Inspect the root ball. If the roots are tightly coiled or circling the bottom of the pot (a condition known as being root-bound), it is important to gently tease them apart with your fingers or make a few shallow vertical cuts with a clean knife. This encourages the roots to grow outwards into the new soil rather than continuing to circle, which can inhibit the plant’s establishment.
Place the plant in the center of the hole, ensuring that the top of the root ball is level with the surrounding soil surface. Planting too deeply can lead to crown rot, while planting too high can cause the roots to dry out. Once you are satisfied with the depth, begin backfilling the hole with the amended soil you excavated. Gently firm the soil around the root ball with your hands to eliminate any large air pockets.
After the hole is filled, create a shallow basin or “moat” of soil around the base of the plant. This will help to direct water to the root zone and prevent runoff. Water the newly planted bellflower thoroughly and deeply, allowing the water to soak in and settle the soil. This initial watering is crucial for establishing good contact between the roots and the soil. Applying a two-inch layer of organic mulch, such as shredded bark or compost, around the plant (but not touching the stem) will help to conserve moisture and suppress weeds.
Propagation through division
Division is the simplest and most reliable method for propagating peach-leaved bellflowers, and it also serves the important purpose of maintaining the health and vigour of established clumps. This process is best carried out every three to four years when you notice the centre of the plant becoming less productive or the flowering diminishing. The ideal times for division are in early spring as new growth appears or in early autumn after the flowering period has finished. These times allow the new divisions to establish themselves in moderate temperatures.
To begin, use a sturdy garden fork to carefully lift the entire clump from the ground. Insert the fork a few inches away from the edge of the plant and work your way around it, gently prying upwards to loosen the root ball. Once lifted, shake off the loose soil to get a clearer view of the root system and the individual crowns. This will help you identify the best places to make your divisions. The goal is to separate the clump into smaller, viable sections.
For smaller clumps, you may be able to gently pull the sections apart with your hands. For larger, more established clumps, you will likely need to use a sharp, clean spade, a garden knife, or two garden forks inserted back-to-back in the centre of the clump to pry it apart. Each new section should have a healthy mass of roots and several strong shoots or growing points. It is generally best to discard the old, woody central portion of the original clump and replant the more vigorous outer sections.
Once divided, the sections should be replanted immediately to prevent the roots from drying out. Plant them at the same depth they were growing before, in a well-prepared bed. Space them appropriately to allow for future growth. After replanting, water the divisions thoroughly to settle the soil and provide essential moisture for the roots to begin their recovery and growth. Keep the soil consistently moist for the next few weeks until you see signs of new growth, indicating that the divisions have successfully established themselves.
Propagation from seeds
Growing peach-leaved bellflowers from seed can be a very rewarding process, although it requires more patience than division. You can either collect seeds from your own plants after the flowers have faded and the seed pods have dried and turned brown, or you can purchase seeds from a reputable supplier. It is important to note that if you collect seeds from a specific cultivar, the resulting plants may not be identical to the parent, as they may have cross-pollinated with other varieties.
Campanula persicifolia seeds are very fine and require light to germinate, so they should not be buried deeply in the soil. The seeds can be sown indoors in late winter or early spring, about six to eight weeks before the last expected frost date. Use a sterile seed-starting mix in trays or small pots. Lightly press the seeds onto the surface of the moist mix, but do not cover them with soil. A very light dusting of vermiculite can help to maintain humidity without blocking light.
Cover the seed tray with a clear plastic dome or plastic wrap to create a humid environment, which aids germination. Place the tray in a warm location with plenty of bright, indirect light. A temperature of around 18-21°C (65-70°F) is ideal. Germination can be slow and erratic, taking anywhere from two to four weeks. During this time, it is crucial to keep the soil consistently moist but not waterlogged, using a fine mist sprayer to avoid dislodging the tiny seeds.
Once the seedlings have emerged and developed their first true leaves, the cover can be removed to improve air circulation. When the seedlings are large enough to handle, they can be carefully transplanted into individual pots to grow on. Before planting them out in the garden, they must be hardened off. This is the process of gradually acclimatising the young plants to outdoor conditions over a week or two, by placing them outside for increasing lengths of time each day. Once hardened off, they can be planted in their final garden positions after the last frost.


