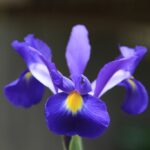
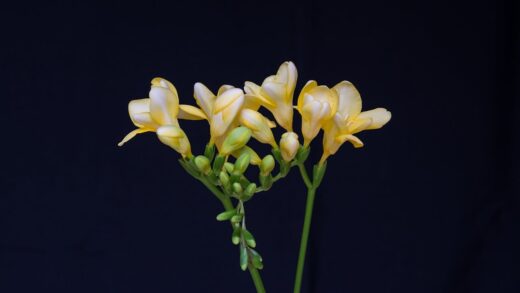
Successfully establishing a vibrant display of Dutch irises begins with a solid understanding of the correct planting techniques and the methods used for their propagation. These elegant flowers, prized for their intricate beauty and long vase life, are grown from bulbs that require specific conditions to thrive and multiply. Proper site selection, soil preparation, and planting depth are the foundational pillars upon which a healthy and floriferous iris patch is built. By mastering these initial steps, any gardener can ensure their bulbs have the best possible start, leading to a spectacular show of color in the spring and early summer.
The quality of the bulbs you begin with will have a direct and significant impact on the outcome of your planting efforts. When selecting Dutch iris bulbs, it is crucial to choose ones that are firm, plump, and free from any signs of damage, mold, or disease. Avoid bulbs that feel soft or spongy, as this is often an indication of rot, and steer clear of any that appear desiccated or overly dry. A healthy bulb should have a noticeable weight for its size, which suggests it contains ample stored energy to fuel its initial growth and produce a strong flower stalk.
The size of the bulb is another important factor to consider, as larger bulbs generally produce more robust plants and larger, more numerous flowers. While smaller bulbs will still grow, they may take an extra season to reach their full flowering potential. Inspect the outer skin, or tunic, of the bulb; it should be relatively intact, though some minor flaking is normal. By taking the time to carefully select high-quality, healthy bulbs, you are making a critical investment in the future success and visual appeal of your garden display.
Before proceeding with planting, it is also a good practice to handle the bulbs with care to avoid bruising or causing any physical damage. While they may seem resilient, dropping them or handling them roughly can create wounds that provide an entry point for soil-borne pathogens. By ensuring you start with the best possible plant material, you set the stage for vigorous growth and a truly rewarding flowering season, minimizing the potential for disappointment and maximizing the chances of a breathtaking floral show.
The optimal planting process
The process of planting Dutch iris bulbs is straightforward, but attention to detail is key to ensuring they establish well and perform to their full potential. The first step, after selecting a suitable location with full sun and well-drained soil, is to prepare the planting holes. A common and efficient tool for this task is a bulb planter, which removes a neat core of soil, but a hand trowel works just as effectively. The holes should be dug to a depth of approximately 4 to 5 inches, creating a space deep enough to protect the bulb while allowing the shoot to emerge without difficulty.
At the bottom of each planting hole, it is highly beneficial to add a source of nutrients that will support the bulb’s development. A small handful of bone meal or a specially formulated granular bulb fertilizer is an excellent choice. These fertilizers are typically high in phosphorus, which is essential for promoting strong and healthy root growth. Mix the fertilizer lightly with the soil at the base of the hole to ensure it is readily available to the new roots as they begin to grow, but avoid direct, concentrated contact with the base of the bulb itself.
When placing the bulb into the prepared hole, its orientation is critically important for proper growth. The Dutch iris bulb has a distinct pointed top and a flatter, wider base where the roots will emerge. The bulb must be positioned with the pointed end facing upwards towards the sky. Planting it upside down or on its side will force the emerging shoot to expend a great deal of energy reorienting itself to grow towards the surface, which can result in a weaker plant and may even prevent it from flowering in its first year.
Once the bulbs are correctly positioned and spaced about 3 to 4 inches apart, the final step is to backfill the holes with the excavated soil. Break up any large clumps of soil to ensure good contact with the bulb and eliminate any large air pockets. After filling the holes, gently firm down the soil with your hands to secure the bulbs in place. A thorough watering immediately after planting is highly recommended, as it helps to settle the soil and provides the initial moisture needed to activate the bulb and encourage root development before winter arrives.
Timing and seasonal considerations
The timing of when you plant your Dutch iris bulbs is one of the most critical factors for success and is largely dictated by your climate zone. For the vast majority of regions, the ideal planting time is in the autumn, typically from September to November, after the intense heat of summer has subsided but before the ground freezes solid. Planting in the fall allows the bulbs sufficient time to develop a strong and healthy root system throughout the winter months. This established root network is essential for the plant to absorb water and nutrients efficiently once spring arrives, fueling the rapid growth of foliage and flowers.
Planting too early in the autumn, when soil temperatures are still warm, can sometimes trigger premature top growth. This new, tender foliage is then highly susceptible to being damaged or killed by the first hard frosts of winter, which wastes the bulb’s valuable energy reserves. Conversely, planting too late in the season, when the ground is already cold or beginning to freeze, may not give the bulbs enough time to establish any roots at all. This can leave them more vulnerable to winter rot and may result in a delayed or diminished performance in the spring.
In very warm climates where winter temperatures are mild and the ground does not freeze, the planting window can be extended later into the autumn and even into the early winter months. In these regions, the bulbs may not require a significant cold period to bloom, although some chilling can still be beneficial for vigorous flowering. Gardeners in these warmer zones should aim to plant when soil temperatures have consistently dropped below 60 degrees Fahrenheit (15°C), which signals to the bulb that it is time to begin its rooting process.
While autumn is the overwhelmingly recommended planting season, it is sometimes possible to plant Dutch iris bulbs in the very early spring, especially if they have been properly chilled or “pre-forced.” However, this is generally less ideal, and the results can be inconsistent. Spring-planted bulbs may produce smaller flowers or only foliage in their first year. For the most reliable and spectacular display of blooms, adhering to the autumn planting schedule gives the Dutch iris the best possible advantage to follow its natural growth cycle.
Propagation through division
Propagation is the process of creating new plants, and for Dutch irises, the most common and effective method for gardeners is through division. This technique involves separating a mature clump of bulbs, which naturally multiplies over time by producing smaller offset bulbs. After several years in the same location, a single planted bulb will have developed into a dense cluster. This crowding can lead to increased competition for resources like water, nutrients, and light, which often results in a gradual decline in the size and number of flowers produced.
The ideal time to divide Dutch iris clumps is during their dormant period in the late summer or early autumn, after the foliage has completely withered and died back. At this stage, the bulbs have finished storing energy for the next season and are in a resting state, making them less susceptible to the stress of being disturbed. Attempting to divide them while they are in active growth or flowering can shock the plants and severely impact their performance. Waiting for the foliage to fully yellow is the crucial signal that the bulbs are ready for division.
To divide a clump, begin by carefully digging around the entire perimeter of the plant cluster with a garden fork or spade, taking care to go deep enough to get underneath the bulbs without spearing them. Once the soil is loosened, gently lift the entire clump out of the ground. Carefully crumble away the excess soil with your hands to expose the individual bulbs. You will notice that the bulbs can be easily separated from the main mother bulb; they often break apart with a gentle twist or pull, but a clean, sharp knife can be used for any that are more stubbornly attached.
After separating the bulbs, it is important to inspect them and select only the healthiest and largest ones for replanting. Discard any bulbs that show signs of rot, disease, or damage. The newly divided bulbs can then be replanted immediately in a new, well-prepared location or in the same bed after amending the soil with fresh compost. This process of division not only provides you with a wealth of new plants to expand your garden but also serves to reinvigorate the original clump, ensuring a robust display of flowers for years to come.
Growing from offsets
A primary way that Dutch irises propagate naturally is through the production of offsets, which are small, new bulbs that form around the base of the main, or “mother,” bulb. These offsets are essentially clones of the parent plant and represent the most reliable way for a gardener to increase their stock of a particular variety. Over the course of a growing season, a healthy mother bulb will use its stored energy to produce one or more of these smaller bulbs. Allowing these offsets to develop is key to the long-term proliferation of an iris clump in the garden.
When you lift a clump of irises for division, you will find these offsets attached to the parent bulb. They can range in size from very small, pea-sized bulblets to more substantially sized bulbs that are nearly ready to flower on their own. The larger offsets can be separated and planted immediately, and they will often produce a flower in their very first season. These should be treated just like a mature bulb, planted at the same 4 to 5-inch depth and given the same spacing to allow them room to grow.
The smaller offsets, often referred to as bulblets, will require a bit more patience as they need time to grow to a mature, flowering size. It is often beneficial to plant these smaller bulblets in a dedicated nursery bed or a less prominent area of the garden where they can develop without the pressure of performing in a main display. Plant them at a slightly shallower depth, perhaps around 2 to 3 inches deep, in well-prepared, fertile soil. This dedicated space allows you to care for them easily until they are large enough to be moved to their permanent location.
Over the next one to two years, these developing offsets will focus their energy on producing foliage and increasing the size of the bulb. During this time, it is important to provide them with adequate water and a balanced, low-nitrogen fertilizer in the spring to support their growth. By nurturing these young offsets, you are effectively creating a sustainable supply of new Dutch iris plants, ensuring that your garden will be filled with their beautiful blooms for many seasons to come, all at no additional cost.
📷: Oleg Yunakov via Wikipedia CC BY-SA 4.0


