Embarking on the journey of planting and propagating basil is a rewarding endeavor that promises a season-long supply of this indispensable culinary herb. The process begins with understanding the two primary methods of starting new plants: from seed and from cuttings. Each technique has its own merits and specific requirements for success, but both ultimately lead to the same goal of a thriving, aromatic plant. Sowing from seed offers the satisfaction of nurturing a plant from its very beginning and provides access to a wider variety of cultivars. Propagation from cuttings, on the other hand, is a faster method that creates an exact clone of the parent plant, ensuring desirable traits like flavor and growth habit are perfectly replicated.
The decision of when and where to plant is paramount and is largely dictated by climate and temperature. Basil is a tender annual that is extremely sensitive to cold, so it’s critical to wait until all danger of frost has passed and the soil has warmed to at least 60°F (15°C) before planting outdoors. For many gardeners, this means starting seeds indoors six to eight weeks before the last expected frost date. This head start allows the seedlings to mature into sturdy young plants that are ready for transplanting once the weather becomes reliably warm. This indoor sowing method significantly extends the growing season, leading to an earlier and more prolonged harvest.
Successful germination of basil seeds hinges on providing the right combination of warmth, moisture, and light. When starting seeds indoors, use a sterile seed-starting mix in small pots or trays to prevent disease. Sow the seeds very shallowly, only about a quarter of an inch deep, and press them gently into the soil surface, as they require some light to germinate effectively. It’s crucial to keep the soil consistently moist but not waterlogged; using a spray bottle to mist the surface is an excellent way to maintain moisture without dislodging the seeds. Placing the seed trays on a heat mat to maintain a soil temperature around 70°F (21°C) will significantly speed up and improve the germination rate.
Once the seedlings have emerged and developed their first set of true leaves (the second set of leaves to appear), they require ample light to grow strong and avoid becoming leggy. A south-facing windowsill can suffice, but for the best results, placing the seedlings under a fluorescent grow light for 12 to 16 hours a day is ideal. Before moving these young plants into the garden, they must be hardened off. This is a gradual acclimatization process over 7 to 10 days, where you expose the seedlings to outdoor conditions for progressively longer periods each day. This vital step prevents transplant shock, a condition that can stunt or even kill the tender plants when they are abruptly moved from a sheltered indoor environment to the harsher conditions outdoors.
Selecting the right variety
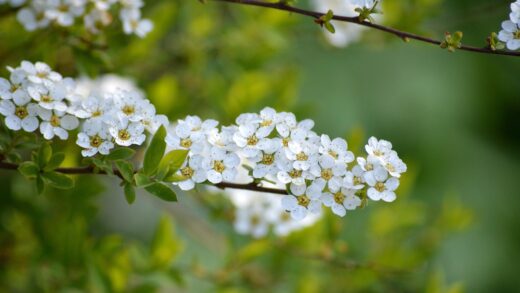
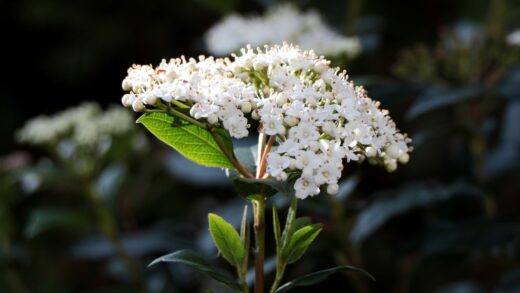
The world of basil extends far beyond the common Genovese type found in most grocery stores. Before planting, it’s worth exploring the diverse array of basil varieties available, each with its own unique flavor profile, appearance, and growth habit. For classic Italian dishes like pesto, Genovese or other large-leaf Italian basils are the gold standard due to their sweet, slightly spicy flavor. If you’re interested in Southeast Asian cuisine, Thai basil, with its sturdy leaves and distinct anise-clove flavor, is an essential choice. Other popular options include the citrusy lemon basil, the spicy cinnamon basil, and the visually striking purple-leaf varieties like ‘Dark Opal’.
More articles on this topic
Your intended culinary use should be a primary factor in your selection. For example, if you plan to make large batches of pesto, a variety like ‘Italian Large Leaf’ or ‘Napolitano’ would be an excellent choice due to their high yields and large, tender leaves. For use in salads or as a garnish, the smaller-leafed globe or bush basils, which grow in a compact, round shape, are both attractive and flavorful. For teas or more exotic dishes, experimenting with varieties like holy basil (tulsi) or African blue basil can add exciting new dimensions to your culinary repertoire. Taking the time to match the variety to its use ensures you will be happy with the final product.
Beyond flavor, consider the plant’s growth habit and suitability for your specific growing conditions. Some basil varieties are more compact and are better suited for container gardening, while others grow into large, vigorous bushes that require more space in a garden bed. For instance, spicy globe basil naturally forms a tidy, mounded shape that is perfect for pots or window boxes. In contrast, a variety like ‘Mammoth’ basil can grow quite large and will need more room to spread out. Reading the seed packet or plant description carefully will provide valuable information on the mature size and shape of the plant, helping you plan your garden layout effectively.
Finally, you might also consider a variety’s resistance to common basil diseases. In recent years, basil downy mildew has become a significant problem for many gardeners and commercial growers. In response, plant breeders have developed several new varieties that show a high degree of resistance to this devastating fungal disease. If downy mildew has been an issue in your garden in the past, seeking out these resistant cultivars, such as ‘Prospera’ or ‘Amazel’, can save you a great deal of frustration and ensure a much more successful and reliable harvest. This proactive approach to variety selection is a key strategy for integrated pest and disease management.
Propagation from cuttings
Propagating basil from cuttings is an incredibly simple and effective method for creating new plants, and it has the significant advantage of being much faster than starting from seed. This technique, also known as vegetative propagation, produces a new plant that is a genetic clone of the parent. This is particularly useful if you have a specific basil plant that you favor for its exceptional flavor, growth habit, or disease resistance. By taking a cutting, you can ensure that the new plant will have the exact same desirable characteristics. It’s also a great way to get a head start on the season or to create more plants from a single store-bought basil plant.
More articles on this topic
To take a cutting, select a healthy, vigorous stem from the parent plant that has not yet begun to flower. Using clean, sharp scissors or a knife, snip off a four-inch section of the stem, making your cut just below a leaf node (the point where leaves emerge from the stem). It is from this node area that the new roots will form. Carefully remove the leaves from the lower two-thirds of the cutting, leaving only two or three sets of leaves at the very top. Removing the lower leaves is crucial because any leaves left submerged in water would rot, potentially contaminating the water and preventing the cutting from rooting successfully.
The simplest method for rooting the cutting is to place it in a glass or jar of water. Submerge the bare part of the stem in the water, ensuring that the remaining leaves are well above the waterline. Place the jar in a location that receives bright, indirect light, but avoid direct sunlight, which can be too intense for the cutting before it has developed roots. Change the water every one to two days to keep it fresh and oxygenated, which helps to prevent bacterial growth. Within a week or two, you should begin to see small white roots emerging from the stem.
Once the new roots have grown to be at least one to two inches long, the cutting is ready to be transplanted into soil. Prepare a small pot with a good-quality, well-draining potting mix. Make a hole in the center of the mix with your finger or a pencil, and gently place the rooted cutting into the hole, being careful not to damage the delicate new roots. Backfill the soil around the stem and gently firm it down. Water the newly potted cutting thoroughly to settle the soil and provide immediate hydration. Keep the soil consistently moist for the first couple of weeks as the plant adapts to its new environment and its root system becomes more established in the soil.
Transplanting seedlings outdoors
The process of transplanting basil seedlings from their indoor starting trays to their final location in the garden is a critical transition that must be handled with care. The primary prerequisite for this move is appropriate weather; you must wait until the threat of frost has completely passed and nighttime temperatures are consistently staying above 50°F (10°C). Basil is extremely sensitive to cold, and exposing young, tender plants to chilly temperatures can severely stunt their growth or even kill them. Additionally, the soil temperature should have had a chance to warm up, as planting in cold soil will also inhibit root development and overall plant vigor.
Before the final move, the seedlings must undergo the hardening-off process. This is perhaps the most important step in ensuring a successful transplant. This procedure involves gradually acclimating the plants to the outdoor environment, including direct sunlight, wind, and temperature fluctuations. Start by placing the seedlings in a shady, protected spot outdoors for just an hour or two on the first day. Over the next seven to ten days, gradually increase the amount of time they spend outside and slowly introduce them to more direct sunlight. This gradual exposure allows the plant’s cellular structure to adapt, preventing the shock that would occur from an abrupt change in environment.
When you are ready to plant, choose a location that receives at least six to eight hours of direct sunlight per day and has well-drained, nutrient-rich soil. Prepare the garden bed by loosening the soil and incorporating some compost to give the plants a healthy start. Dig holes that are slightly larger than the root ball of your seedlings, spacing them approximately 10 to 12 inches apart. This spacing is important to allow for good air circulation between the mature plants, which helps to reduce the risk of fungal diseases. If you are planting in rows, space the rows about 18 inches apart.
To remove a seedling from its container, gently squeeze the sides of the pot to loosen the soil and then carefully tip it out, supporting the base of the plant with your hand. Avoid pulling on the stem, as this can cause damage. Place the entire root ball into the prepared hole, ensuring that the top of the root ball is level with the surrounding soil surface. Gently backfill the hole with soil, pressing it down lightly to eliminate any air pockets around the roots. Immediately after planting, water the seedlings thoroughly at their base to help settle the soil and reduce transplant stress.
Direct sowing into the garden
For gardeners in climates with long, warm growing seasons, direct sowing basil seeds into the garden is a straightforward and viable option that bypasses the need for indoor seed starting and transplanting. The key to success with this method is timing. You must wait until the soil has thoroughly warmed up in the spring, reaching a consistent temperature of at least 65°F (18°C), and all danger of frost has passed. Planting seeds in soil that is too cold will result in poor germination rates and can cause the seeds to rot before they have a chance to sprout. Patience is essential; it’s better to sow a little late than too early.
Preparing the seedbed is a crucial first step. Choose a site that receives full sun, as basil needs abundant light to thrive. Work the soil to a fine tilth, breaking up any clumps and removing weeds, rocks, and other debris. This creates a smooth, even surface for sowing. It is highly beneficial to amend the soil by working in a few inches of compost or other rich organic matter. This will not only provide essential nutrients for the young plants but will also improve the soil’s structure, ensuring it retains adequate moisture while still draining well, which is the ideal environment for basil roots.
When sowing the seeds, it’s important not to plant them too deep. Basil seeds are small and require some light to germinate, so they should be sown only about a quarter of an inch deep. A simple method is to make shallow furrows in the prepared bed, sprinkle the seeds thinly along the rows, and then lightly cover them with a fine layer of soil. After sowing, gently firm the soil down to ensure good seed-to-soil contact. This contact is vital for the seeds to absorb the moisture they need to begin the germination process.
After sowing, the seedbed must be kept consistently moist until the seedlings emerge, which typically takes between 7 and 14 days, depending on the soil temperature. Use a watering can with a fine rose or a gentle setting on a hose nozzle to water the area. A strong spray of water can easily wash the shallowly planted seeds away. The goal is to keep the soil surface damp but not saturated. Once the seedlings have developed a few sets of true leaves, they should be thinned to their final spacing of about 10 to 12 inches apart. This thinning process is critical to prevent overcrowding, which would lead to competition for resources and poor air circulation.