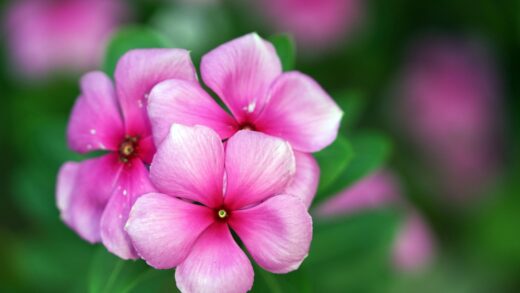
Amaryllis, with its stunning, trumpet-shaped flowers, is a popular choice for adding a splash of vibrant color indoors, especially during the winter months. Proper care is essential to ensure these magnificent bulbs produce their spectacular blooms year after year. Understanding the plant’s life cycle, from flowering to dormancy, is the cornerstone of successful cultivation. This involves providing the right conditions at each stage, including appropriate light, water, and temperature, to encourage robust growth and prolific flowering. With attentive care, an amaryllis bulb can thrive for decades, becoming a cherished part of any plant collection.
The journey begins with selecting a healthy, firm bulb, which is the powerhouse of the plant. A larger bulb typically indicates more flower stalks and a greater number of blooms. Once potted, the initial phase of care focuses on awakening the bulb from its dormancy. This requires placing it in a warm location with bright, indirect light to stimulate the emergence of the flower stalk. During this period, watering should be minimal, just enough to keep the soil slightly moist, as overwatering can lead to bulb rot before active growth begins. Patience is key, as it can take several weeks for the first signs of life to appear.
As the flower stalk grows, the plant’s needs evolve. It is crucial to rotate the pot regularly to prevent the stalk from leaning towards the light source, ensuring it grows straight and strong. Once the buds begin to show color, moving the plant to a slightly cooler location, away from direct sunlight, can significantly prolong the life of the beautiful blooms. The flowering period is the culmination of months of energy storage, and providing optimal conditions during this display ensures the plant remains healthy for the next cycle. Continue to water sparingly, checking the soil moisture level to avoid waterlogged conditions.
After the flowers have faded, the focus of care shifts towards nourishing the bulb for the following season’s display. This is a critical period of growth and energy replenishment. The faded flowers should be snipped off at the top of the stalk to prevent the plant from expending energy on seed production. However, the stalk itself should be left to wither naturally, as it will continue to photosynthesize and transfer energy back into the bulb. It is during this post-blooming phase that the long, strap-like leaves will fully develop, playing a vital role in regenerating the bulb.
The growth cycle
Understanding the annual growth cycle of the amaryllis is fundamental to its long-term health and reblooming potential. The cycle can be divided into distinct phases: flowering, foliage growth, dormancy, and reawakening. Each phase has specific requirements for light, water, and nutrients that must be met to prepare the bulb for the next spectacular show. Successfully navigating these stages ensures the bulb has sufficient resources to produce impressive blooms repeatedly. This cyclical nature is what makes the amaryllis such a rewarding plant to cultivate.
More articles on this topic
The foliage growth phase, which occurs after flowering, is arguably the most important for the bulb’s future. During this time, the leaves work to convert sunlight into energy through photosynthesis, which is then stored in the bulb. To support this, the plant should be moved to a location that receives several hours of direct sunlight each day. Regular watering and the application of a balanced liquid fertilizer every two to four weeks are essential to promote vigorous leaf growth. Healthy, green leaves are a clear indicator that the bulb is effectively replenishing its energy reserves.
As late summer or early autumn approaches, the plant will naturally begin to enter its dormancy period. The leaves will start to yellow and wither, signaling that it is time to reduce watering and cease fertilization. This resting phase is a necessary part of the cycle, allowing the bulb to prepare for the next flowering period. The plant should be moved to a cool, dark, and dry place, such as a basement or a closet, where temperatures remain between 10-13°C. This mimics the natural environmental cues the plant would experience in its native habitat.
After a dormancy period of at least eight to ten weeks, the bulb is ready to be reawakened to start the cycle anew. The first sign that the bulb is ready to grow again is often the tip of a new flower stalk emerging from the neck of the bulb. At this point, the old soil can be replaced with fresh potting mix, taking care not to damage the roots. The pot should be moved back into a warm, brightly lit area, and the watering process should be restarted, initiating the growth of another magnificent display of flowers.
Light and temperature requirements
Amaryllis thrives in bright, indirect light, especially when the flower stalk is first emerging. A south-facing window with a sheer curtain or an east-facing window that receives gentle morning sun is an ideal location. Direct, intense sunlight can scorch the leaves and cause the flowers to fade prematurely. Consistent light exposure is crucial for even growth; therefore, rotating the pot every few days is highly recommended. This simple practice prevents the tall, heavy flower stalks from leaning excessively towards the light source and potentially toppling over.
More articles on this topic
Once the plant is in full bloom, its light and temperature preferences shift slightly if the goal is to prolong the floral display. Moving the amaryllis to a cooler room with less direct light can extend the life of the flowers by several days, or even weeks. An ideal temperature during the blooming period is around 18-20°C. Avoiding placement near heat sources like radiators or vents is also important, as the dry, hot air can cause the flowers to wilt and dry out quickly. This adjustment in environment allows for a longer appreciation of the stunning blooms.
Following the flowering period, the plant’s energy needs increase significantly as it focuses on replenishing the bulb. During this foliage growth stage, the amaryllis requires much more light. It should be moved to the sunniest location available, such as a south-facing window where it can receive at least six hours of direct sunlight each day. This abundance of light fuels the process of photosynthesis, which is essential for storing enough energy to produce flowers the following year. Insufficient light during this phase is one of the most common reasons for a failure to rebloom.
The dormancy period requires a complete change in conditions. The plant needs a cool, dark, and dry environment to rest. Temperatures between 10-13°C are optimal for this resting phase. A garage, basement, or even a cool closet can serve as a suitable location, provided it is dark and the bulb is protected from freezing temperatures. This cool-down period is not merely a suggestion but a biological necessity for the bulb to initiate the development of new flower buds. Without this proper rest, the bulb may only produce leaves in the subsequent growth cycle.
Watering and feeding schedule
Proper watering is a delicate balance when caring for amaryllis. Overwatering is one of the most common mistakes and can quickly lead to bulb and root rot, a condition from which the plant may not recover. It is best to water the plant thoroughly only when the top 5 centimeters of the soil feel dry to the touch. When watering, apply water directly to the soil surface, avoiding the neck of the bulb where water can collect and cause rot. The pot must have drainage holes to allow any excess water to escape freely.
During the initial growth phase, when the flower stalk is emerging but before leaves have developed, the plant’s water needs are minimal. It is crucial to be particularly cautious with watering during this time. A small amount of water every week or so is typically sufficient to encourage growth without saturating the soil. As the stalk and leaves begin to grow more actively, the watering frequency can be gradually increased. The plant will transpire more as its leaf surface area expands, thus requiring more moisture from the soil.
The feeding schedule for amaryllis is directly tied to its growth cycle. Fertilization should not begin until the first leaves have appeared and are actively growing, which is typically after the main flowering period. During the vigorous leaf growth phase, the plant benefits from regular feeding to help the bulb store energy. A balanced, water-soluble fertilizer, such as one with a 10-10-10 or 20-20-20 formulation, should be applied every two to four weeks, following the manufacturer’s instructions for dilution. This regular nutrient supply is vital for the development of a large, healthy bulb.
As the plant prepares for dormancy in late summer, both watering and feeding should be gradually tapered off. This signals to the bulb that it is time to stop its active growth and begin its resting phase. Once the leaves have completely yellowed and withered, all watering and fertilizing should cease for the duration of the dormancy period. The soil should be allowed to dry out completely. This dry rest is critical for the health of the bulb and for initiating the hormonal changes required for future flower production. Feeding should only resume once the bulb is brought out of dormancy and new growth appears.
Repotting and soil management
Repotting an amaryllis is not an annual necessity; in fact, they often bloom best when they are slightly pot-bound. Generally, repotting is only required every two to three years or when the bulb has grown so large that it is pressing against the sides of the pot. The ideal time to repot is just before the end of the dormancy period, as the bulb is preparing to start its new growth cycle. This allows the root system to establish itself in the new soil before the energy-intensive process of producing a flower stalk begins.
When choosing a pot, select one that is only slightly larger than the bulb itself. A pot that is 2-5 centimeters wider than the diameter of the bulb is ideal. This snug fit helps to prevent the soil from staying overly wet, which can lead to rot. The pot must have at least one drainage hole at the bottom. The type of material is a matter of preference, but a heavier ceramic or clay pot can provide stability and prevent the top-heavy plant from tipping over when it is in full, glorious bloom.
The choice of soil is critical for the health of the amaryllis. The potting medium must be well-draining to prevent water from accumulating around the bulb and roots. A high-quality, sterile potting mix designed for houseplants is a good starting point. To improve drainage further, this can be amended with materials such as perlite, sand, or fine grit. A suitable mixture might consist of two parts potting soil, one part perlite, and one part well-rotted compost for added nutrients. This creates a light, airy medium that holds sufficient moisture without becoming waterlogged.
During the repotting process, handle the bulb and its roots with care. Gently remove the old, loose soil from around the roots, but avoid disturbing the root ball excessively. Inspect the bulb for any signs of disease or rot, and trim away any dead or mushy roots with a clean, sharp knife. When placing the bulb in the new pot, ensure that the top one-third to one-half of the bulb remains exposed above the soil line. Planting the bulb too deeply is a common error that can inhibit flowering and promote rot at the neck of the bulb.
Post-bloom care and encouraging reblooming
The period immediately following the fading of the flowers is critical for ensuring the amaryllis will bloom again the following year. Once the last flower has withered, it should be cut off to prevent the plant from diverting energy into producing seeds. The flower stalk, however, should be allowed to remain on the plant. It will continue to photosynthesize and contribute energy back to the bulb until it turns yellow and starts to shrivel, at which point it can be cut back to a few centimeters above the bulb.
This post-bloom period is when the focus shifts entirely to vegetative growth. The plant should be treated like any other leafy houseplant, with the primary goal being to foster strong, healthy foliage. Place the plant in the sunniest location possible to maximize photosynthesis. Water regularly, allowing the soil to dry slightly between waterings, and begin a consistent fertilization program. This is the time when the bulb acts as a storage organ, accumulating all the energy it will need to produce the next season’s magnificent flowers.
As the days shorten and autumn approaches, the leaves will naturally begin to senesce, turning yellow and dying back. This is the signal to prepare the plant for its necessary dormancy period. Gradually reduce watering and stop fertilizing completely. This process mimics the end of the growing season in the plant’s native environment and is a crucial trigger for initiating the development of future flower buds within the bulb. Rushing this process or cutting the leaves off while they are still green can significantly reduce the chances of reblooming.
To guarantee reblooming, a proper dormancy period is non-negotiable. Once the foliage has completely died back, move the pot to a location that is cool, dark, and dry, with temperatures ideally between 10-13°C. The bulb needs to rest in these conditions for a minimum of eight to twelve weeks. After this chilling period, the pot can be brought back into a warm, bright location. Repot if necessary, resume watering sparingly, and patiently wait for the tip of a new flower stalk to emerge, heralding the start of another spectacular flowering season.