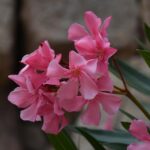
The summer’s great favorite, the oleander, is one of the most beloved Mediterranean plants. While its care brings joy to many, the question of wintering inevitably arises each year as the cold months approach. The oleander cannot withstand frost, making it essential to provide suitable conditions for it during the winter. Otherwise, we won’t be able to enjoy its blooms in the next season. Successful wintering is crucial for the plant’s health and future flowering, and it requires considering several factors that we will now discuss in detail. It is most important to be aware of when and how to prepare the plant for winter and which room is most suitable for it during the cold months.
Preparing for wintering
The first and most important step in wintering the oleander is proper preparation, which begins in the early autumn months. First, it’s worth thoroughly inspecting the plant and removing any dry, damaged, or dead parts, as well as any overcrowded shoots. This not only improves the plant’s aesthetic appearance but also reduces the risk of pests and diseases, as dense foliage can provide an ideal hiding place for unwanted creatures. It is very important that this pruning is not done after the plant is moved indoors for winter but while it is still outdoors, allowing the cut surfaces to heal properly.
During the pre-winter pruning, it is also wise to ensure that the pruning shears are disinfected to avoid transferring pathogens from other plants. Drastic cutting back is not recommended at this time, as it could jeopardize next year’s flowering. Only remove the absolutely necessary parts and leave some of the shoots so that the plant has enough energy for the next growing season. It’s best to do the pruning gradually over several weeks before moving the plant completely into its winter quarters.
Thorough preparation of the oleander also includes pest control. Before bringing it indoors, carefully inspect the underside of the leaves and the base of the shoots, as scale insects, aphids, or spider mites often settle here. If you spot any pests, it’s a good idea to treat the plant with a biological or chemical pesticide before wintering to prevent the pests from multiplying in an enclosed space. The ideal time for cleaning and spraying is when the outdoor temperature still allows for working outside.
Finally, but not least, before wintering, we must reduce watering and nutrient supply. The oleander needs to prepare for its winter dormancy period, and less water and nutrients help the plant slow down its growth processes. The last watering before wintering should be done when the pot’s soil has completely dried out. Nutrient supplements should also be phased out at the end of summer so that the plant doesn’t produce new, soft shoots that are more vulnerable to winter conditions.
More articles on this topic
Choosing the right wintering location
One of the most critical elements of successful oleander wintering is choosing the right room. Ideally, the wintering location is a cool, bright room where the temperature remains stable between 5 and 10 °C. This temperature range provides the oleander with the necessary winter dormancy, preventing the plant from sprouting too early while also protecting it from frost. Garages, unheated stairwells, or cellars can often be ideal, provided they get enough light; otherwise, the plant will become leggy and weak due to a lack of light.
The amount of light is also a critical factor when selecting a wintering location. Although the oleander requires less light during its winter dormancy than in the summer months, complete darkness is harmful. Providing adequate light conditions is essential for retaining leaves and maintaining the plant’s vitality. A north-facing window may be sufficient, but if the room is dark, it’s worth considering using artificial lighting, such as a plant grow light, to supplement the missing sunlight.
The humidity of the wintering location also affects the plant’s condition. Oleanders prefer dry air, so overly high humidity is unfavorable because it can lead to the proliferation of fungal diseases, such as powdery mildew. It is important that the room is well-ventilated to ensure proper air circulation, which further reduces the risk of diseases. Heated rooms should be avoided, as the dry, warm air is conducive to the proliferation of spider mites and other pests.
If there isn’t enough natural light in the wintering location, the plant tends to stretch and its shoots become weak and pale as spring approaches. This phenomenon indicates a lack of chlorophyll production due to poor lighting. In such cases, special care must be taken when moving the plant outside in the spring, and it should be gradually accustomed to sunlight to avoid leaf burn. Artificial lighting can help prevent this problem and allow for the development of stronger, healthier shoots.
More articles on this topic
Care tasks during wintering
Even during its winter dormancy, the oleander still needs attention, though its care is much simpler than in the summer months. Watering must be minimized, as the plant consumes very little water in the cool environment. Overwatering can lead to root rot, which can cause the plant’s demise. Only water when the pot’s soil is completely dry, and even then, only a small amount to prevent the root ball from drying out entirely.
During wintering, nutrient supply is completely omitted. The plant does not need nutrients during its dormant period, and fertilizing at this time would only be a wasted expenditure of energy. Nutrients become important again only at the beginning of the growing season in early spring. The last nutrient application should be done before wintering at the end of summer, so the plant can prepare for its rest.
Pest and disease control is also important during wintering. Although pest reproduction slows down in a cooler environment, it doesn’t stop completely. It’s a good idea to inspect the plant regularly, at least once a month, especially the underside of the leaves, looking for signs of scale insects and spider mites. If an infection is detected, the plant must be immediately isolated and treated to prevent the other plants from becoming infected.
At the end of the wintering period, as spring approaches, it’s a good idea to gradually increase watering and start acclimating the plant to warmer temperatures and sunlight. The first times it is moved outdoors after the spring frosts have passed, it’s best to do so on cloudy days and gradually increase the time spent outside. This gradual process is essential to prevent the plant from going into shock and to keep its leaves from getting scorched by sudden, strong sunlight.
The spring return and oleander care
When the risk of spring frost has passed and the weather is consistently mild, it’s time to move the oleander back outside. The first few weeks after the wintering period are crucial for the plant’s health. First, choose a shady, protected spot in the garden or on the patio and gradually acclimate the plant to sunlight, avoiding direct, intense sun. It is a good idea to maintain this acclimatization process for up to 1-2 weeks.
After moving it outside, it’s worth checking the plant’s soil and overall condition. The soil mass tends to become compacted over the winter, so it can be helpful to loosen the top layer of soil. If the pot has become too small for the plant, now is the time to repot it. Choose a larger pot and use fresh, nutrient-rich, well-draining soil where the oleander’s roots can expand freely. After repotting, water the plant thoroughly.
As spring arrives, the oleander will start to grow again, and you can resume a regular nutrient supply. Initially, a slow-release, balanced fertilizer is recommended, and then, during the summer, you can switch to high-potassium liquid fertilizers specifically designed for flowering plants. Regular, but not excessive, nutrient supplementation is essential for abundant flowering.
During the summer months, the oleander requires abundant watering and plenty of sunlight. Place it in a location where it receives at least 6-8 hours of direct sunlight per day. During the flowering period, it’s also a good idea to keep an eye on it regularly to prevent the appearance of pests and diseases. Removing faded flowers is also important, as this stimulates the formation of new buds and allows the plant to continuously produce its beautiful blooms throughout the season.


