The moth orchid, or as many know it, Phalaenopsis, is one of the world’s most popular houseplants, capable of elevating almost any home with its elegant appearance and long-lasting blooms. However, for your plant to shine in its most beautiful form year after year and reward you with its flowers again, pruning at the right time and in the right way is essential. This process is not just an aesthetic issue but is crucial for maintaining the plant’s health and optimizing the use of its energy reserves. Mastering the correct pruning technique ensures that the moth orchid does not waste its strength on maintaining old parts, but instead directs it towards growing new shoots, leaves, and most importantly, a new, abundant inflorescence. A well-maintained orchid is vigorous, more resistant to diseases, and is guaranteed to be grateful for the care.
The success of pruning greatly depends on using the right tools and preparing them properly. Before making any cuts on the plant, it is essential to thoroughly disinfect the blade of your pruning shears, small scissors, or even a sharp craft knife. This can be most easily done with a cotton ball dipped in rubbing alcohol or by briefly passing the blade over a flame, making sure it cools down afterward. Sterility is key, as pathogens like fungi and bacteria can enter the plant’s tissues through open wound surfaces, causing serious infections. Never use a dull or dirty tool, as it damages the plant tissues, which slows down wound healing and increases the risk of disease.
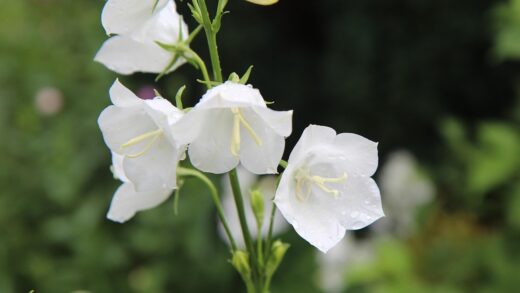
For effective pruning, you need to be familiar with the anatomy of the moth orchid’s flower spike. On the spike, you will find small bumps covered with tiny, triangular, parchment-like leaves, known as nodes or “sleeping eyes.” From these nodes, a new flower branch, or in rarer cases, a complete small plant, a “keiki,” can potentially develop under the right conditions. During pruning, we specifically target these nodes to guide the plant’s growth in a certain direction. Observing their position on the spike helps decide where to make the cut to encourage reblooming.
Pruning essentially has two main goals: to encourage reblooming and to maintain the overall health of the plant. When you cut back a spent flower spike, you are prompting the orchid to focus its energy on growing a new flower branch rather than on ripening seeds. This can shorten the time between two flowering periods. On the other hand, removing dried, diseased, or damaged parts, such as yellowing flower spikes, dead roots, or spotted leaves, prevents problems from spreading and allows the plant to focus on nourishing its vigorous parts.
Timing the prune: when to grab the shears?
The most important signal for pruning is the end of the flowering cycle, which is when the last flower has wilted and fallen off the spike. It is important not to rush the pruning as long as there is even a single flower on the plant, as this would unnecessarily shorten the time you can enjoy the blooms. Give the orchid time to finish its flowering, and observe the changes in the flower spike’s condition in the following days and weeks. This patience will help you choose the most appropriate pruning strategy that best suits the plant’s current state. After the flowers fall, the plant will give clear signals about the future fate of the spike.
More articles on this topic
Once the last flower has fallen, carefully examine the flower spike. Two basic scenarios are possible, requiring different interventions. If the spike begins to turn yellow, then brown, and gradually dries out completely, it indicates that the plant no longer wishes to nourish it and has withdrawn all useful nutrients from it. In this case, the spike is unsalvageable, and it is best to remove it completely. Conversely, if the flower spike remains vibrant green and vigorous, there is a good chance that with proper pruning, you can encourage it to bloom again.
When making the pruning decision, you must consider the overall condition of the plant in addition to the state of the flower spike. A strong, healthy orchid with several firm, dark green leaves and many healthy, silvery-green roots can easily handle growing a new flower branch on the same spike. However, if the plant appears weak, for example, it has few or limp leaves, or its root system is damaged, then it is a wiser decision to remove the entire flower spike. This allows the orchid to direct all its energy towards vegetative growth, i.e., developing new leaves and roots, to strengthen itself for the next abundant bloom.
Although the moth orchid can bloom almost anytime indoors, its growth cycle often follows the natural changes in light conditions. Pruning after flowering provides a sort of rest period for the plant, during which it can concentrate on developing its vegetative parts. This period is essential for it to gather enough strength to create another spectacular inflorescence. Therefore, pruning is not just a horticultural technique, but a way to support your plant’s natural life rhythm and long-term health.
Pruning techniques: the fate of the flower spike
One of the most common and straightforward pruning methods is the complete removal of the flower spike. This technique should be applied when the flower spike starts to yellow and brown after flowering and dries out completely. In this case, the plant itself has decided to stop nourishing the spike. Make the cut with a sterilized tool as close to the base of the plant as possible, leaving a stump of about 1-2 centimeters. This method is also recommended even if the plant growing on a vigorous spike appears weak, as it allows all its energy to be directed towards regeneration.
More articles on this topic
If the flower spike remains hard and green after the flowers have fallen, you have the option of a partial cutback in the hope of reblooming. Find the second or third node (sleeping eye) from the bottom of the spike. With a sterile blade, cut the spike about 1.5-2 centimeters above this node. This cut encourages the plant to grow a new flower branch from the selected sleeping eye. This method usually results in faster flowering than removing the entire spike, but the secondary inflorescence may often be smaller than the original one.
There is also a more passive approach, the “wait and see” strategy. If the flower spike remains green and vigorous, you can also decide not to touch it at all. It may happen that the plant produces a new branch or buds at the tip of the spike or from one of the upper nodes without any pruning. The advantage of this is that you do not subject the plant to any stress, but the disadvantage is that the new branch may be less aesthetically pleasing, and the number of flowers may be fewer. This method requires patience but offers an interesting opportunity for observation.
After pruning, it is advisable to treat the cut surface to prevent infections. Although this is not always mandatory, a simple and effective method is to sprinkle a pinch of ground cinnamon on the fresh cut. Cinnamon has natural fungicidal and drying properties, which promotes the rapid closure of the wound and prevents pathogens from entering. Alternatively, you can use a special wound-sealing balm, but for most home gardeners, cinnamon is perfectly adequate.
Beyond pruning: caring for roots and leaves
When caring for a moth orchid, it may be necessary to prune not only the flower spike but also the roots, although this is needed much less frequently. Root pruning is typically best done at the time of repotting, usually every 1-2 years. At this time, by carefully removing the plant from its pot, you can thoroughly inspect the condition of the root system. Healthy aerial roots are fleshy, firm, and their color is green when wet and silvery-white when dry. In contrast, dead roots are papery, hollow, limp, or mushy and waterlogged, and their color is brown or black.
When pruning roots, the most important things are caution and moderation. Remove only the clearly dead, diseased, or damaged root parts with sterile, sharp scissors. Cut back to the healthy, green or white tissue to prevent the spread of rot. Avoid mutilating healthy roots, as they are vital for water and nutrient uptake. Excessive root pruning can cause severe shock to the plant and significantly set back its development, so always be conservative.
Caring for the leaves is also part of comprehensive maintenance. The natural yellowing and dying of the lower, older leaves is part of the plant’s life cycle; let them fall off on their own. However, if you notice signs of disease on a leaf, such as black, watery spots, mold, or rot, it must be removed immediately. With a sterilized craft knife or blade, cut off the diseased leaf at its base, being careful not to touch the plant’s stem. This will prevent the infection from spreading to the other healthy parts of the plant.
It is important to understand that pruning in itself is not a miracle cure but an integral part of a holistic care program. The key to abundant and regular flowering is creating the right balance between light, water, humidity, and nutrients. A well-nourished plant kept in optimal conditions responds much better to pruning and can regenerate more quickly. Therefore, pruning is most effective when performed on an already healthy and vigorous orchid, complementing daily, expert care.