Celery, a deservedly popular and versatile vegetable, rewards proper care with a bountiful and high-quality harvest, although it is considered a demanding plant. The secret to successful celery cultivation lies in attention to detail, from the careful selection of the growing site to the intricacies of harvesting and storage. This plant has a long growing season, meaning it requires continuous attention from early spring sowing to autumn harvest, but the end result, the crispy stalk celery or the plump, aromatic celeriac, is worth all the effort. Understanding the cultivation process and applying the correct agrotechnical steps are essential for achieving a plentiful yield, so it is worth preparing thoroughly before embarking on celery growing.
Celery prefers deep, nutrient-rich, well-draining soils that can retain moisture yet allow excess water to drain away. Loose-structured loam or sandy loam soils are ideal, as they do not hinder the development of the corm or root system. It is also sensitive to soil pH; the most optimal medium for it is slightly acidic to neutral, with a pH value between 6.0 and 7.0. Overly acidic or alkaline soil can inhibit nutrient uptake, leading to slowed growth and a decline in crop quality.
Soil preparation should begin in the autumn preceding planting with deep digging or plowing. This is the most suitable time to incorporate organic matter, such as well-rotted manure or compost, which not only increases the soil’s nutrient content but also improves its structure and water-holding capacity. Organic fertilizer slowly releases nutrients throughout the growing season, ensuring the steady development of the celery. This autumn base fertilization is crucial for the plant’s vigorous start.
In the spring, before transplanting, the soil must be worked again, making it friable and fine-tilled with a rototiller or garden cultivator. At this time, a complex fertilizer containing all major nutrients (nitrogen, phosphorus, potassium) can also be applied to provide the young seedlings with all necessary resources for initial growth. Carefully prepared, nutrient-rich, and loose-structured soil provides the best foundation for celery to develop into a healthy and strong plant throughout the season.
The tricks of sowing and raising seedlings
Due to celery’s extremely long growing season and its tiny, slow-germinating seeds, direct sowing is not recommended in our climate; the foundation of successful cultivation is early, indoor seedling raising. The seeds should be sown in late February or early March, about 8-12 weeks before the expected date of the last spring frosts. A special feature of celery seed is that it germinates in light, which means it absolutely needs light to sprout, so it should not be covered with soil when sowing. This characteristic requires a special sowing technique.
More articles on this topic
For sowing, use a high-quality, sterile seedling mix to prevent fungal diseases that threaten young plants, such as damping-off. Sprinkle the seeds evenly on the surface of the soil-filled seed tray or pot, then gently press them into the soil, or cover them with a very thin layer of vermiculite or sand, which helps retain moisture but allows light to pass through. To ensure continuous humidity, cover the seed container with a transparent plastic film or glass plate and spray it regularly with water.
During germination, the optimal temperature is between 21-24 °C; in a warmer or colder medium, germination can become slow or even fail. Celery seed requires patience, as germination can take up to two or three weeks, so do not give up waiting. As soon as the first cotyledons appear, the cover must be removed, and the seedlings need plenty of light to develop into strong, stocky plants and not become leggy. Natural window light is often insufficient, so it is advisable to use a grow light.
About 7-10 days before transplanting, the seedlings must be hardened off, that is, gradually accustomed to outdoor conditions. This process, “hardening off,” is crucial to avoid transplant shock. Initially, take the plants out to a sheltered, shady spot for only a few hours, then increase the time spent outdoors and the exposure to direct sunlight day by day. By the end of the hardening-off period, the seedlings will be strengthened and ready to move to their final location.
Transplanting and proper spacing
The carefully raised celery seedlings can be transplanted when the danger of spring frosts has permanently passed, and the soil temperature has reached at least 10-12 °C. This is usually around mid-May in Hungary. The most suitable seedlings for transplanting are about 10-15 cm tall, with a strong stem and at least 4-6 true leaves. Underdeveloped or overgrown, leggy seedlings have a harder time taking root, and their subsequent development may also be slower.
More articles on this topic
The transplanting process itself requires precision; dig the holes slightly larger than the seedlings’ root ball. Plant the seedlings at the same depth as they were in the nursery pot, being particularly careful that the root crown, the base of the plant, does not end up below the soil surface, as this can lead to corm deformation or stem rot. After planting, gently firm the soil around the plant so that the roots make good contact with the earth, and then water the seedlings thoroughly.
Ensuring proper spacing is essential for the healthy development of the plants, good crop quality, and disease prevention. For celeriac and stalk celery, the optimal plant spacing is 25-30 cm, and the row spacing is 40-50 cm. This distance provides enough space for the corms to grow and the foliage to develop, and it guarantees adequate air circulation between the plants, which reduces the risk of fungal diseases.
In the first few weeks after transplanting, the most important task is to provide regular and even watering so that the seedlings’ root systems can regenerate as quickly as possible and begin to grow in their new location. During this period, watering with a starter fertilizer solution can also help with rooting and vigorous shoot growth. Continuously monitor the plants, and if signs of stress, such as wilting or yellowing leaves, are observed, act immediately to remedy the problem.
The key role of irrigation and nutrient supply
Celery has an extremely high water demand, which is due to its shallow root system and its juicy, high-water-content stalk and corm. One of the most critical points for successful cultivation of the plant is ensuring a continuous and even water supply throughout the entire growing season. Irregular watering, allowing the soil to dry out and then become wet again, causes stress to the plant, which can result in hollow, woody, fibrous stalks or cracked corms, significantly reducing the quality and palatability of the crop.
During irrigation, aim for deep, soaking water application that moistens the top 20-30 cm layer of the soil, where most of the roots are located. The weekly water amount should range between 25-50 mm, depending on the amount of rainfall and the weather. The most effective irrigation method is drip irrigation or the use of a soaker hose, as these systems deliver water directly to the root zone, minimizing evaporation loss and keeping the foliage dry. Keeping the leaves wet favors the spread of fungal diseases.
Celery is not only water-demanding but also a nutrient-demanding plant, often described as a “heavy feeder.” Regular nutrient replenishment is essential for a bountiful harvest. After transplanting, it is advisable to water the crop every 2-3 weeks with a balanced, water-soluble fertilizer solution. In the middle of the growing season, when corm and foliage growth is most intense, a side-dressing is also recommended, which can be done with compost or granular fertilizer spread alongside the rows and lightly worked into the soil.
Among the nutrients, nitrogen is responsible for the development of lush, green foliage, which is particularly important for stalk celery, while phosphorus and potassium support root and corm growth and resistance to diseases. Pay attention to the plant’s signals: yellowing lower leaves may indicate a nitrogen deficiency, while weak, stunted growth can suggest a general nutrient deficiency. Nutrients applied at the right time and in the right proportions guarantee the optimal development of celery and a high-quality harvest.
Weed control and the benefits of mulching
Weed control is a cornerstone of celery cultivation because celery has a poor ability to suppress weeds due to its shallow root system. Weeds are serious competitors with celery for water, nutrients, and light, especially at the beginning of the growing season when the seedlings are still small and vulnerable. In a weedy area, celery’s development slows down, and the quantity and quality of the harvest are significantly reduced, so regular weeding is essential.
Weed control is most effectively done by hand-weeding or shallow hoeing. It is important to hoe carefully, not too deeply, to avoid damaging the celery’s near-surface roots, which could set the plant back in its development. Weeding should be done at regular intervals, preferably before the weeds become established, to prevent them from seeding and spreading further in the area. A weed-free stand will be healthier and develop more vigorously.
One of the most effective and natural ways to combat weeds is mulching. Mulch is a layer of soil cover spread around the plants; it can be straw, grass clippings, compost, wood chips, or even biodegradable film. A thick, 5-7 cm layer of organic mulch effectively prevents most weed seeds from germinating by blocking out light. This method significantly reduces the time and energy spent on hand-weeding or hoeing.
In addition to weed suppression, mulching has several other benefits. The soil cover reduces evaporation from the soil, helping to retain moisture in the root zone, which is a huge help for the water-demanding celery. Furthermore, mulch protects the soil from overheating in the summer heat and from sudden temperature fluctuations. As the organic mulch slowly decomposes, it enriches the soil with valuable nutrients and organic matter, further improving its structure and fertility.
Plant protection: fighting diseases and pests
Celery, like many other horticultural crops, can be susceptible to various diseases and pest attacks, so regular plant protection and prevention are crucial. Among the most common diseases is late blight (Septoria apiicola), which appears as small, yellowish spots on the leaves that later turn brown and die. To prevent this, it is important to ensure proper spacing for good air circulation, avoid wetting the foliage during irrigation, and practice crop rotation.
The best strategy for disease control is always prevention. Choosing resistant varieties from the start can reduce the risk of problems. If disease symptoms do appear, the first step is to immediately remove and destroy the infected plant parts to prevent further spread. In more severe cases, fungicides may be necessary, but preventive agrotechnical methods, such as crop rotation and proper hygiene, should always be prioritized.
Several pests can also damage celery. Aphids weaken the plant by sucking on young shoots and leaves, while the larvae of the celery fly, known as leaf miners, chew characteristic tunnels in the leaves, reducing the assimilation surface. Slugs and snails are a particular threat to young seedlings and corms, which they chew on. Regularly inspect the plants for pests to detect signs of infestation early.
In pest control, follow the principles of integrated pest management. Soapy water or neem oil sprays can be effective against aphids. Remove and destroy leaves infected by leaf miners. Use various traps or biological control methods for slugs and snails. Attracting beneficial insects like ladybugs and lacewings to the garden can also greatly help in the natural control of pest populations, creating a healthier ecosystem in the garden.
The master strokes of harvesting and storage
The timing and method of harvesting celery depend on whether you are growing stalk celery or celeriac. The harvesting of stalk celery can begin when the outer stalks reach a usable size and thickness but are still tender and crisp. Harvesting can be done continuously by breaking off the outer stalks, allowing the center of the plant to continue developing, or the entire plant can be cut at the soil line. For the best flavor and texture, harvest in the cool of the morning.
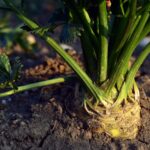
Celeriac is harvested when the corm reaches a diameter of at least 7-10 centimeters, although larger, fist-sized corms are not uncommon. Harvesting should be completed before the first serious frosts, as the storability of a frozen corm is significantly reduced. Carefully lift the corms from the ground with a garden fork, being careful not to damage them. After harvesting, trim the leaves and thinner side roots from the corm.
The refrigerator is the most suitable place for short-term storage of freshly picked celery. Stalk celery can be kept fresh for up to two weeks by standing its base in a shallow dish of water or by wrapping it tightly in aluminum foil, which preserves its crispness. Cleaned celeriac will also keep for one to two weeks in the refrigerator’s vegetable crisper, but other methods are recommended for long-term storage.
Celeriac is clearly more suitable for long winter storage. Intact, healthy corms can be stored for months in a cool, dark, high-humidity place, such as a root cellar or pit. The best results are achieved by layering the corms in damp sand or sawdust, which prevents them from drying out and preserves their freshness. For preserving stalk celery, blanching followed by freezing is the most common and effective method, allowing you to enjoy its flavor even in winter.


