The artichoke, this thistle-like Mediterranean vegetable specialty, may at first seem challenging to grow, but with the right knowledge, it can reward us with an abundant harvest even in Hungarian gardens. The plant is not only a versatile culinary delicacy but also a perennial with high ornamental value, an imposing figure that can become the jewel of any corner of the garden with its deep green, lobed leaves and its later-appearing purple flower heads. However, to grow it successfully, it is essential to become familiar with its specific needs, from the criteria for variety selection to the tricks of winterization. This article provides a detailed guide for all those who would like to embark on this exciting horticultural adventure and enjoy the unparalleled taste of freshly picked artichokes from their own garden.
For many, the artichoke is synonymous with Italian or French cuisine, and few would think that it can be successfully grown under the climatic conditions of our country. Although it truly prefers warmer, frost-free winters, this obstacle can be easily overcome with the right choice of variety and by ensuring winter protection. It is important to understand that the artichoke is a perennial plant, which means that with a single planting, we can harvest from it continuously for up to 4-5 years, provided we create optimal conditions for it. The key to successful cultivation is attention to detail, which includes careful soil preparation, professional nutrient replenishment, and watering tailored to the plant’s needs, all of which together ensure healthy development and a bountiful yield.
Before embarking on cultivation, it is worth thoroughly researching the different varieties, as not all of them tolerate the rigors of a continental climate equally well. There are specifically cold-hardy varieties, such as ‘Green Globe’ or ‘Violet de Provence’, which are more likely to survive even the harsher Hungarian winters. Every step from sowing the seeds to raising the seedlings and planting them out requires precision, as young plants are particularly sensitive to environmental stress. However, patience and care bear fruit: a mature, healthy artichoke plant not only supplies the kitchen with ingredients but also creates a stunning visual effect, proving that this special plant rightly deserves a place in Hungarian gardens.
The cultivation of artichokes is therefore a complex but extremely rewarding task that, after the initial difficulties, rewards one with a sense of achievement and a special gastronomic ingredient. Understanding the plant’s life cycle, fully meeting its environmental needs, and providing continuous and professional care are essential conditions for an abundant harvest. In the following, we will detail the cultivation technology steps and agrotechnical practices that will help anyone become a successful artichoke grower and enjoy the unique taste and aesthetic value of their home-grown vegetable. As a result of persistent work, the garden can be enriched with a plant that will fill the careful gardener with pride for many years.
Selecting the right location and preparing the soil
The alpha and omega of successful artichoke cultivation is the careful selection of the growing site. Due to its Mediterranean origin, the plant is particularly demanding of light and warmth, so we should choose the sunniest, most sheltered part of the garden for it. A south-facing, wind-protected area is ideal, where the plant receives at least 6-8 hours of direct sunlight daily, which is essential for the proper development and ripening of the buds. In a shady or semi-shady location, the artichoke will become leggy, its stem system will be weaker, and the long-awaited harvest may not materialize, or the size and quality of the buds will fall far short of expectations.
More articles on this topic
It also has high expectations for the soil’s structure and nutrient content. The artichoke prefers deep, well-draining, nutrient-rich, loamy soils. Heavy, clayey soils with poor drainage are not suitable for it, as standing water can lead to root rot, causing the plant to die. It is advisable to deeply dig the area intended for cultivation in the autumn, at least 40-50 centimeters deep, and generously incorporate well-rotted manure or compost into the soil. This not only provides the necessary nutrients but also improves the soil structure, making it looser and more airy.
The pH of the soil is also a crucial factor; the artichoke prefers neutral or slightly alkaline soils (pH 6.5-7.5). Soils that are too acidic must be amended with limestone powder or dolomite powder before planting to achieve the optimal pH value. During soil preparation, care must also be taken to ensure it is weed-free, as young seedlings struggle to compete with aggressively spreading weeds for water and nutrients. Careful, detailed soil preparation lays the foundation for healthy plant development and a subsequent abundant harvest.
Just before planting, it is advisable to loosen the soil again and incorporate a complex, slow-release fertilizer that provides the necessary macro- and micronutrients during the initial growth phase. It is important to consider that the artichoke is a large plant that needs a lot of space to develop. A spacing of at least 1-1.5 meters should be left between the plants to allow the leaves to spread freely and for all parts of the plant to receive sunlight. Proper spacing is not only important for disease prevention through better air circulation but also facilitates weeding and harvesting.
Propagation: Sowing seeds and division
Artichoke propagation can be done in two main ways: by sowing seeds or by division. Sowing seeds, although it may seem like a cheaper solution, requires more patience and expertise, and plants grown from seed generally take a year longer to bear fruit than those propagated by division. The seeds should be sown indoors in early spring, at the end of February or the beginning of March, in pots or seed trays filled with high-quality seedling soil. The seeds require a warm temperature of around 20-22 °C to germinate, so it is advisable to keep the pots in a heated room on a windowsill. Germination usually takes 2-3 weeks.
More articles on this topic
When the small seedlings have developed 2-4 true leaves, they should be carefully transplanted into larger, individual pots to give their root systems enough space for further development. During seedling raising, regular but moderate watering is crucial, avoiding overwatering, which can cause damping-off. Before planting out, the young plants must be gradually acclimatized to the outdoor environment; this process, called hardening off, takes about 1-2 weeks. During this time, the seedlings should be taken outside for increasingly longer periods each day, first to a shady spot, then to a progressively sunnier one, to strengthen them and avoid post-planting shock.
Division is a faster and more reliable method of propagation that can be performed on well-developed mother plants that are at least 2-3 years old. The best time for this is in early spring, after the frosts have passed, when the plant has just started to grow. Using a sharp spade or knife, carefully separate the offshoots growing on the side of the mother plant, making sure that each separated part has its own root system and at least one or two shoots. These new plants can be immediately planted in their final location, in the previously carefully prepared soil.
The advantage of plants obtained by division is that they are genetically identical to the mother plant, so they are guaranteed to have the same characteristics, such as fruit size and taste. In addition, they often bear fruit much earlier, often in the year of planting, as they start with a more developed, stronger root system. This method is excellent for maintaining and expanding the stock of proven varieties that are well-adapted to the local climate, ensuring a continuous and predictable yield year after year. Division also serves to rejuvenate overgrown, old plants, stimulating the mother plant to produce new shoots.
Watering and nutrient supply
The water requirement of the artichoke is quite high, especially during the active growth phase of the vegetation period and during bud formation. To achieve an abundant and tasty harvest, regular and thorough watering is essential, ensuring the soil remains consistently and evenly moist. However, it is important to avoid overwatering and standing water, as the roots are extremely sensitive to lack of air and rot. Watering should be done in the early morning or late evening hours to allow the water to seep deep into the soil and to minimize evaporation loss. The best solution is drip irrigation, which delivers water directly to the base of the plant, avoiding unnecessary wetting of the leaves, which could lead to the development of fungal diseases.
To develop its large foliage and fleshy buds, the artichoke needs a lot of nutrients, so regular nutrient replenishment is crucial. In addition to the organic manure incorporated in the autumn, adequate nutrition must also be provided during the vegetation period. From early spring, when growth begins, it is advisable to water the plants with a balanced, nitrogen-rich liquid fertilizer (such as nettle tea or a complex fertilizer) every two to four weeks. Nitrogen promotes foliage development, which is essential for subsequent abundant flower formation, as photosynthesis, which produces energy for the plant, takes place in the leaves.
When the plant reaches the flower bud formation stage, the focus of nutrient supply should shift towards potassium and phosphorus. Potassium improves the quality, taste, and shelf life of the fruit, and increases the plant’s resistance to diseases and stress. Phosphorus plays an essential role in flower and root formation. During this period, we can use special, bloom-boosting fertilizers or high-potassium fertilizers. Mulching the soil (with straw, grass clippings, or compost, for example) not only helps to suppress weeds and retain soil moisture but also continuously enriches the soil with nutrients as it decomposes.
An important sign of nutrient deficiency is when the leaves start to turn yellow, growth slows down, or the buds remain small and do not develop properly. Excessive nitrogen intake, on the other hand, can result in excessive leaf growth at the expense of bud formation and can make the plant more susceptible to aphid attacks. The key to successful nutrient management is therefore balance and conscious replenishment tailored to the plant’s phenological phases, which ensures optimal development and a rich, high-quality harvest.
Plant protection: The most common pests and diseases
Although the artichoke is a relatively resistant plant, it is not immune to attacks from pests and diseases, which must be controlled in a timely and professional manner. One of the most common and annoying pests is the black bean aphid, which loves to colonize young shoots, the undersides of leaves, and the buds. The aphids weaken the plant with their sucking, distort the leaves, and the sooty mold that develops on the honeydew they secrete further worsens the situation. In case of a mild infestation, it may be sufficient to wash off the aphids with a strong jet of water or to spray with nettle tea or a potash soap solution. In more severe cases, however, the use of systemic chemical pesticides may be necessary, but always follow the product’s instructions for use and the pre-harvest interval.
Slugs, especially slugs without shells, can also cause serious damage, particularly to young seedlings and fresh shoots. They are active at night and chew irregular holes in the leaves, which can significantly set back the plant’s development. Effective control measures include setting up beer traps, sprinkling sawdust, eggshells, or special iron phosphate-based slug pellets around the plants. For prevention, it is important to keep the garden clean and remove weeds, as dense, neglected areas provide ideal hiding places for slugs.
Among the diseases, the most significant are powdery mildew and downy mildew, which pose a threat mainly in warm, humid weather. Powdery mildew forms a white, powdery coating on the leaves and stem, while downy mildew causes yellowish-green spots on the upper side of the leaves and a grayish-white mold on the underside. The key to prevention is maintaining proper plant spacing, which ensures good air circulation between the plants, and keeping the foliage dry during watering. In case of infection, the diseased leaves must be immediately removed and destroyed. Sulfur-based or copper-based fungicides are available for control, which should be applied at the first sign of infection.
Less commonly, root rot can also occur, caused by soil-borne fungi, and is usually the result of overwatering, poorly drained, compacted soil. The sign of the disease is the wilting of the plant, browning of the root collar, and death of the roots. At this point, it is almost impossible to save the plant, so the emphasis is on prevention. Proper soil preparation, ensuring good drainage, and professional watering practices are the most effective defense against root diseases. By following the principles of integrated pest management and prioritizing preventive agrotechnical methods and biological control options, chemical use can be minimized, allowing us to harvest healthy and safely consumable produce.
Harvesting and using the buds
The culmination of artichoke cultivation is the long-awaited harvest, the correct timing of which is crucial for the quality of the buds. Harvesting should begin when the buds have reached the size characteristic of the variety, but are still firm, compact, and the bracts are tightly closed. If we wait too long, the bracts begin to open, the center of the bud loosens, and the inside becomes fibrous and inedible. It is best to use a sharp knife or pruning shears for harvesting, and to cut the bud with a stem of about 5-10 cm, as this part is also edible and helps to keep the bud fresh.
The artichoke produces the largest, so-called central bud on the main flowering stem, which should be harvested first. Its removal stimulates the plant to develop smaller, lateral buds, so the harvest period can be extended for several weeks, ensuring a continuous supply. A well-developed, healthy plant can produce up to 8-12 buds per season from the second or third year onwards. It is advisable to harvest in the morning, when the plants are still full of moisture, so the buds stay fresh and crisp for longer.
The uses for freshly picked artichokes are extremely varied. The simplest method of preparation is steaming or boiling, after which the fleshy base of the bracts and the heart of the artichoke can be eaten, after removing the inedible, “hairy” choke from the center of the bud. Served with various dips, such as garlic-lemon butter or aioli, it is a real delicacy. Artichokes are excellent for grilling, roasting, or can be stuffed with spiced minced meat or vegetables. Smaller, more tender buds can even be eaten raw, thinly sliced in salads, or preserved in oil.
The artichoke is not only delicious but also extremely healthy. It is rich in fiber, vitamins (especially C and K), and minerals such as magnesium, phosphorus, and potassium. It has an outstanding content of cynarin, an antioxidant compound that stimulates the production and secretion of bile, thereby supporting the liver’s detoxification functions and digestion. Regular consumption can contribute to lowering cholesterol levels and maintaining general well-being, so artichokes grown in your own garden offer not only a culinary experience but also health benefits.
Wintering the plant in Hungary
The artichoke is a perennial plant of Mediterranean origin, so the often harsh winters in Hungary pose a serious challenge for it. Successful overwintering is one of the most critical points of cultivation, requiring careful preparation and attention. The frost-sensitive rhizome must be protected from the sub-zero temperatures, especially from prolonged, hard frosts, which can cause the complete destruction of the plant. Preparations for wintering should begin before the first serious frosts, usually at the beginning of November. At this time, the plant’s foliage should be cut back to a height of about 20-30 centimeters above the ground.
The cut-back plants must be covered thickly, with a layer of at least 20-30 cm of some loose, airy insulating material. Straw, dry leaves, pine branches, or compost are excellent for this purpose. It is important that the covering material does not become too compacted, so that air can pass through it, avoiding stuffiness and rot. It is advisable to pull a layer of earth over the organic covering layer, which further increases the thermal insulation. Another proven method is to place a large, inverted pot or bucket over the cut-back plant and then cover that with insulating materials, creating an air layer to protect the heart of the plant from frost.
The main purpose of winter covering is to protect the rhizome from deep frosts and sudden temperature fluctuations. The covering should be left on the plant until the danger of spring frosts has passed, usually until mid-to-late April. In the spring, the covering material should be removed gradually, in several steps, to give the plant time to get used to the changing conditions. If the protection is removed too early, a late frost can still damage the newly emerging shoots. However, leaving the cover on for too long can lead to the plant becoming stuffy and the appearance of fungal diseases.
An alternative solution, especially in colder, wetter areas or for more valuable varieties, is to dig up the plant in the autumn and overwinter it in a large pot in a frost-free but cool place (such as a cellar or garage). In this case, the plant is dormant and therefore requires only minimal watering, just enough to prevent the soil from drying out completely. In the spring, after the frosts have passed, the plant can be planted out again in the open ground. Although this method involves more work, it provides greater security for the plant’s survival and also allows for the successful cultivation of more frost-sensitive varieties.
The place and role of the artichoke in the garden
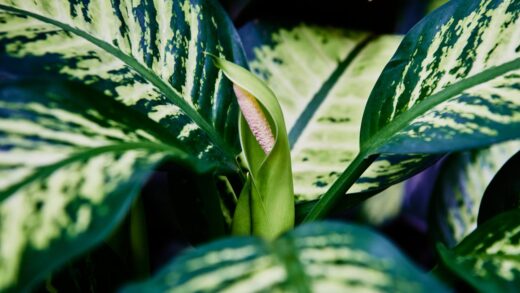
The artichoke is not just an edible vegetable, but also an extremely attractive, architectural ornamental plant that provides a stunning sight both as a solitary specimen or planted in small groups. Its large, deeply lobed, silvery-green leaves create a dramatic contrast with other plants in the garden and lend a special texture and form to the beds throughout the season. The plant can grow up to 1.5-2 meters tall, making it an excellent background plant or a central element of a larger flower bed. Due to its imposing size and appearance, even a single plant can dominate the landscape and attract attention.
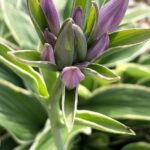
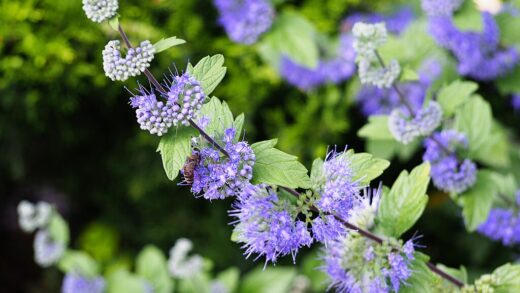
If the buds are not harvested for consumption but are allowed to develop further, they will open into huge, purple, thistle-like flower heads in the middle of summer. These flowers are not only beautiful but also attract pollinating insects like a magnet, especially bees and bumblebees, thus contributing to the biodiversity of the garden. The cut flowers also look great in a vase for a long time or can be dried to become special elements of winter dry flower arrangements. The artichoke, therefore, provides a dual benefit: on the one hand, it yields a delicious crop, and on the other, it enhances the beauty of the garden with its aesthetic value.
The artichoke pairs well with other sun-loving plants with similar needs. Mediterranean herbs such as rosemary, lavender, or thyme not only look good next to it but their scent can also help to repel some pests. Lower-growing plants suitable for ground cover, such as sedum species, can help to suppress weeds and retain soil moisture around the plant. When planning, always consider the considerable final size of the artichoke so that it does not overwhelm neighboring, smaller plants.
Overall, the artichoke is a versatile plant that has a place in any garden where the owner is not afraid of a little challenge and appreciates a unique appearance and gastronomic pleasures. The experience gained during its cultivation and the joy of a successful harvest compensate for all the work invested. a healthy, well-cared-for artichoke plant can be the pride of the garden for many years, delighting not only the eyes but also the taste buds, proving that the boundaries between the kitchen garden and the ornamental garden can easily be blurred.