Lemon balm, scientifically known as Melissa officinalis, is one of the most beloved and widely cultivated medicinal and culinary herbs, winning over gardens and kitchens alike with its refreshing, lemony scent and versatile uses. This perennial plant, belonging to the Lamiaceae or mint family, is outstanding not only for its gastronomic and medicinal value but also because it is extremely easy to care for, providing a sense of achievement even for novice gardeners. The cultivation of lemon balm has a long history; the ancient Greeks and Romans highly valued it for its calming and digestive properties. With proper care, the plant generously provides us with its aromatic leaves year after year, which can be used both fresh and dried.
From a botanical perspective, lemon balm is a herbaceous perennial characterized by a distinctive square stem, typical of mint family members. Its leaves are arranged oppositely on the stem, are heart-shaped or ovate with a serrated edge, and their surface is slightly hairy, which contributes to the release of essential oils and its intense lemon fragrance. The vibrant green color of the leaves dominates during the growing season, adding a fresh splash of color to the garden. The plant has a bushy, dense habit that can be further encouraged with proper pruning.
Regarding its growth habit, lemon balm is quite vigorous and tends to spread, a common trait among most members of the mint family. It readily propagates through underground rhizomes and self-seeding, so if you don’t want it to take over the garden, it is wise to keep its growth in check. It typically reaches a height of 60-90 centimeters and forms a similarly wide bush, providing an ideal size for continuous harvesting. This spreading nature also makes it suitable for use as a ground cover, provided it is given enough space.
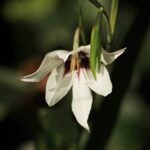
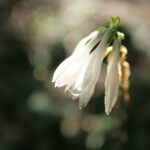
An important part of lemon balm’s life cycle is its small, white or pale yellow flowers that appear in mid-summer, clustered in false whorls in the leaf axils. Although these flowers are not showy, they are extremely attractive to pollinators, especially bees, which is where the plant’s scientific name originates, as “Melissa” means bee in Greek. After flowering, the plant produces seeds that can sprout the following spring, and its above-ground parts die back with the first serious frosts, only to re-emerge with renewed vigor from the rootstock in spring.
The ideal planting location and soil preparation
For optimal development, lemon balm prefers a location in full sun or partial shade, where it receives at least five to six hours of direct sunlight daily. An adequate amount of sunlight is essential for maximizing the essential oil content, which gives the plant its characteristic scent and flavor; in shadier spots, the plant may become leggy and its fragrance less intense. However, in hot climates, protection from the scorching afternoon sun, i.e., partial shade, can be beneficial as it prevents leaf scorch and dehydration. Choosing the ideal location is therefore crucial for achieving an abundant and high-quality yield.
More articles on this topic
Soil quality is also a determining factor in the successful cultivation of lemon balm; the plant prefers well-draining, moderately fertile soils. The best choice is loose, sandy or loamy soil that prevents water from stagnating in the root zone, thus preventing root rot. Heavy clay soils are less ideal, but their structure can be improved by incorporating organic matter, such as mature compost or sand, which increases soil aeration and drainage.
The soil’s pH level also affects nutrient uptake; lemon balm prefers a slightly acidic to neutral pH range (6.0-7.5). It is advisable to perform a soil test before planting and, if necessary, adjust the pH, for example, by adding lime to overly acidic soil or peat moss to overly alkaline soil. When preparing the bed, it is important to thoroughly remove weeds, loosen the deeper soil layer, and incorporate organic fertilizer or compost to provide the necessary nutrients for initial growth.
Growing lemon balm in a container or raised bed is also an excellent solution, especially if you want to curb its invasive nature. A pot at least 30-40 cm in diameter and depth provides adequate space for root development, but it is essential that the container has drainage holes at the bottom to allow excess water to escape. For container growing, use a high-quality, loose potting mix and keep in mind that container-grown plants require more frequent watering as their soil dries out faster.
Planting and propagation methods
Propagating lemon balm from seed is possible, although this method requires more patience than planting seedlings. It is best to sow seeds indoors 6-8 weeks before the last expected frost date, in a pot or seedling tray. Since lemon balm seeds need light to germinate, cover them very thinly with soil, or simply press them onto the soil surface. Keep the soil consistently moist during germination and maintain a temperature of around 18-20°C; seedlings usually emerge within 10-14 days.
More articles on this topic
The most common and reliable method of planting is to transplant nursery-bought or pre-grown seedlings into the open ground after the danger of spring frost has passed. Before planting out, it is important to “harden off” the seedlings by gradually acclimatizing them to outdoor conditions over several days, placing them outside for increasingly longer periods each day. To plant, dig a hole twice the size of the seedling’s root ball, place the plant in it, then backfill the hole with soil, gently firm it, and finally, water thoroughly.
The easiest and most effective way to propagate existing, mature lemon balm clumps is by division. This operation is best performed in early spring or autumn when the plant’s growth is less vigorous. Carefully lift the entire plant from the ground with a spade or digging fork, then divide the rootstock by hand or with a sharp knife into several sections, each with at least a few shoots and roots. Plant these new divisions immediately in their final location and water them thoroughly to aid root establishment.
Lemon balm can also be successfully propagated by cuttings, with late spring or early summer being the most suitable time. Select a healthy, strong, non-flowering shoot and cut a 10-15 cm long piece from it, just below a leaf node. Remove the lower leaves from the cutting, then place the stem in a glass of water or a moist rooting medium, such as a mixture of perlite and peat. Roots usually appear within a few weeks, and once they are strong enough, the young plant can be planted in its final location.
Watering and nutrient supply for lemon balm
Lemon balm has moderate water needs; it prefers consistently moist but not waterlogged soil, which creates optimal conditions for lush growth. Young, freshly planted specimens require more regular watering until their root systems are established, so pay special attention to soil moisture in the first few weeks. Once well-established, garden-grown lemon balm becomes quite drought-tolerant and can withstand short, dry spells thanks to its extensive root system. Nevertheless, during prolonged droughts, it is advisable to supplement water to keep the foliage healthy and dense.
The frequency and amount of watering are influenced by several factors, including climate, soil type, and whether the plant is grown in the ground or in a container. A basic rule is to water only when the top few centimeters of soil have dried out, avoiding waterlogging. Deep but infrequent watering is more effective than frequent, shallow watering, as it encourages the roots to grow deeper into the soil, making the plant more stable. Watering should preferably be done in the morning, directly at the base of the plant, to allow the leaves to dry by evening, reducing the risk of fungal diseases.
Lemon balm is not a particularly heavy-feeding plant; in fact, excessive fertilization can be detrimental to its quality. While a plentiful supply of nitrogen may result in lush foliage, it also reduces the concentration of essential oils in the leaves, which compromises the plant’s aroma and medicinal properties. For most garden soils, spreading a thin layer of compost or well-rotted manure around the plant in spring is sufficient to provide the necessary nutrients for the entire season. This slow-release organic matter not only feeds the plant but also improves soil structure and water retention.
If the soil is particularly poor, or the plant shows signs of nutrient deficiency through yellowing leaves, a spring application of a balanced, general-purpose, slow-release fertilizer may be warranted. Avoid high-nitrogen products and always follow the dosage instructions on the packaging. Container-grown lemon balm may require more frequent feeding, as nutrients are leached out of the soil more quickly with watering; a monthly application of a liquid organic fertilizer during the growing season may be ideal for them.
Pruning and controlling growth
Regularly pruning lemon balm is crucial for maintaining the plant’s health, creating a compact, bushy shape, and stimulating the growth of continuous fresh shoots. Without pruning, the plant tends to become leggy, its lower parts become woody, and the leaves become smaller and sparser, reducing the quantity and quality of the harvestable yield. Cutting it back encourages the plant to develop new, lateral shoots from dormant buds, making the clump much denser and more lush.
The first major pruning should be done in late spring or early summer, before flowering begins, when the plant has reached a height of 30-40 centimeters. At this time, the shoots can be cut back by as much as half or two-thirds with sharp pruning shears or scissors, always making the cut just above a pair of leaves. This seemingly drastic intervention prompts the plant to regenerate very quickly, and within weeks it will reward you with new shoots full of tender leaves. A second, similar-sized pruning can be done after flowering during the season, ensuring an autumn harvest.
As a typical representative of the mint family, lemon balm is prone to aggressive spreading, both through its underground runners (rhizomes) and by scattering its seeds. There are several effective methods to contain this; one of the surest solutions is to plant it in a large pot or container, which can even be sunk into a garden bed. Another option is to use root or rhizome barriers, which are dug into the ground around the plant to prevent the root system from spreading excessively.
The other main cause of unwanted proliferation is self-seeding, which can be prevented by removing the flowers before they set seed, i.e., by preventing bolting. As soon as the small, white flower buds appear, cut off the flowering stems, or combine this with a larger harvest. This practice, also known as “deadheading,” not only prevents uncontrolled spreading but also directs the plant’s energy towards producing more foliage, as the leaves are the most valuable part of the lemon balm.
Harvesting and storage
You can begin harvesting lemon balm leaves as soon as the plant is well-established and has sufficient foliage, which usually occurs a few weeks after planting. The leaves have the most intense flavor and essential oil content before the plant flowers, so for the best quality, it is advisable to harvest before the flower buds appear. The best time for harvesting is in the morning, after the dew has dried from the leaves but before the sun’s heat has evaporated the valuable aromatic compounds.
The harvesting technique is extremely simple: you can snip off individual leaves or entire stems with sharp scissors or pruning shears, depending on how much fresh herb you need. For a larger harvest, you can cut back the entire plant to 10-15 centimeters above the ground, which also serves as a vigorous rejuvenating pruning. The plant responds quickly to this and will soon produce new shoots, allowing you to harvest generously from the same clump up to three or four times in a single season.
Freshly picked lemon balm leaves have the best aroma, so it is best to use them as soon as possible. They can be stored in the refrigerator for a few days if wrapped in a slightly damp paper towel and placed in a sealed plastic bag or container to maintain their freshness. Fresh leaves are excellent for making teas, lemonades, and syrups, for flavoring salads, fish dishes, and desserts, and for infusing water or oils. A handful of fresh leaves dropped into a pitcher of water makes a refreshing and healthy summer drink.
For longer-term preservation, drying and freezing are the two most common methods. To dry, tie small bunches of the cut stems and hang them in a warm, dark, well-ventilated room, such as an attic or pantry, until the leaves are completely dry and crumbly. To freeze, chop the leaves and place them in ice cube trays with a little water or olive oil, so you can use them in portioned amounts for soups and sauces. Although dried and frozen lemon balm loses some of its fresh aroma, its flavor remains enjoyable.
Managing pests, diseases, and other problems
Thanks to its natural essential oil content, lemon balm is an extremely robust plant that is resistant to most pests, which greatly simplifies plant protection tasks. Nevertheless, especially when weakened, stressed, or grown indoors, it can occasionally be affected by aphids, spider mites, or whiteflies. Aphids usually colonize the tips of fresh, young shoots, while the presence of spider mites is indicated by fine webbing on the undersides of the leaves and tiny, yellowish dots.
When controlling pests, strive to apply the principles of integrated pest management (IPM) and avoid using strong chemicals, especially since the plant is grown for consumption. For minor infestations, it may be sufficient to wash the pests off the leaves with a jet of water or to encourage natural enemies like ladybugs and lacewings. For more stubborn infestations, you can use biological pesticides such as insecticidal soap or neem oil, which are effective but gentler on the environment.
The most common diseases affecting lemon balm are of fungal origin, such as powdery mildew or root rot, which typically develop in overly humid, damp conditions with poor air circulation. Powdery mildew forms a white, powdery coating on the leaves and stems, which inhibits photosynthesis and weakens the plant. Root rot is caused by overwatering and poorly drained soil, leading to the decay of the roots and the sudden wilting of the plant.
Preventing diseases is always easier than treating them, so the greatest emphasis should be placed on prevention. Ensure proper spacing between plants for good air circulation, water at the base of the plant to avoid wetting the foliage, and ensure the soil has good drainage. If powdery mildew appears, remove the infected leaves and apply a spray of baking soda or horsetail tea. The most effective defense against root rot is prevention, which means establishing correct watering practices and improving soil structure.